Difference between revisions of "Release notes/0.92"
m |
m (→Live Path Effects: mention new feature for Bend and Pattern Along Path LPEs) |
||
| Line 106: | Line 106: | ||
* Helper lines come again to life. | * Helper lines come again to life. | ||
* The option to add a bend path directly was added to the pen/pencil shape combo box. | * The option to add a bend path directly was added to the pen/pencil shape combo box. | ||
* On-canvas controls for the width parameter have been added to the Pattern Along Path and Bend LPE. | |||
=== Spiro Live === | === Spiro Live === | ||
Revision as of 01:08, 16 January 2017
Other languages: العربية Català Česky Deutsch English Español Français Italiano 日本語 한국어 Polski Português Português do Brasil Русский Slovenčina 中文
Inkscape 0.92
Release highlights
Released on 2017-01-01.
- Mesh Gradients are now supported.
- Many SVG2 and CSS3 properties are now supported (e.g. paint-order, mix-blend-mode). Not all are available from the GUI.
- The new Object dialog allows to select, label, hide and lock any object in the drawing from a dialog that lists them all
- Selection sets make it possible to 'group' objects together regardless of document structure
- Guides can now be locked to avoid accidental movement
- Several new path effects have been added, among them Envelope/Perspective, Lattice Deformation, Mirror and Rotate Copies
- There are several new extensions (e.g. a seamless pattern extension) and a new filter (colorblindness simulation) included in the release, many old extensions have been updated or got new features
- Spray tool and measure tool received a set of nifty new features
- Interactive smoothing for lines created with the Pencil tool
- BSplines (and more) are available for the Pen tool
- Checkerboard background can be used to more easily see object transparencies
Watch the video which presents the latest version
Important changes
- The default resolution was changed from 90dpi to 96dpi, to match the CSS standard. For more background information, please see the Wiki article about handling of units in Inkscape. Inkscape 0.92 will attempt to identify 'legacy' Inkscape files that need to be converted. If such a file is detected, the user will be offered three options:
- Set 'viewBox'. Inkscape will add an appropriate 'viewBox' which will do a global scaling of the document. It will also adjust the document width and height if necessary.
- Scale elements. Inkscape will scale each internal element.
- Ignore. Do nothing. This is an appropriate choice for documents meant for screen display.
- [See release blocker bug report for more details.]
- For developers and packagers, the switch from autotools to CMake is a relevant change (users who do not compile their own version will not be affected). While the old system is still available for 0.92, it is now also possible to compile Inkscape using CMake (Background info about why this change was made and How to work with CMake).
Manipulating Objects
Objects Dialog
New dialog for manipulating the object tree.
- Drag and drop reordering of objects.
- Lock, and hide one or more items.
- Use Ctrl+F to search for an item.
- Select one or more objects in the drawing.
- Shows individual objects as well as layers.
- Ability to change highlight color of objects.
- Ability to set blend mode per object.
Imported from Ponyscape.
Selection Sets Dialog
New dialog that allows the creation of selection sets that are not affected by document structure.
Usage:
- Open Dialog with 'Object > Selection sets'
- To create a new selection set:
- click on the '+' button at the bottom of the dialog (double-click on its label to edit)
- To add objects to a selection set:
- select object on the canvas
- in the 'Selection sets' dialog click on the '+' icon before the selection set in the list
- To select all objects of a selection set:
- deselect any existing selection and click on the selection set in the list
- To remove an object from a selection set:
- select the selection set in the dialog
- click on 'Items' to show all objects in the set
- select an object on the canvas or in the Items list in the dialog
- click on the 'Delete' icon (trashbin) before the object in the list
- To delete a selection set:
- select it in the list and click on the '-' button at the bottom of the dialog
Text
Font Features
It is now possible to take advantage of OpenType tables to select alternative glyphs from a font. For this, a third tab ('Variants') has been added to the 'Text and Font' dialog. Note that browser support is still limited. Inkscape must also be linked with a recent version of the Pango library.
Vertical Text
Support for vertical text layout has been improved.
- The default behavior for Latin bases glyphs has been changed. They are now rotated sideways as required by the SVG 1.1 standard.
- Support for the CSS 3 'text-orientation' property has been added. (Note that this property is not yet fully supported by browsers.)
- The CSS 3 values for the 'writing-mode' property are supported in rendering. Saving still uses the deprecated SVG 1.1 values.
Accessibility
Converting text to a path will save the text in the 'aria-label' attribute. This is useful for accessibility and could eventually be used by Inkscape to reconstruct the text.
Line Spacing
Line spacing in Inkscape now follows the CSS standard for the 'line-height' property. Note the following points:
- The unit for 'line-height' can now be chosen. Previous versions of Inkscape used a unitless value. When the value is unitless, the line spacing is recalculated for each change in font size. This is the most commonly expected behaviour. When the value has a unit, the line spacing is calculated at the point where the CSS 'line-height' property is defined and that value is used regardless of following changes in font size. This however, will not always lead to evenly spaced lines due to the idiosyncrasies of how line spacing is calculated in CSS. (See Tav's write up CSS Text Line Spacing Exposed for the details.)
- The minimum spacing between lines is determined by the 'strut' value. This is determined by the product of the 'font-size' and 'line-height' values on the outermost text element. These values are shown and can be set when the "Outer Style" button is enabled in the Text Tool's Tool Control bar. To set the 'strut' to zero, set the outer style 'line-height' to zero.
If the 'strut' has zero height, you'll need to set 'line-height' on all the inner text elements to keep the lines from being on top of each other. Use Ctrl-A to select all the text and disable the "Outer Style" button to set the "line-height" on all the inner elements.
Note: when the "Outer Style" button is not enabled, the "Font size" and "Line height" boxes show the values of either the high-lighted selected text or at the cursor point (if no text is selected). Changes in font size and line spacing will be applied to the selected text or to all the inner elements (if no text is selected). Unlike other styling properties (e.g. fill color), there is no visual indicator of which characters have a particular 'line-height' value. One can step through character by character with the cursor to determine a span of characters with the same 'line-height' value.
- To create a set of evenly spaced lines regardless of font size, set the 'strut' value to the desired line spacing and then set the inner 'line-height' values to zero.
Live Path Effects
- Now some suitable LPEs can be applied to clips and masks.
- Helper lines come again to life.
- The option to add a bend path directly was added to the pen/pencil shape combo box.
- On-canvas controls for the width parameter have been added to the Pattern Along Path and Bend LPE.
Spiro Live
Extended video: https://www.youtube.com/watch?v=bFakiI5f0-Y
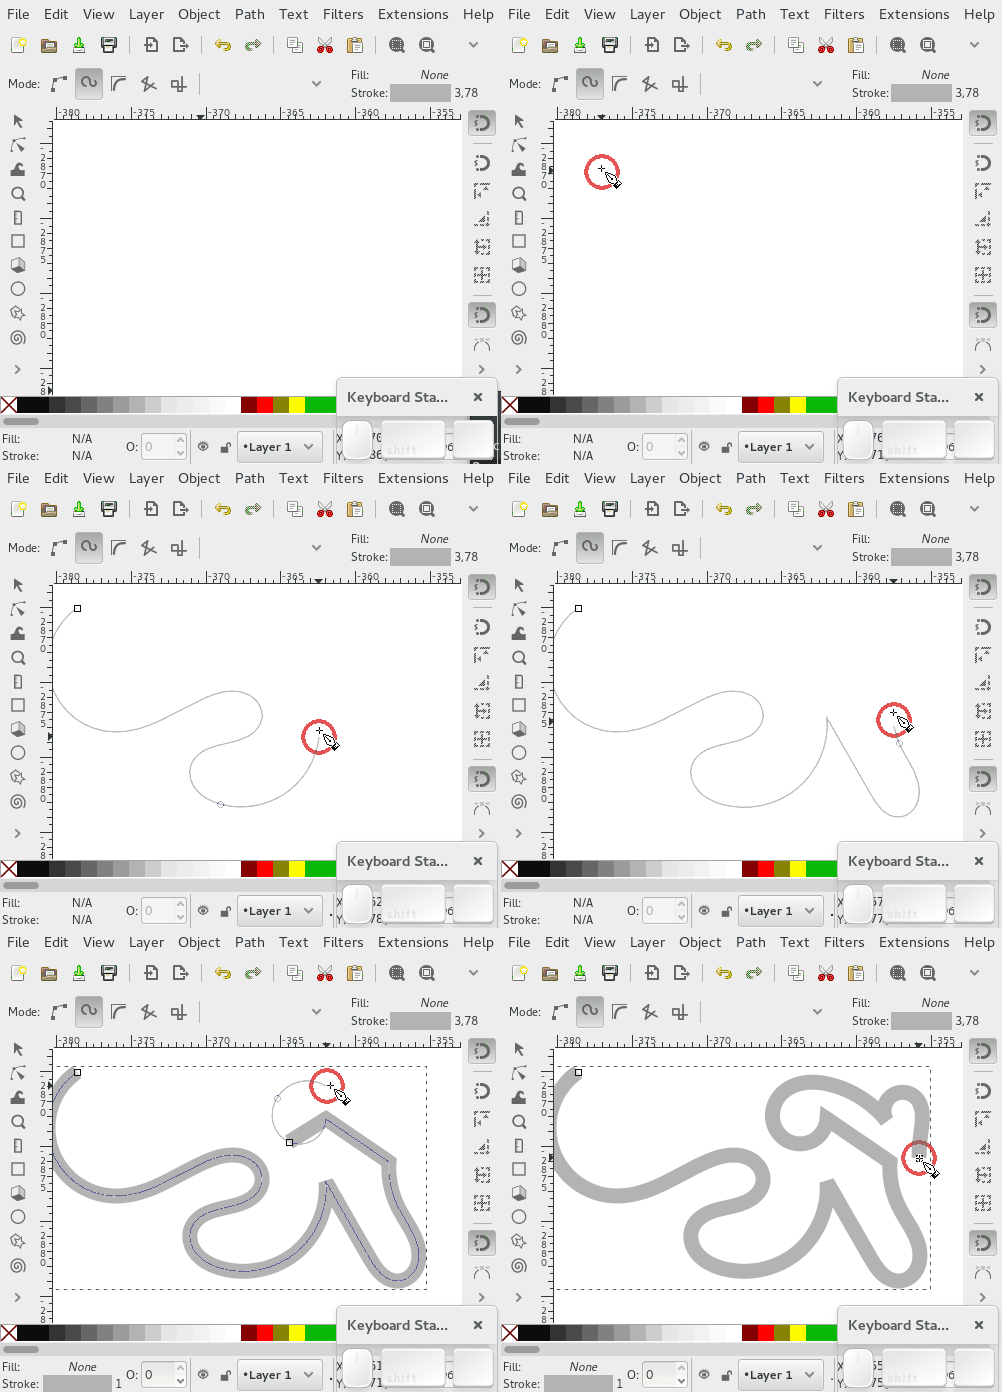
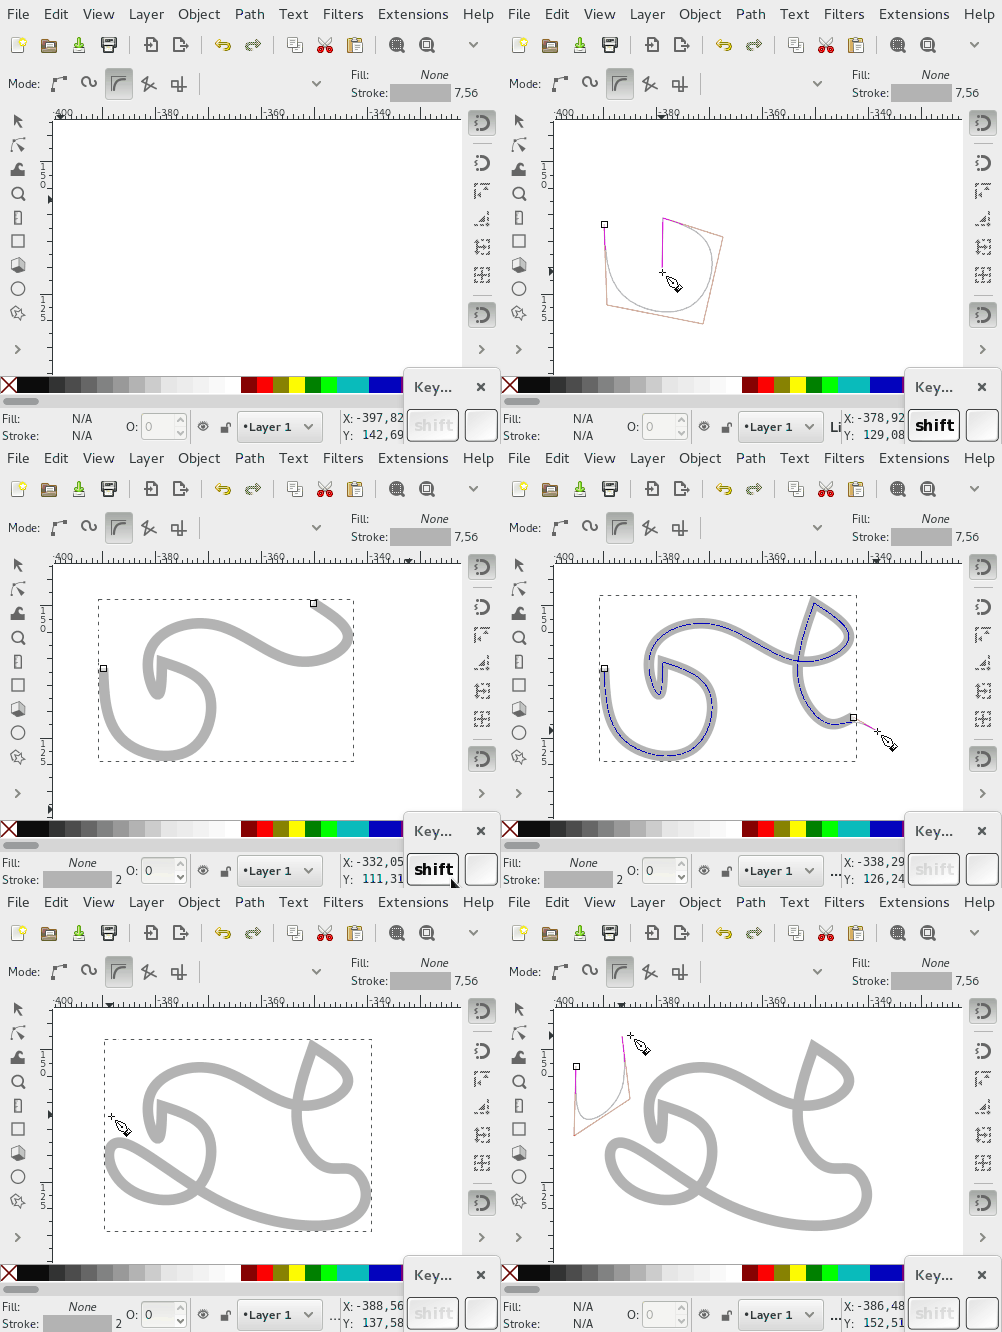
Based upon Spiro Live Path Effect, now shows the result while drawing.
- Cusp nodes can be created by holding down the Shift key.
- When you append a path in cusp and Spiro mode, the helper preview path will be displayed.
BSpline
Extended video https://www.youtube.com/watch?v=vwV0DHvA-OE
Pen & Node mode
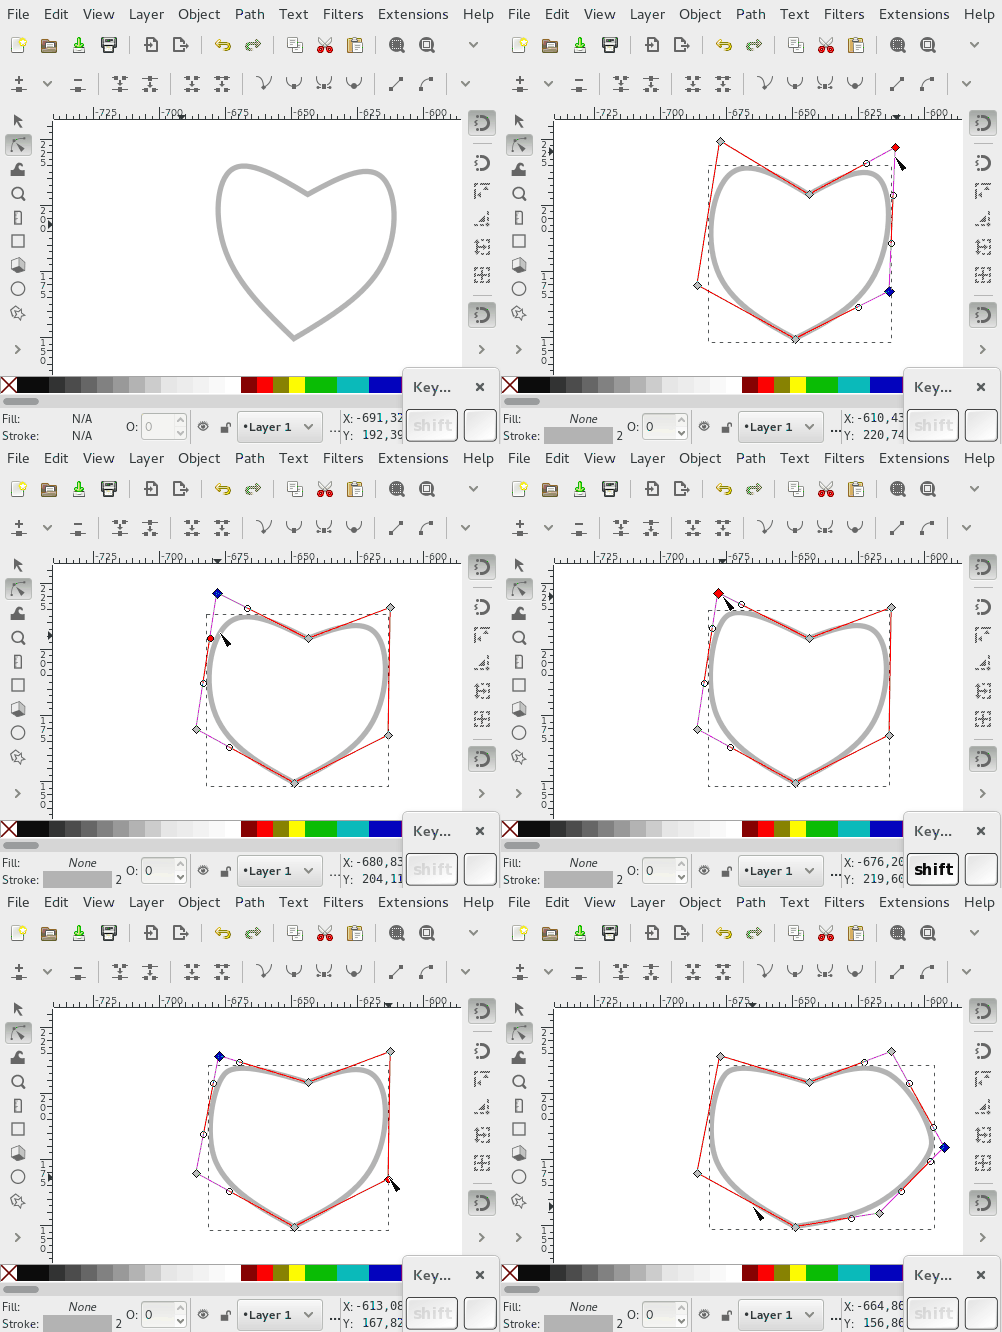
Uses the BSpline Live Path Effect while creating and editing paths.
- Works with Pen and Pencil tool directly.
- Create cusp nodes by holding down the Shift key (Pen/Bézier tool only).
- When a path is appended, a preview helper path will also be shown.
- Hold down Shift key and drag on a handle to change the weight of a bspline in node tool.
- Custom weight steps are applied by holding CTRL down and dragging on a handle with the node tool (no Shift key required).
- Double-click on a handle resets weight to default
Live Path Effect mode
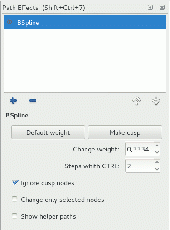
The options in the Live Path Effect dialog give you full control over bspline paths.
- Option to set to Default weight (0.3333 times curve segment)
- Option to make nodes cusp
- Numeric input for weight
- Option to set number of Steps with CTRL to quickly snap the weight in node/handle editing
- Apply changes if weight ... applies changes in the widgets to all nodes with weight == 0 or weight > 0 or both, for example, retains cusp nodes when you change the weight and have unselected "Apply changes if weight == 0".
- Change only selected nodes applies to all other widgets changes.
- Shows a helper path with the final shape and the generated new nodes.
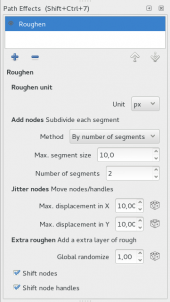
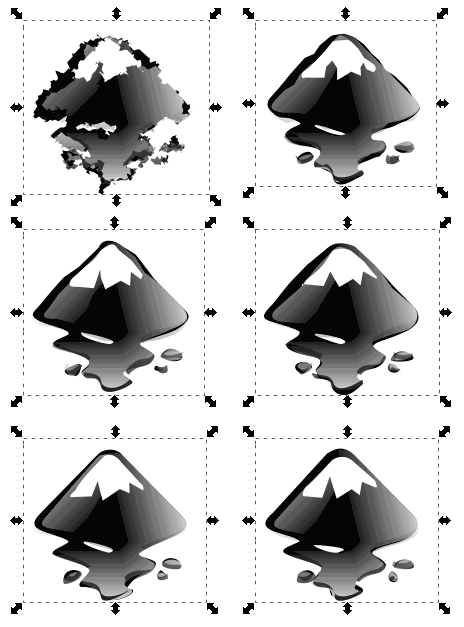
Roughen
Extended video: https://www.youtube.com/watch?v=130Dbt0juvY
This path effect is a semi-clone of two extensions, ("add nodes" and "jitter nodes") and handles units.
The parameters are similar to both extensions and adds a global randomizer.
- Can be applied to paths, shapes and groups.
- Can be applied to clips and masks, if they are vector objects.
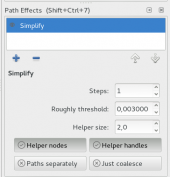
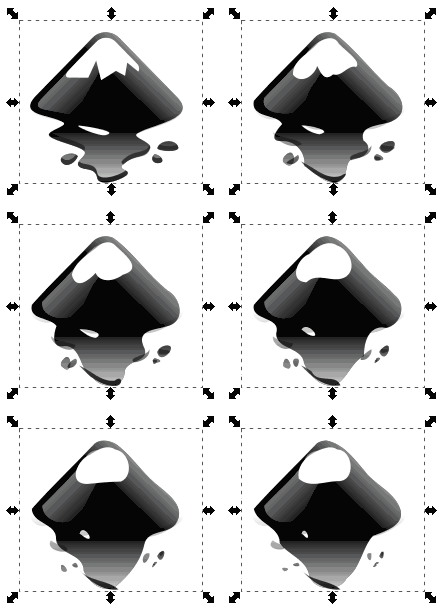
Simplify
Extended video: https://www.youtube.com/watch?v=gaWujN_iTSk
Simplifies a vector element using a non-destructive live path effect.
- Can be used on paths, shapes and groups of these.
- Can be applied to clips and masks, if they are vector objects
- The effect's threshold can be modified in the preferences dialog, by setting a numeric parameter.
- Apply Simplify multiple times in the same LPE.
This path effect can optionally be applied directly via the pencil/freehand drawing tool's tool bar when creating a new path. It then replaces the normal smoothing (which would be a destructive operation).
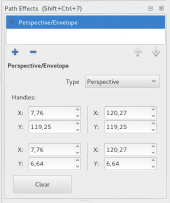
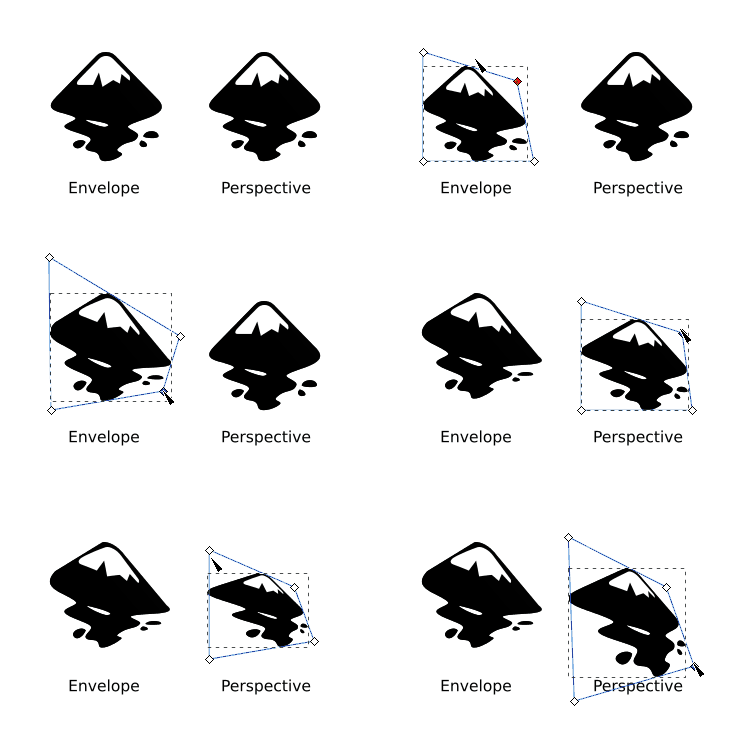
Perspective/Envelope
Extended video: https://www.youtube.com/watch?v=CjKGatyxTZ8
Both deformations can be applied by specifying 4 points.
- Two modes, perspective and envelope
- Can be used on paths, shapes and groups.
- Also works with vector clips and masks.
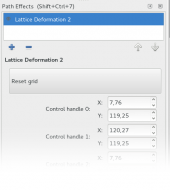
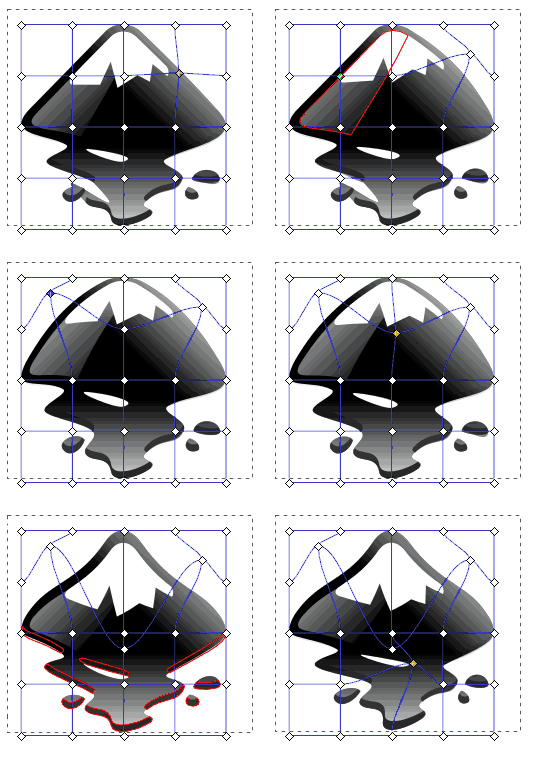
Lattice Deformation 2
Extended video: https://www.youtube.com/watch?v=YlK9L88_tWE
Symmetry video: https://www.youtube.com/watch?v=jhuVjqFA6ig
- Deforms an object by 25 handles arranged in a mesh
- Optionally deforms symmetrically along vertical or horizontal axis or both.
- Can be applied to paths, shapes and groups.
- Also works on vector clips and masks.
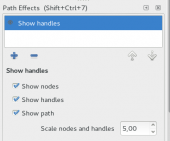
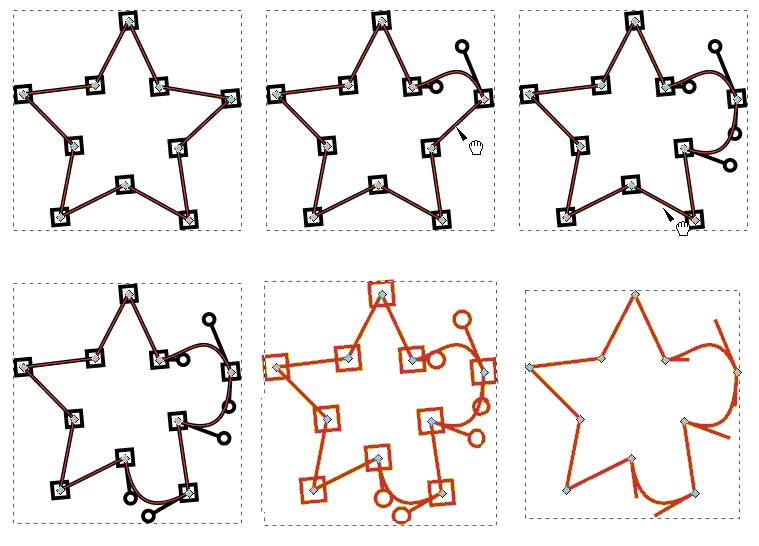
Show Handles
Extended video: https://www.youtube.com/watch?v=h9ul_PR9XYo
An LPE version of the Show Handles extension.
- Works on paths, shapes and groups.
- Works on clones.
- Node and Handle shapes are resizeable
- If not applied to a clone, this is a destructive LPE, it does not save styles, better work on a copy!
Transform by two points
Extended video: https://www.youtube.com/watch?v=ZLmYdWoXXIw
Extended video (Elastic rubber): https://www.youtube.com/watch?v=lOWTeZC_LjM
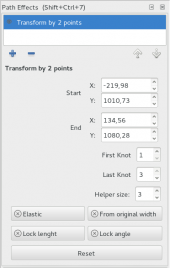
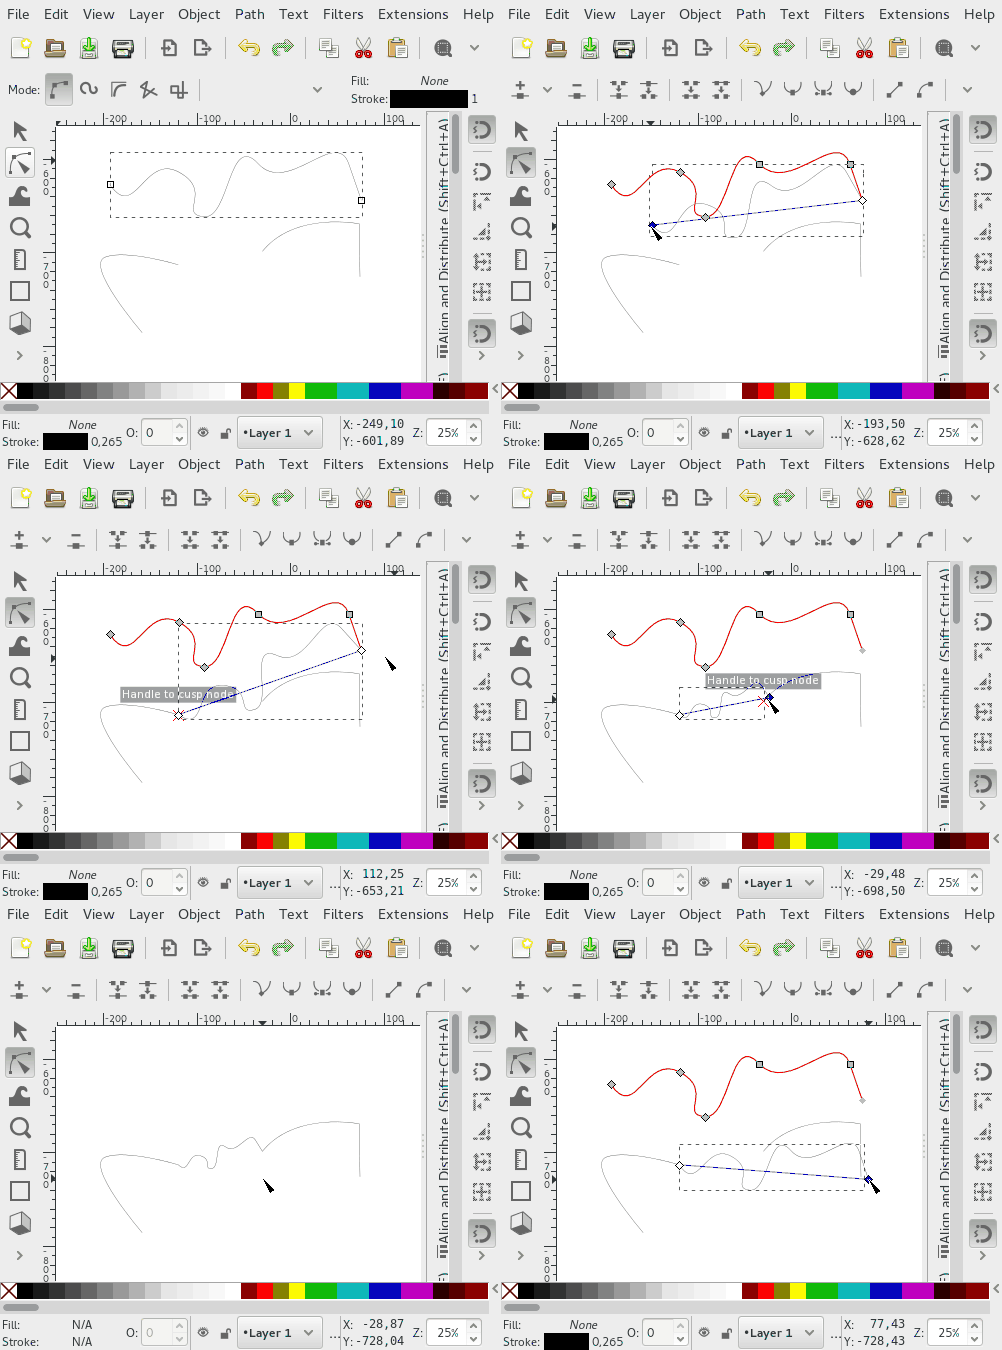
Transforms an element by two control points (e.g. moving, skewing, resizing and rotation). You can position the control points on the bounding box edge midpoints or by the index of the nodes of the original path. Thanks to Ivan Louette for the idea for this effect!
- Works on paths, shapes. With groups you have limited features constrained to bounding box.
- Allows snapping of both control points.
- Allows to fix angle or distance.
- Elastic mode to simulate a rubber band path.
- Two bounding box edge midpoints can be used as control points if 'From original width' is active.
Rotate copies
Extended video (partial fuse path): https://www.youtube.com/watch?v=UpI8gRbkTu4
Extended video (live editing): https://www.youtube.com/watch?v=fBQpvfgT4mE
Extended video (kaleidoscope): https://www.youtube.com/watch?v=LfMixSKy3Eo
Arranges identical elements dynamically on an arc or circle.
- Works on paths, shapes and groups of paths.
- Allows to fuse the result to create kaleidoscope-like effects
- Allows to arrange the copies on an arc when the 360° copies checkbox is not checked.
- Live editing.
Mirror Symmetry
Extended video: https://www.youtube.com/watch?v=m1sj4AeU3Yo
Mirrors an item dynamically.
- Works on paths, shapes and groups.
- Allows to fuse the result.
- Different mirror lines: Free, bounding box center X, bounding box center Y, Document center X, Document center Y.
Attach Path
Connect a path to another path (optionally at each end), by attaching it to a specified location on the other path (specified as in <node number>.<fraction of segment length>, or by dragging a handle).
The connecting curve segment can be shaped with handles, or by entering a number.
This LPE makes it possible for the first time to have 'crossings' between paths that move with the path when it is modified, which isn't possible within the SVG specification.
Bounding Box
An arbitrary path can be used to serve as a bounding box rectangle for the path that is linked. It will follow all transformations of the linked path. This can, for example, be used to provide a background for exporting as png.
Ellipse by 5 Points
An ellipse will be constructed, whose circumference will go through each of the nodes of a 5-node path.
Fill between Many
Adds a fill to a collection of independent open paths, connecting their ends with straight lines.
- The LPE is applied to one path (which will be converted into the fill, and serves as a 'container' for the effect).
- The other paths, which are part of the drawing, can then be added to it by copy-pasting in the LPE dialog.
- The order in which the paths are filled can be changed, and the direction can be reversed for each path independently.
Now it is possible to apply the kind of path effects which only work on a path without subpaths (PowerStroke, Taper Stroke, ...) to the single paths (see image for an example).
Fill between Strokes
Similar to 'Fill between Many', but can only be used on two open paths, to fill them seamlessly.
- Requires a 'container' path, which will turn into the fill after the first path has been added to the LPE.
- Connects one couple of path ends with a stroke, if the path that functions as a container has a stroke set.
- Can also be used to apply a duplicate stroke.
Interpolate Points
This LPE redraws all path segments, using one of the following interpolation methods:
- Centripetal Catmull-Rom
- CubicBezierFit
- CubicBezierJohan
- Linear
- SpiroInterpolator
Join Type
The LPE allows you to set the type of connection to be used on cusp nodes and path end caps.
- Available join types:
- Beveled
- Extrapolated Arc
- Extrapolated Arc Alt1
- Extrapolated Arc Alt2
- Extrapolated Arc Alt3
- Miter
- Miter Clip
- Rounded
- Available end cap types:
- Butt
- Peak
- Rounded
- Square
- Set Miter limit
- Set stroke width
Taper Stroke
Draw tapered strokes with different settings for open paths without subpaths.
- Change width of stroke ends with handles on both ends, or by entering offset numerically
- Different amounts of rounding can be applied
- Stroke width can be changed
- Join type for cusp nodes can be selected:
- Beveled
- Extrapolated
- Miter
- Rounded
Pen / Bézier tool
- New shortcut to automatically close a path when it is being drawn: Shift + Enter
Spray tool
Extended video 1 (No overlap): https://www.youtube.com/watch?v=uehj4ATOWos
Extended video 2 (No overlap multiple items): https://www.youtube.com/watch?v=1eTG2U3qlb4
Extended video 3 (Over visible, pick color): https://www.youtube.com/watch?v=aTdKu7mAZE8
Extended video 4 (Pressure): https://www.youtube.com/watch?v=kWdQnxd_z30
Extended video 5 (Trace -clones- dialog): https://www.youtube.com/watch?v=Zn3vzf-yA_w
- New eraser mode
- More pressure toggles added
- "No overlap" option with optional multiple elements
- "No overlap" option between different background colors
- Configurable offset for overlaps
- Color picker from center or average area
- Apply picked color to fill
- Apply picked color to stroke
- Invert picked colors
- Spray over transparent background areas
- Spray over non-transparent background areas
- Makes use of "Trace the drawing" options from Tiled Clones dialog
Measure tool
Extended video: https://www.youtube.com/watch?v=OE0cVDGCzbM
- Measure is kept until a new one is made (only visible when using measure tool)
- Repositioning of origin/end
- Convert to object
- Convert to guides
- Add just the distance measurement, consisting of editable text and a line indicating start and end
- Display a 'phantom measurement' temporarily to be able to compare two measurements
- Reverse origin/end
- Measure global
- Measure only current layer
- Change precision
Gradient tool
- To accomodate for keyboards that do not have an Insert key, the keyboard combination Shift+I can now also be used to insert a new stop into a gradient.
Align and Distribute
- NEW: drop-down chooser with options to align nodes relative to each other in node editing mode.
Import / Export
Export PDF / EPS / PS
- The default PostScript level for exporting from the command line changes from 2 to 3 (consistent with the user interface PS exporter which defaults to level 3). Level 3 is required for gradient support.
Export Optimized SVG
- Completely redesigned settings dialog
- Starting with version 0.92, Inkscape uses the Scour version installed on the system (e.g. via "pip install scour") instead of a bundled version so you can always profit from the latest improvements
- A lot of new features and fixes in the Scour module itself, check out the release notes (Scour 0.26 from 2011-05-09 was the version that has been bundled with Inkscape 0.91)
Export to PNG
- PNG file extension is now enforced, to prevent exporting with invalid / misleading file extensions.
Extensions
New
- Render > Seamless Pattern (Screencast)
- Images > Set Image Attributes (Bug #1357808, can be used to fix the scaling problem of raster images in SVGs created with previous Inkscape versions)
- Render > NiceCharts (github repo, not maintained)
- Arrange > Deep Ungroup (Bug #171117)
Plotter Driver
Multiple Pens
The Plotter driver (Extensions -> Export -> Plot) can now handle multiple pens to create colorful drawings on Pen Plotters:
- Create a layer for every pen to use and move the corresponding drawings into it
- Name the layer with a title like "Pen 1" or "MyLayerName Pen 1", where the number corresponds to the pen number the plotter should use
- The layer name always overrides the standard pen setting in the plot menu
Serial Connection
The connection settings now allow you to specify rarely used serial connection settings like byte size, stop bits and parity. Most plotters use the default settings, so only change these if you know what you are doing.
HPGL Export
The HPGL export (File -> Save as -> HP Grafics Language file) has now the same multiple pens feature as the #Plotter Driver.
HPGL Import
The HPGL import (File -> Open -> Select .hpgl file) can now import multiple pens into corresponding layers, see #Plotter Driver for more information.
PDF Import
The image 'interpolate' value is now used to determine how to display bitmaps (interpolated or blocky).
Miscellaneous Improvements
- Arrange > Restack has new options to reverse and shuffle the z-order of selected objects.
- Render > Random Tree has new option to omit redundant segments.
- Visualize Path > Measure Path has additional text layout options.
- Render > Barcode was updated with new EAN2 code and extended EAN13 with automatic EAN2 and EAN5 additions
- Color > Randomize now allows to set the range for randomization, and (with some limits) can now also randomize opacity
- Modify Path > Jitter nodes was partially rewritten and now also supports Pareto and Log-Normal distributions.
Extension Development
- It is now possible for an extension to retrieve a list of selected nodes (See Bug #171287 for an example extension).
Filters / Blend Modes
New Filters
- Color > Color Blindness filter allows to simulate different color blindness conditions.
New Blend Modes
Blend Modes can now be applied to single objects as well as to layers.
In addition to the previously available modes 'Multiply', 'Screen', 'Darken' and 'Lighten', the following modes are now available:
- Overlay
- Color Dodge
- Color Burn
- Hard Light
- Soft Light
- Difference
- Exclusion
- Hue
- Saturation
- Color
- Luminosity
Other dialogs
Document Properties: Licences
All selectable licences have been updated to most current version.
Filter Editor
Filter list now displays how often a filter is used.
Menus
- 'Resize page to selection' added to Edit menu, shortcut: Shift+Ctrl+R
- 'Pop selection out of group' available in context menu of objects which are part of a group, when the group has been entered, and via the 'Objects' menu. It will move the object up by one level in the grouping hierarchy.
- 'Create Clip Group' from context menu groups the selected objects and clips that group with a clone of itself. This allows for quick creation of, for example, inset shadows.
Other user interface
Node Snapping
Snapping in the node tool has been improved:
- When double clicking to insert new nodes, the position of these new nodes will snap to for example path intersections and to path-guide intersections
- When grabbing a segment of a path and dragging it to deform it, the pointer will now snap
Checkerboard Background
It is now possible to use a checkerboard background when editing. This allows one to clearly see the transparency of objects. (See "Page" tab of the "Document Properties" dialog.)
View Box
One can now set the SVG 'viewBox' attribute from the GUI. This attribute sets the scale of the drawing by determining the real-world value of the SVG user unit (pixel size).
Lock Guides
Now guides can be locked and unlocked globally or individually.
Panning
Panning with space bar can now be deactivated in the Preferences (uncheck Behavior > Scrolling > Mouse Move pans when Space is pressed).
SVG and CSS
- The 'marker-orientation' property now recognizes units ('deg', 'rad', 'grad' and 'turn').
- The new SVG 2 'context-fill' and 'context-stroke' properties are implemented which allows the auto-matching of arrowhead fill color to path stroke color.
- The new SVG 2 marker orientation attribute value 'auto-start-reverse' is implemented. This allows one arrow marker to be used for both ends of a path.
- The new CSS 3 'mix-blend-mode' and 'isolation' properties are implemented, allowing setting the blend mode between objects without using filters.
- The new SVG 2 'paint-order' property is now supported. This allows setting the order in which the fill, stroke, and markers are drawn (see the 'Stroke style' tab in the 'Fill and Stroke' dialog).
- The SVG 1.2/SVG 2 'vector-effect' property's 'non-scaling-stroke' value is now supported. This will keep the stroke width fixed regardless of the zoom factor.
- The new SVG 2 'mesh' paint server is supported, including bicubic auto-smoothing. A primitive GUI is available.
- The SVG 1.1 'text-decoration' property is now rendered (underlines, strike through, etc.). CSS 3 'text-decoration' properties are also rendered.
- The new SVG 2 'hatch' paint server is now supported.
- The CSS 'white-space' property is now supported. Use of this property was added in SVG 2 to replace the now deprecated 'xml:space' attribute.
- The SVG 1.1 'textLength" and 'textAdjust' attributes are implemented, however, there is no GUI for these attributes.
- Rendering of the Component Transfer filter primitive has been corrected.
- Units are now recognized in the text and tspan 'x', 'y', 'dx', and 'dy' attributes.
- Percentage values are now interpreted correctly for shapes.
New SVG 2 and CSS 3 features are generally not enabled in the GUI until widespread support in browsers.
New dependencies
- The Paintbucket and Trace Bitmap tools now use an external copy of the Potrace library, which is available in many Linux distributions or can be obtained from http://potrace.sourceforge.net
- Export to Optimized SVG now depends upon an external copy of the Scour python module, which can be obtained via pip (pip install scour), package management (version may be outdated) or from the scour project github site. For Windows versions, the module is included.
Translations
New UI translations for Assamese, Bodo, Dogri, Gujarati, Hindi, Icelandic, Kannada, Kashmiri (Perso-Arabic and Devanagari), Konkani (Latin and Devanagari scripts), Maithili, Malayalam, Manipuri (Meetei Mayek and Bengali scripts), Marathi, Odia, Santali (Devanagari and Ol-Chiki scripts), Sanskrit, Sindhi, Tamil, Urdu (Perso-Arabic and Devanagari scripts).
Many other translations have been updated and improved.
Notable Bugfixes
- Severe performance issues on MS Windows, 64bit Inkscape builds on systems with Intel graphic cards (hiding the rulers was a workaround for Inkscape 0.91) (bug #1351597)
- On MS Windows, 64bit Inkscape builds, printing may result in mostly black pages when partial opacity is used in the document (bug #1418865)
- Printing offsets page (Windows) (bug #918319)
- "Tiled Clones" inside transformed groups/layers in resized documents are displaced (bug #168651)
- Displaced clones, offsets (bug #844909, bug #653574, bug #1152657, bug #1245339, bug #168013, bug #177751)
- Crash on quit before saving has completed, resulting in incompletely saved files (bug #967416)
- Guides: Colour not rendered opening saved document (bug #1374870)
- Text tool: Fails to set new default font family (bug #1227232)
- Extensions: Failure with documents lacking width/height attributes (bug #1461346, bug #1463623)
- UI: Missing icons with Gtk+'s built-in icon theme (Windows, OS X) (bug #1269698)
- Text rendering cuts off trailing character (bug #1283194, bug #1450675)
- Paste style - markers are omitted (bug #1467674)
- DXF export doesn't support <line> and <circle> elements (bug #1474347, bug #1489320)
- Crash when importing raster images of different file types (bug #1467103)
- Filter effects and blur quality options broken (bug #1512729) (To get the same render quality in 0.92 as you had in 0.91, you need to set filter effects quality to 'Better' and the blur quality to 'Average'.)
- Shape: 'Triangle in' and 'Triangle out' are identical (bug #1525401)
Many other crashes, memory leaks and lots of little things have also been fixed. For an exhaustive list of bugs that have been fixed, please see the milestones page for Inkscape 0.92 and the milestones page for the (not released) Inkscape version 0.91.1.
Known Issues
- Fonts that are loaded by font managing software on Windows are not available for selection in Inkscape (bug #1416674)
- Dialogs that have been minimized do not open again until their icon in the dock is clicked on (bug #1270295, will be fixed in 0.93)
- The opacity indicator isn't initialized correctly (0% opacity even when the object is fully opaque, bug #1463078, will be fixed in 0.93)
- For some texts, the line height that is used for displaying the text in 0.91 doesn't correspond to the one that is used in 0.92, so line height is larger than it should be (as a workaround, there is an extension available that can fix those texts).
[Please fill in]
Previous releases
- Release notes/0.91
- Release notes/0.48 (0.48.1, 0.48.2, 0.48.3, 0.48.4, 0.48.5)
- Release notes/0.47
- Release notes/0.46
- Release notes/0.45
- Release notes/0.44
- Release notes/0.43
- Release notes/0.42
- Release notes/0.41
- Release notes/0.40
- Release notes/0.39
- Release notes/0.38
- Release notes/0.37
- Release notes/0.36
- Release notes/0.35
