Difference between revisions of "Release notes/1.0/de"
(Updating to match new version of source page) |
(Updating to match new version of source page) |
||
| Line 7: | Line 7: | ||
'''(definitely not released yet - [[AnnouncePlanning1.0]])''' | '''(definitely not released yet - [[AnnouncePlanning1.0]])''' | ||
Released on '''«YYYY-MM-DD»'''. | Released on '''«YYYY-MM-DD»'''. | ||
== Release highlights == | |||
* Theming support | * [[#customization|Theming support and more new customization options]] | ||
* | * [[#hidpi|Better HiDPI (high resolution) screen support]] | ||
* Canvas rotation and mirroring | * [[#macos|Native support for macOS with a signed and notarized .dmg file]] | ||
* On-Canvas alignment of objects | * [[#origin|Coordinate origin in top left corner by default]] | ||
* | * [[#canvas|Canvas rotation and mirroring]] | ||
* | * [[#on-canvas-align|On-Canvas alignment of objects]] | ||
* | * [[#view-modes|Split view and X-Ray modes]] | ||
* [[#powerpencil|PowerPencil for drawing editable, variable width strokes with a pressure sensitive graphics tablet]] | |||
* | * [[#png-export|New PNG export options]] | ||
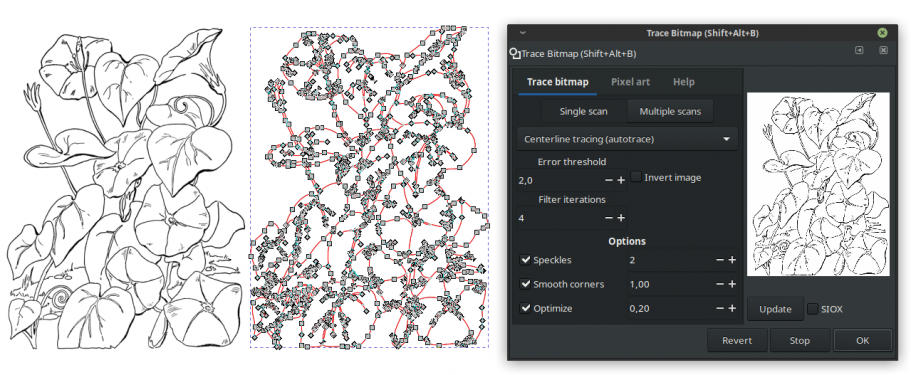
* New Live Path Effect selection dialog | * [[#centerline|Integrated centerline tracing for vectorizing line drawings]] | ||
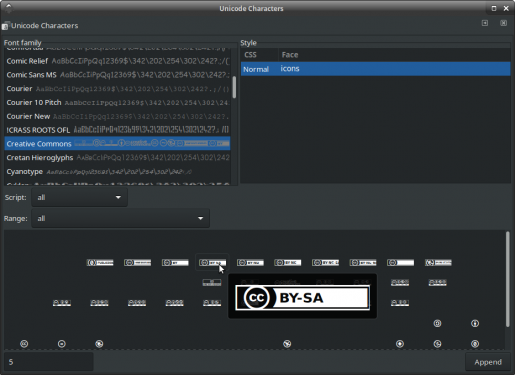
* Path operations | * [[#symbols|Searchable Symbols dialog]] | ||
* Variable fonts (only if compiled with pango library version >= 1.41.1) | * [[#lpe-dialog|New Live Path Effect (LPE) selection dialog]] | ||
* | * [[#lpes|New Corners (Fillet/chamfer) LPE, (lossless) Boolean Operation LPE (experimental), Offset LPE and Measure Segments LPE (and more!)]] | ||
* [[#performance|Path operations, deselection of a large number of paths as well as grouping/ungrouping are much faster now]] | |||
* [[#line-height|Much improved text line-height settings]] | |||
* [[#variable-fonts|Variable fonts support (only if compiled with pango library version >= 1.41.1)]] | |||
* [[#flowed-text|Browser-compatible flowed text]] | |||
* [[#extensions-api|Extensions programming interface updated, with many new options]] - ''Note: this introduces breaking changes, some third-party extensions will have to be updated to work with Inkscape 1.0'' | |||
* [[#python3|Python 3 support for extensions]] | |||
== | == General: Application == | ||
=== | === Performance <span id="performance"></span>=== | ||
Lots of small performance improvements in various areas combine to make Inkscape run smoother than before: | |||
* Accelerated breaking apart of paths and Boolean operations (by disabling intermittent canvas rendering during these operations). | |||
* Accelerated "deselect" speed (by improving internal data structure algorithms). | |||
* Faster grouping and ungrouping of groups with a large number of objects | |||
* Speed boost to operations on large sets of objects in the Objects dialog (Issue [https://gitlab.com/inkscape/inbox/issues/392 #392]) | |||
* Faster lookup of attributes (MR [https://gitlab.com/inkscape/inkscape/merge_requests/448 #448]) | |||
=== Mac Application <span id="macos"></span>=== | |||
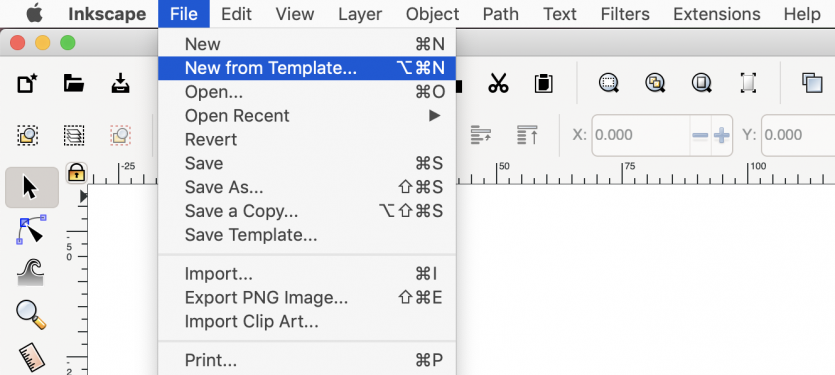
Inkscape is now a first-rate native macOS application, and no longer requires XQuartz to operate. The minimum required operating system version is OS X El Capitan 10.11. | |||
It has a standard Mac-style menu bar (rather than a menu bar within the window). Keyboard shortcuts now use the command (<kbd>⌘</kbd>) key rather than the control key. Retina display screen resolution is now supported. The build is now cleanly 64-bit, a prerequisite for macOS Catalina 10.15 and beyond. It comes bundled with Python 3 to power Inkscape extensions. | |||
<gallery mode="packed" heights=250px> | |||
File:Mac_menu_1.0_screenshot.png|''Inkscape 1.0 on macOS''|alt=Inkscape 1.0 on macOS | |||
</gallery> | |||
== | == General User Interface == | ||
=== Modernized GUI Toolkit=== | |||
The user interface has been changed to utilize a more recent version of GTK+ (GTK+ 3). This is a collection of user interface building blocks that Inkscape uses to draw the user interface on the screen. This new version brings many improvements, especially for users of HiDPI (high resolution) screens. | |||
Bringing the newer GTK+ toolkit to Inkscape has been an eagerly anticipated goal for a long time. It has taken much effort by the team involved and it was a focus point of the [https://inkscape.org/en/news/2018/05/22/2018-boston-inkscape-hackfest/ Boston Hackfest]. | |||
=== Window position / size / behavior === | |||
Improvements and fixes to the code for handling/restoring window size and position [https://gitlab.com/inkscape/inkscape/merge_requests/180] | |||
were made. The window manager handles most of the jobs now, which should make it much more robust. If you still encounter problems with this, please report those [https://inkscape.org/report to our bug tracker]. | |||
The dialog opacity options have been removed, because they were causing crashes that could not be fixed otherwise. | |||
<gallery mode="packed" heights=350px> | |||
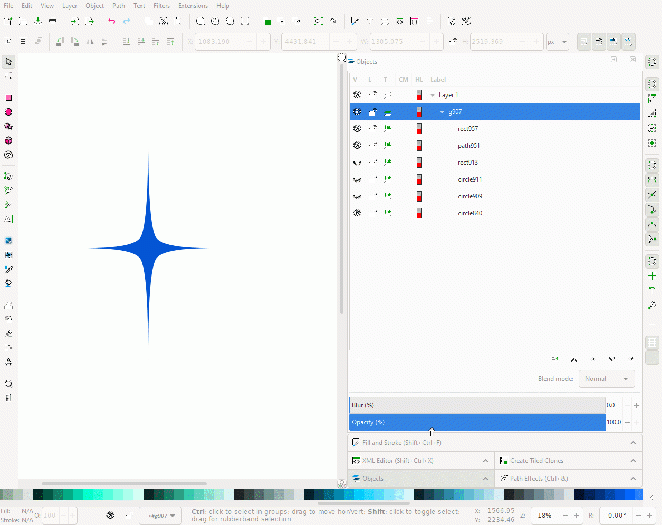
File:Panels re-arrangement.gif|Panels re-arrangement | |||
</gallery> | |||
=== | === High Resolution Screens <span id="hidpi"></span> === | ||
Inkscape now supports HiDPI (high resolution) screens natively. This means that icons and node handles will no longer be tiny on monitors with large pixel dimensions, and the canvas will no longer look blurry. | |||
=== Tool box === | |||
The tools have been reordered and grouped into more logical groups. Groups from top to bottom: | |||
* Edit tools | |||
* Create Shapes | |||
* Create Shapes from scratch | |||
* Color Editing | |||
* Other tools | |||
* Canvas tools. | |||
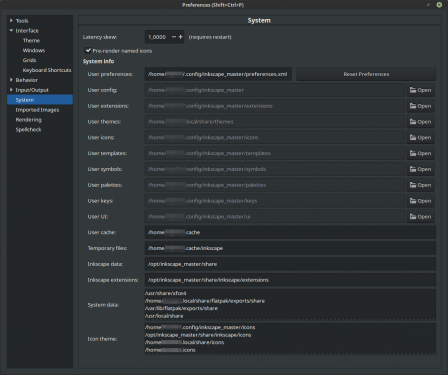
Users can customize the order of the tools by putting a customized version of the file <code>inkscape/share/ui/toolbar-tool.ui</code> into a folder named <code>ui</code> in their Inkscape user configuration folder, if they prefer a different order. | |||
=== | <gallery mode="packed" heights=500px> | ||
File:Inkscape tools .png|''Reordered tools in the tool box''|alt=Reordered tools in the tool box | |||
</gallery> | |||
=== Improved number entry fields === | |||
Many numeric entry fields no longer change their value when scrolling while the mouse is hovering over them. They now need to be selected (clicked into). Then scrolling will change the value as previously. This change was made, because scrolling docked dialogs easily led to accidental change of values. | |||
Additionally, '''<kbd>Ctrl + Scroll</kbd>''' on a selected numeric entry field will now change the value in larger steps. | |||
== Canvas == | |||
=== | === Y-Axis Inversion <span id="origin"></span>=== | ||
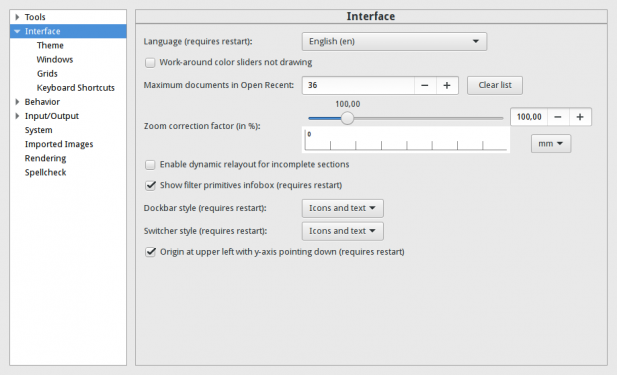
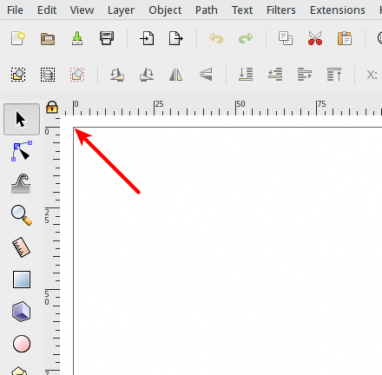
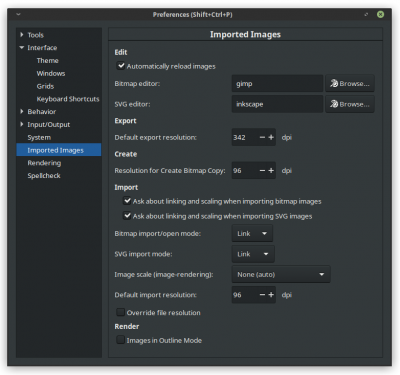
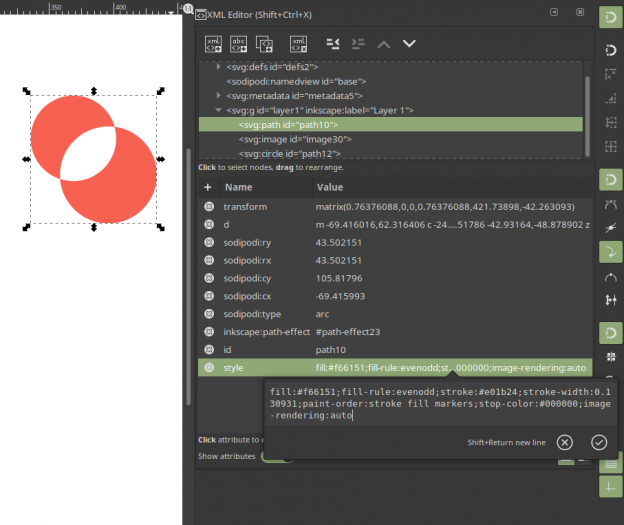
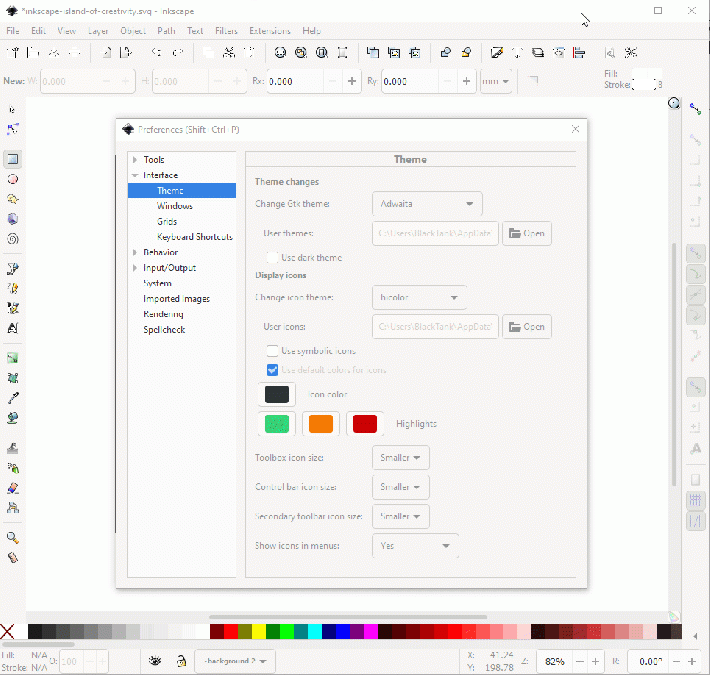
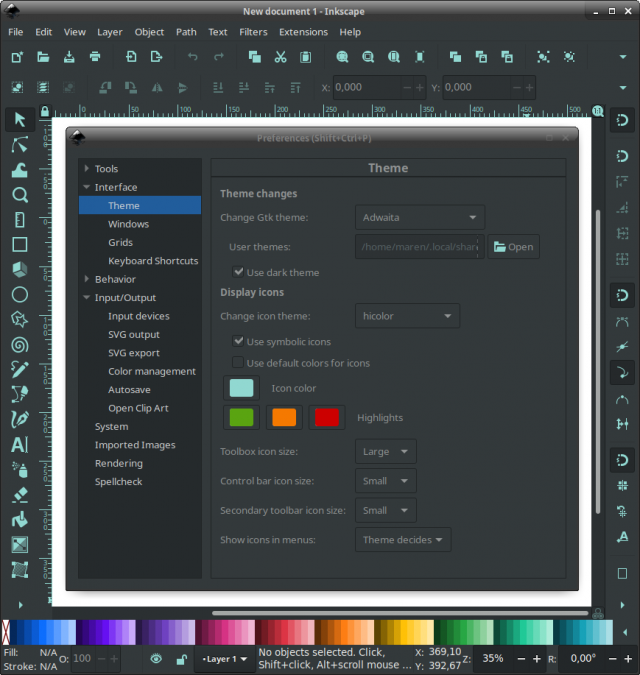
During the [https://inkscape.org/en/news/2018/09/20/inkscape-hackfest-kiel-2018-what-happened/ Inkscape Hackfest in Kiel], a significant change by Thomas Holder was integrated into the Inkscape codebase. It sets the origin of the document to the top left corner of the page. This finally makes the coordinates that a user can see in the interface match the ones that are saved in the SVG data (unit conversions/transformations may be required), and makes working in Inkscape more comfortable for people who are used to this more standard behavior. The old behavior can be reactivated in the preferences, at <code>Edit → Preferences → Interface</code> (disable 'Origin in upper left with y-axis pointing down'). | |||
== | <gallery mode="packed" heights=250px> | ||
File:Origin in upper left.png|''Option in the preferences' 'Interface' section''|alt=Option in the preferences' 'Interface' section | File:Origin in upper left.png|''Option in the preferences' 'Interface' section''|alt=Option in the preferences' 'Interface' section | ||
File:Origin in upper left page.png|''Effect of the option (left upper page corner at 0/0)''|alt=Effect of the option (left upper page corner at 0/0) | File:Origin in upper left page.png|''Effect of the option (left upper page corner at 0/0)''|alt=Effect of the option (left upper page corner at 0/0) | ||
</gallery> | </gallery> | ||
=== | === Canvas Rotation <span id="canvas"></span>=== | ||
With '''<kbd>Ctrl + Shift + Scroll wheel</kbd>''' or '''<kbd>Ctrl + Scroll wheel dragging</kbd>''' the drawing area can be rotated and viewed from different angles. In the bottom right corner of the window, the viewing angle can be entered manually. '''<kbd>Right-click</kbd>''' to select between a set of preset values. You can also reset canvas rotation in <code>View → Canvas orientation → Reset Rotation</code>. Keyboard shortcuts for clockwise/counter-clockwise/no rotation can be set in the preferences. | |||
<gallery mode="packed" heights=300px> | |||
File:Canvas rotation ink.gif|''Rotating the canvas''|alt=Rotating the canvas | |||
</gallery> | |||
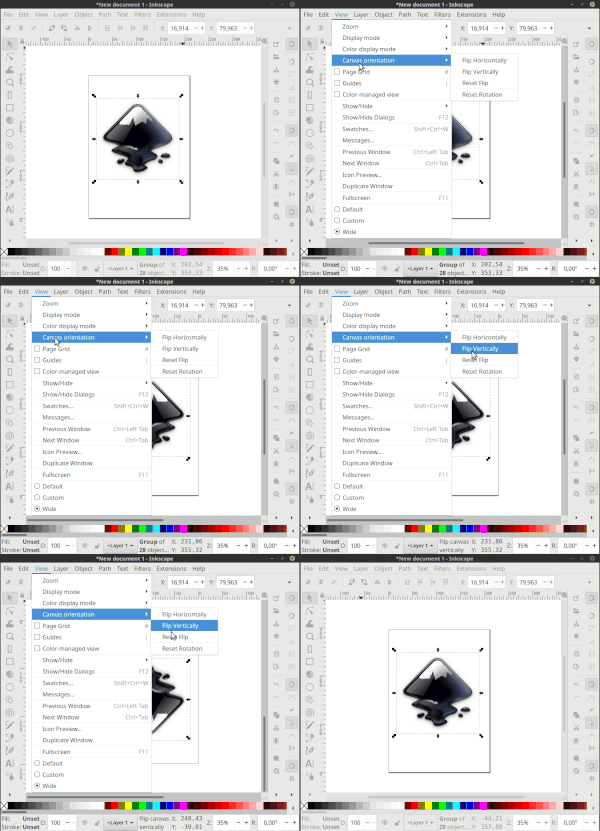
=== Canvas Mirroring === | === Canvas Mirroring === | ||
The canvas can now be flipped, to ensure that the drawing does not lean to one side, and looks good either way. | The canvas can now be flipped, to ensure that the drawing does not lean to one side, and looks good either way. | ||
The vertical/horizontal flipping is available from the menu View | The vertical/horizontal flipping is available from the menu <code>View → Canvas orientation → Flip horizontally / Flip vertically</code>. Keyboard shortcuts for flipping the canvas can be set in the preferences (<code>Edit → Preferences → Interface → Keyboard shortcuts</code>). | ||
<gallery mode="packed" heights=250px> | |||
File:Flip canvas 300px.gif|''Mirroring the canvas''|alt=Mirroring the canvas | |||
</gallery> | |||
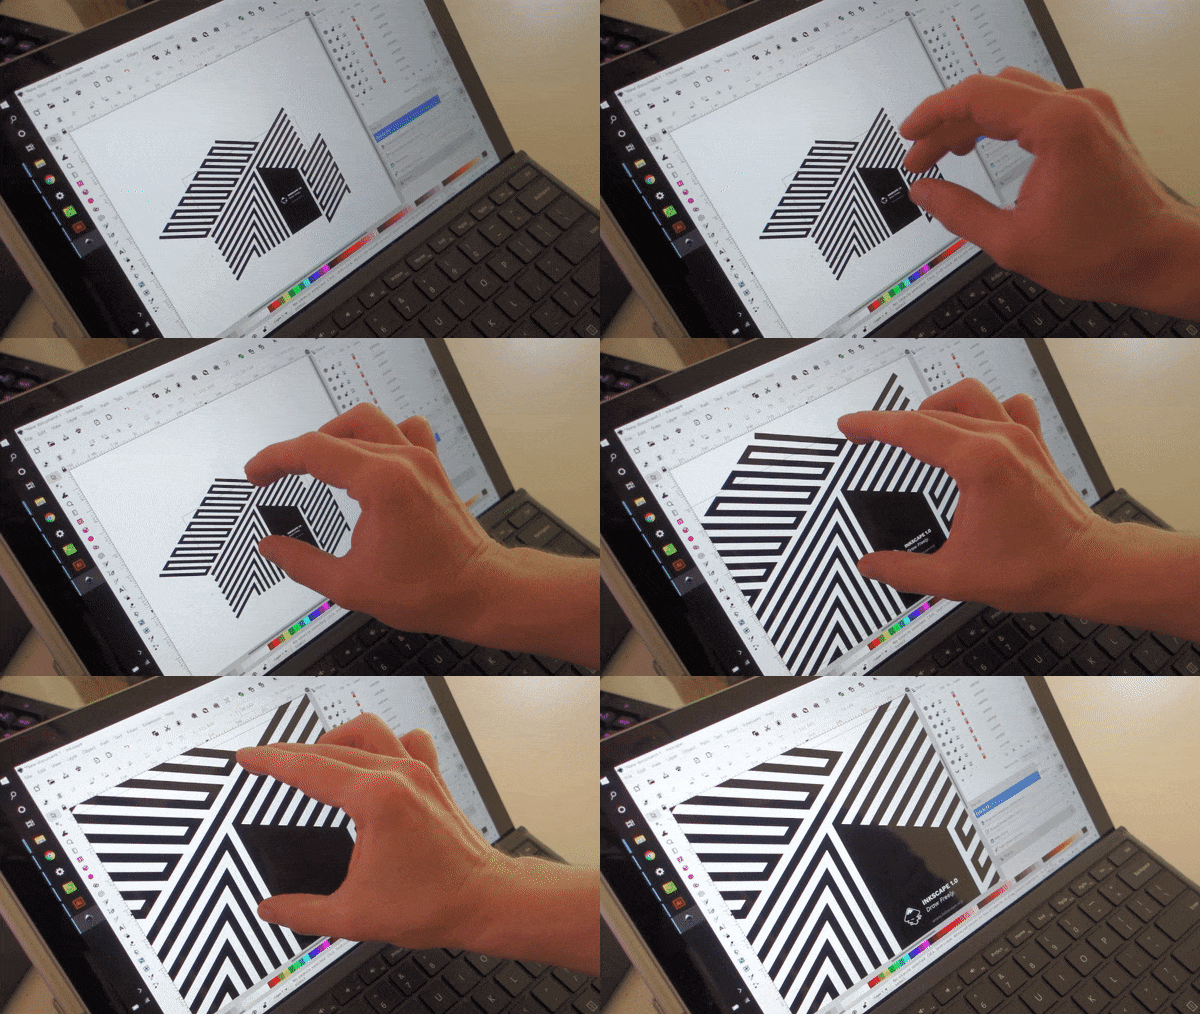
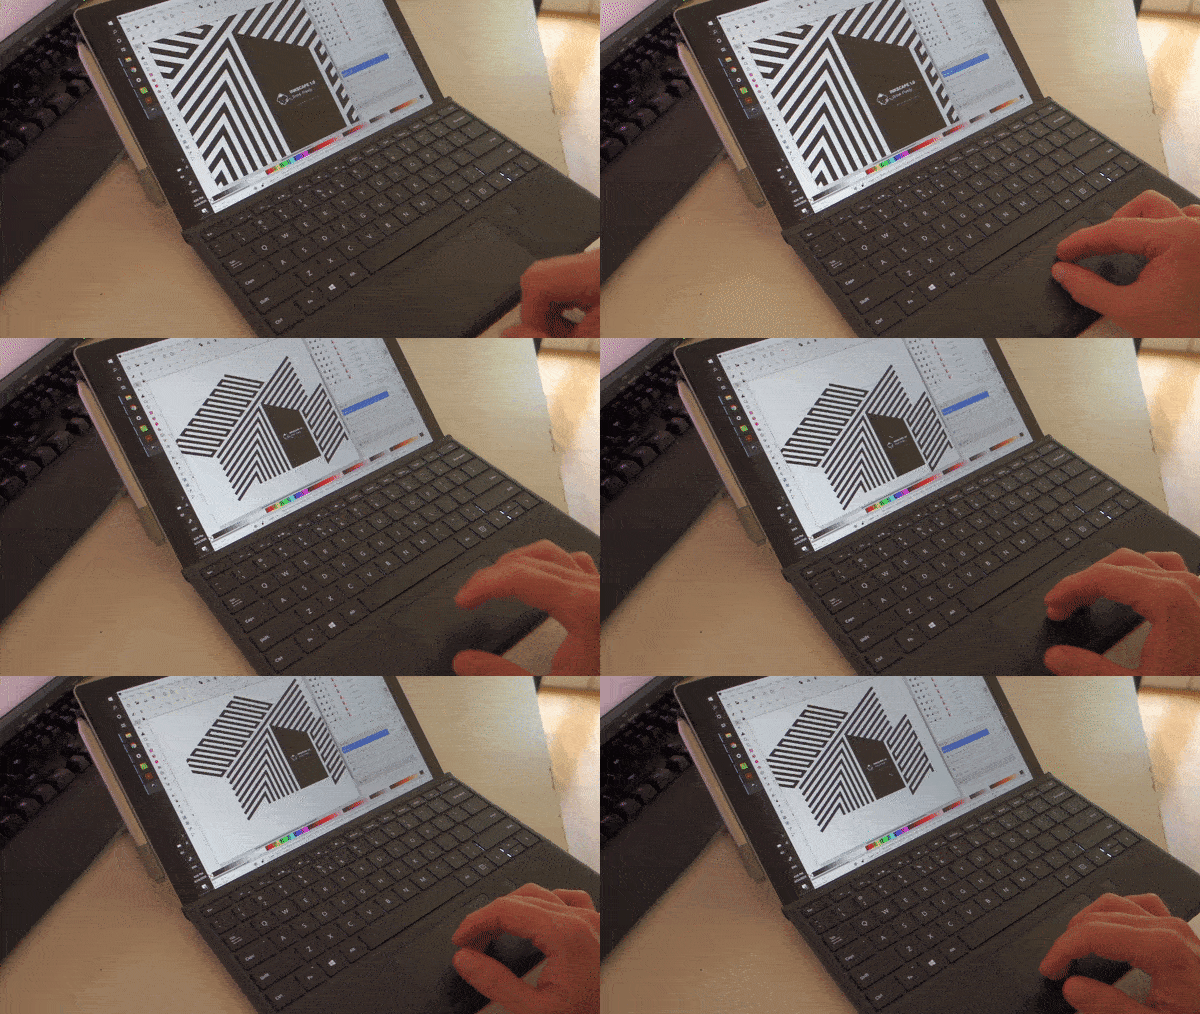
=== Pinch-to-zoom === | === Pinch-to-zoom === | ||
On supported hardware (trackpad, touchpad, multi-touch screen), the canvas can be zoomed with the two-finger pinch gesture. | On supported hardware (trackpad, touchpad, multi-touch screen), the canvas can be zoomed with the two-finger pinch gesture. | ||
<gallery mode="packed" heights=250px> | |||
File:Pitch to zoom.gif|''Pinch to zoom on touch-sensitive display''|alt=Pinch to zoom on touch-sensitive display | |||
File:Zooming .gif|''Pinch to zoom on trackpad''|alt=Pinch to zoom on trackpad | |||
</gallery> | |||
=== Duplicate Guides === | === Duplicate Guides === | ||
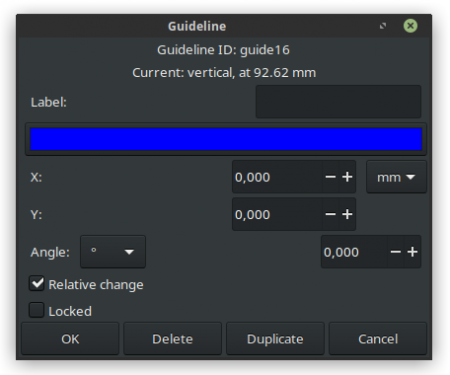
A new option for duplicating guides was added to the 'Guideline' dialog. This new feature, when used | A new option for duplicating guides was added to the 'Guideline' dialog (access by double-clicking on a guide line). This new feature, when used before the 'relative change' option (dialog needs to be opened once for each step), makes it easier to create guides that are offset by a certain distance / angle from an existing guide. | ||
<gallery mode="packed" heights=250px> | |||
File:Duplicate guide.png|''Duplicate guide button in guide editing dialog''|alt=Duplicate guide button in guide editing dialog | |||
</gallery> | |||
=== Context menu === | === Context menu === | ||
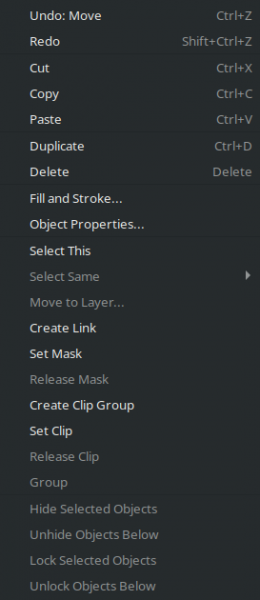
| Line 195: | Line 153: | ||
* Unlock objects below (the mouse cursor) | * Unlock objects below (the mouse cursor) | ||
<gallery> | <gallery mode="packed" heights=400px> | ||
File:Context menu.png|''New options in context menu''|alt=New options in context menu | File:Context menu.png|''New options in context menu''|alt=New options in context menu | ||
</gallery> | </gallery> | ||
| Line 201: | Line 159: | ||
=== Snapping === | === Snapping === | ||
* In Edit | * In <code>Edit → Preferences → Behavior → Snapping</code>, a new option was added to '''disable snapping''' in new documents or files that are opened with Inkscape for the first time. | ||
== View == | == View == | ||
| Line 211: | Line 169: | ||
This function is available via: | This function is available via: | ||
* | * <code>View → Zoom</code> | ||
* Zoom tool tool controls | * the Zoom tool's tool controls bar | ||
* Keyboard shortcut <kbd>Ctrl + 4</kbd> | * Keyboard shortcut '''<kbd>Ctrl + 4</kbd>''' | ||
<gallery mode="packed" heights=350px> | |||
File:Center page .gif|''Center view on page without changing zoom level''|alt=Center view on page without changing zoom level | |||
</gallery> | |||
=== Split View Mode === | === Split View Mode <span id="view-modes"></span>=== | ||
The new Split View Mode features a draggable separator that becomes visible as soon as the Split view mode has been activated. On one side of the separator, the canvas will look just like before, while on the other side, everything will be displayed in outline mode, and objects can more easily be grabbed with the mouse or edited with the node tool. | |||
It can be moved on the canvas by grabbing either the separation line or the central handle. The sides can be switched by clicking on one of the little arrows on the handle. | |||
Activate it with one of: | |||
* <code>View → Split View Mode</code> | |||
* '''<kbd>Ctrl + 6</kbd>''' | |||
To deativate the mode, either deactivate the checkbox in the menu again, use the keyboard shortcut a second time, or drag the separator off the canvas. | |||
<gallery mode="packed" heights=250px> | |||
File:Split Screen-smaller.gif|''Split screen mode''|alt=Split screen mode | |||
</gallery> | |||
=== X-Ray Mode === | |||
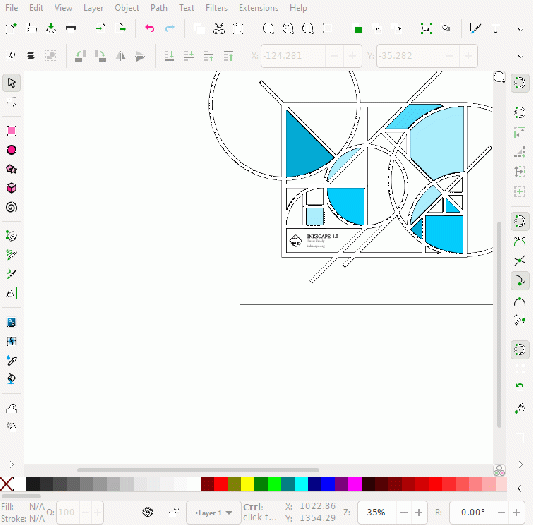
When the X-Ray mode is active, a circular area that shows objects on the canvas in outline mode will follow the mouse pointer. This makes editing complex drawings with many objects layered on top of one another much easier, and is especially useful when used with the node tool. | |||
Activate it with: | |||
* <code>View → XRay Mode</code> | |||
* <kbd>Alt + 6</kbd> | |||
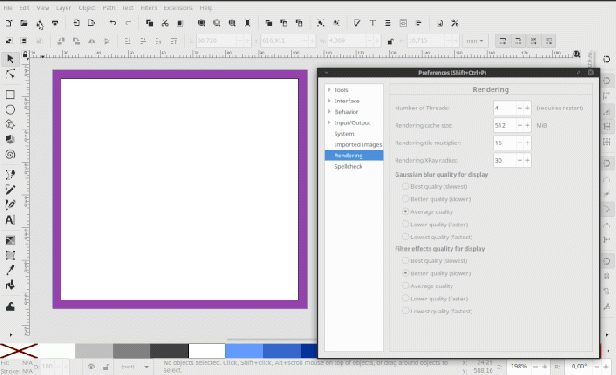
The size of the X-Ray circle can be adjusted in <code>Edit → Preferences → Rendering → Rendering XRay radius</code>. | |||
To deactivate the mode, either deactivate the checkbox in the menu again, or use the keyboard shortcut a second time. | |||
<gallery mode="packed" heights=250px> | |||
File:XRay mode.gif|''X-Ray mode''|alt=X-Ray mode | |||
</gallery> | |||
=== Visible Hairlines Display Mode === | === Visible Hairlines Display Mode === | ||
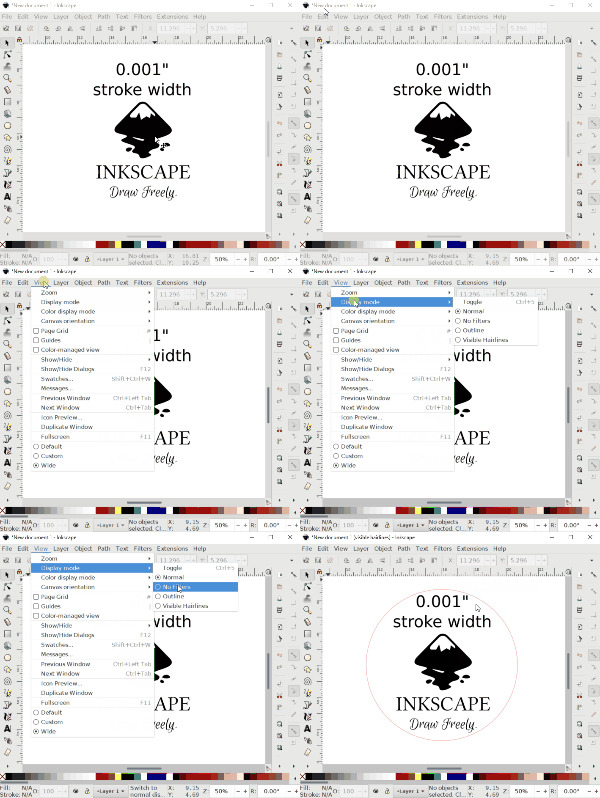
This new display mode is available in the menu under | This new display mode is available in the menu under <code>View → Display Mode → Visible Hairlines</code>. It ensures that all lines of nonzero width are visible (with a minimum visible line width), regardless of zoom level, while still drawing everything else normally. | ||
This is especially useful for | This is especially useful if you need to assign very small line widths for use with CNC machines like laser cutters and vinyl cutters which use hairlines to denote cut lines. In that case, you will still be able to see the lines, even when zoomed out. | ||
<gallery mode="packed" heights=250px> | |||
File:visible_hairlines.gif|''Thin lines always visible in Visible Hairlines mode''|alt=Thin lines always visible in Visible Hairlines mode | |||
</gallery> | |||
== Paths == | == Paths == | ||
| Line 240: | Line 233: | ||
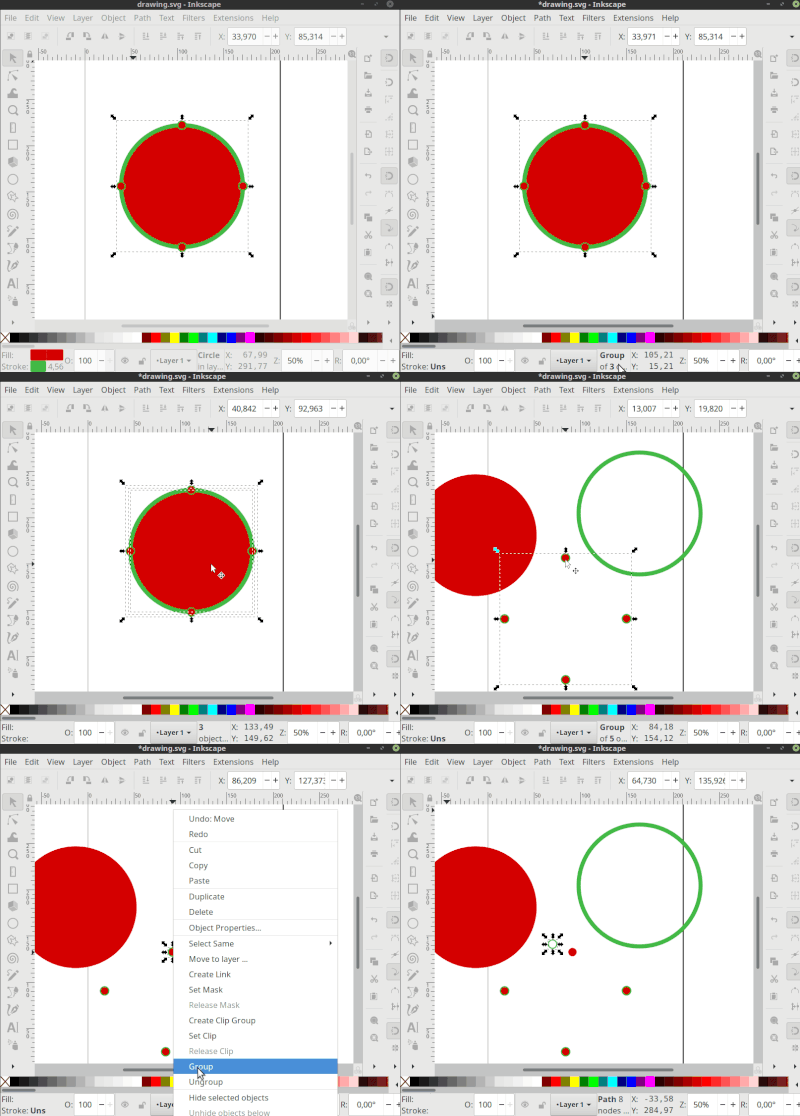
* A group of all markers (if applicable; one group per marker, consisting of its outline and its fill turned into a path) | * A group of all markers (if applicable; one group per marker, consisting of its outline and its fill turned into a path) | ||
<gallery mode="packed" heights=250px> | |||
File:Stroke to path.gif|''New behavior of Stroke to Path''|alt=New behavior of Stroke to Path | |||
</gallery> | |||
=== Unlinking Clones for Path Operations === | === Unlinking Clones for Path Operations === | ||
| Line 246: | Line 241: | ||
Clones and Symbols are now automatically unlinked, before a Boolean operation (union, difference, etc.), or one of the Path operations 'Combine', 'Break apart', or 'Stroke to Path' is performed. | Clones and Symbols are now automatically unlinked, before a Boolean operation (union, difference, etc.), or one of the Path operations 'Combine', 'Break apart', or 'Stroke to Path' is performed. | ||
A setting in the preferences at | A setting in the preferences at <code>Behavior → Clones → Unlink Clones</code> allows the User to disable the automatic unlinking. | ||
== Tools == | == Tools == | ||
| Line 252: | Line 247: | ||
=== Bézier Tool === | === Bézier Tool === | ||
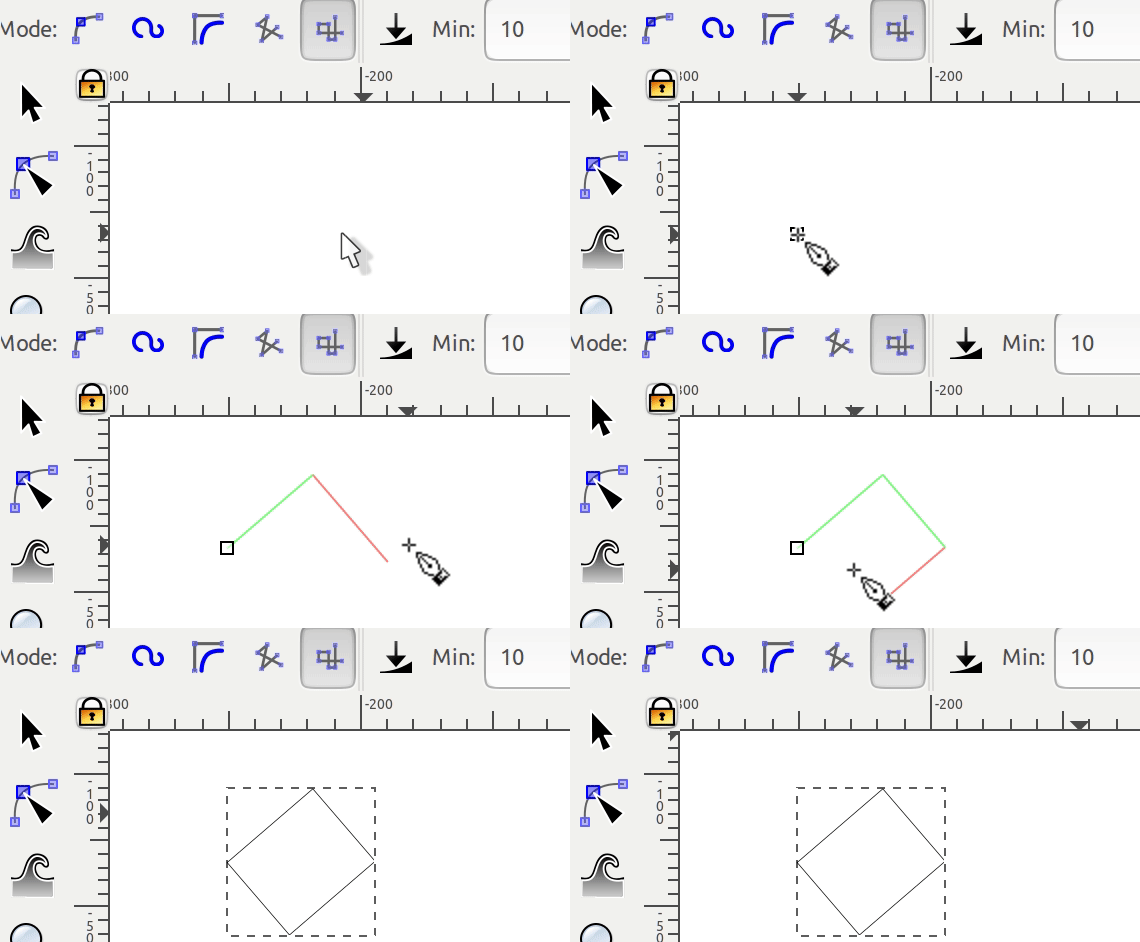
The tool mode 'Create sequence of paraxial segments', which previously would only draw lines parallel to the x and y axis of the document, now supports arbitrary starting angles. After the first segment, all further angles will use the current angle | The tool mode 'Create sequence of paraxial segments', which previously would only draw lines parallel to the x and y axis of the document, now supports arbitrary starting angles. After the first segment, all further angles will use the current angle ±90°. If you want your first segment to work as in previous versions, you need to press '''<kbd>Ctrl</kbd>''' after the first click. This will restrict your options to (by default) 15° steps. | ||
<gallery> | <gallery mode="packed" heights=250px> | ||
File:Paraxial arbitrary starting angle.gif|''Arbitrary starting angle for paraxial mode''|alt=Arbitrary starting angle for paraxial mode | File:Paraxial arbitrary starting angle.gif|''Arbitrary starting angle for paraxial mode''|alt=Arbitrary starting angle for paraxial mode | ||
</gallery> | </gallery> | ||
| Line 260: | Line 255: | ||
=== Calligraphy Tool === | === Calligraphy Tool === | ||
A new option to add dots has been added to the tool. Click in place without moving the mouse to create a dot, Shift+Click to create a larger dot ''[ | A new option to add dots has been added to the tool. Click in place without moving the mouse to create a dot, '''<kbd>Shift + Click</kbd>''' to create a larger dot ''[Known issues: [https://gitlab.com/inkscape/inbox/-/issues/2368 inbox#2368], [https://gitlab.com/inkscape/inbox/-/issues/2342 inbox#2342]]''. | ||
=== Circle Tool === | === Circle Tool === | ||
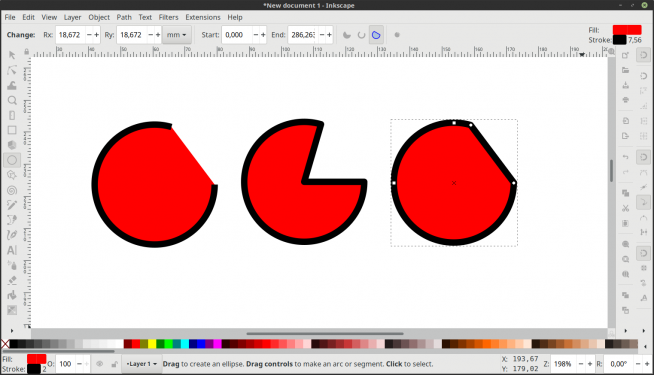
| Line 266: | Line 261: | ||
The circle tool can now also create closed ("filleted") circle shapes (closed arcs) with the click of a button. | The circle tool can now also create closed ("filleted") circle shapes (closed arcs) with the click of a button. | ||
<gallery> | <gallery mode="packed" heights=250px> | ||
File:Circle chord.png|''Circle tool shapes in this release''|alt=Circle tool shapes in this release | File:Circle chord.png|''Circle tool shapes in this release''|alt=Circle tool shapes in this release | ||
</gallery> | </gallery> | ||
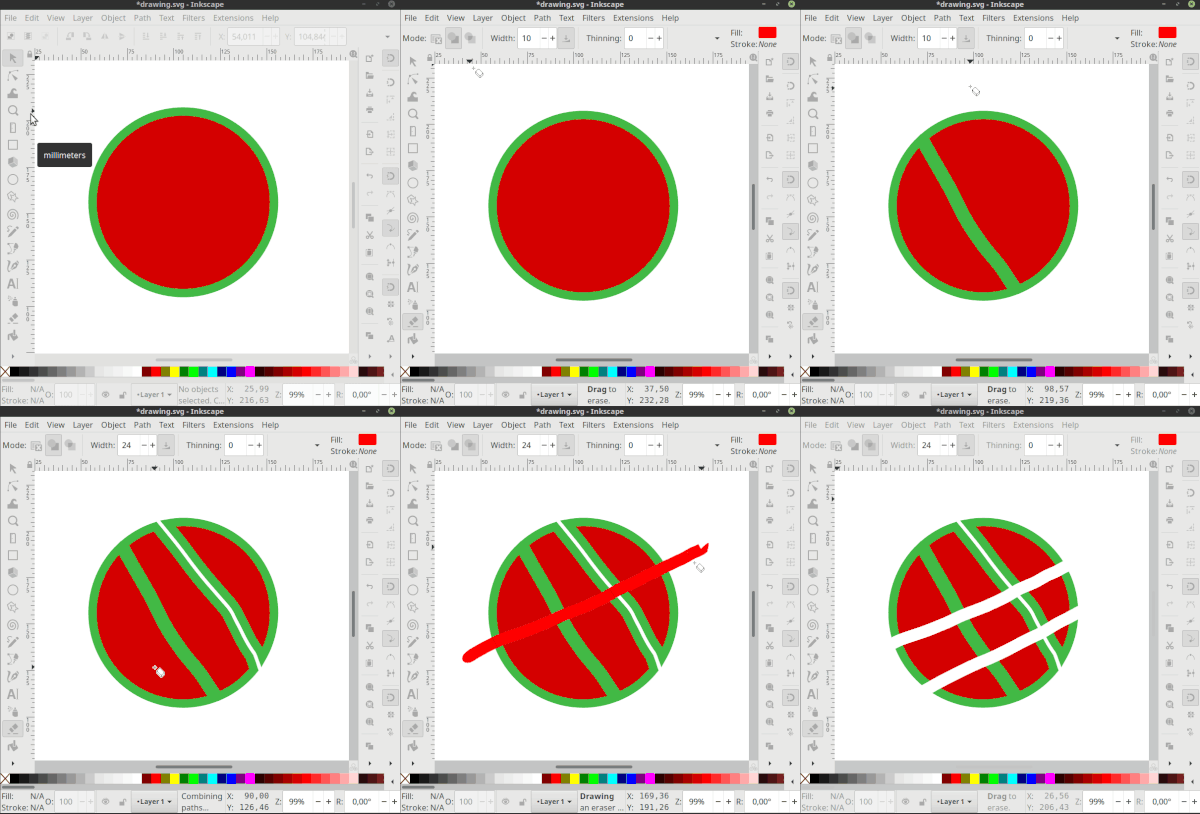
| Line 273: | Line 268: | ||
* Added option to control eraser width with a pressure sensitive input device. | * Added option to control eraser width with a pressure sensitive input device. | ||
* Added thinning, caps and tremor options (as used for calligraphy tool). | * Added thinning, caps, and tremor options (as used for calligraphy tool). | ||
* New option to erase as clip, which allows the User to non-destructively erase (parts of) various types of elements, including raster images and clones. | * New option to erase as clip, which allows the User to non-destructively erase (parts of) various types of elements, including raster images and clones. | ||
<gallery mode="packed" heights=350px> | |||
File:Erase with clip.gif|''Erasing by setting a clip''|alt=Erasing by setting a clip | |||
</gallery> | |||
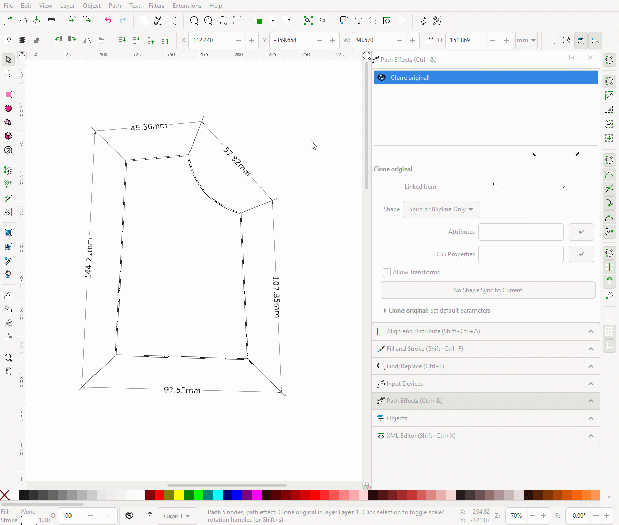
=== Measurement Tool === | === Measurement Tool === | ||
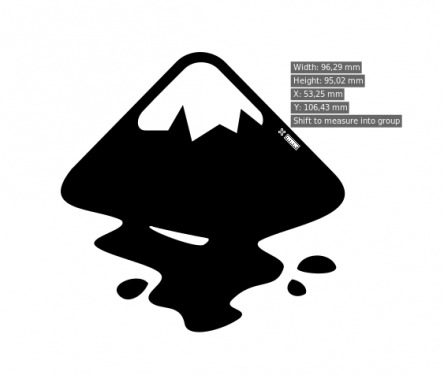
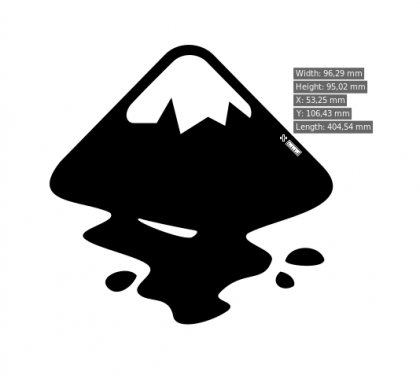
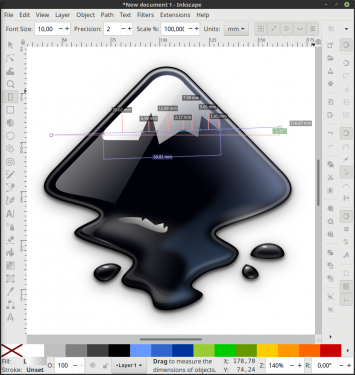
Hovering over a path with the tool now displays the length, height, width and position of the path. If you hover over a group, it will show the width, height and position of the group. Holding Shift switches to showing info about the constituents of the group. | Hovering over a path with the tool now displays the length, height, width, and position of the path. If you hover over a group, it will show the width, height, and position of the group. Holding '''<kbd>Shift</kbd>''' switches to showing info about the constituents of the group. | ||
The tool also has a new option to only measure selected objects when using click-and-drag. | The tool also has a new option to only measure selected objects when using click-and-drag. | ||
<gallery> | <gallery mode="packed" heights=250px> | ||
File:Measure tool info.png|''New info text from measurement tool (for a group)''|alt=New info text from measurement tool (for a group) | File:Measure tool info.png|''New info text from measurement tool (for a group)''|alt=New info text from measurement tool (for a group) | ||
File:Measure tool info group shift.png|''Measurement tool info text for a single path (in a group with Shift)''|alt=Measurement tool info text for a single path (in a group with Shift) | File:Measure tool info group shift.png|''Measurement tool info text for a single path (in a group with Shift)''|alt=Measurement tool info text for a single path (in a group with Shift) | ||
| Line 292: | Line 289: | ||
=== Pencil Tool === | === Pencil Tool === | ||
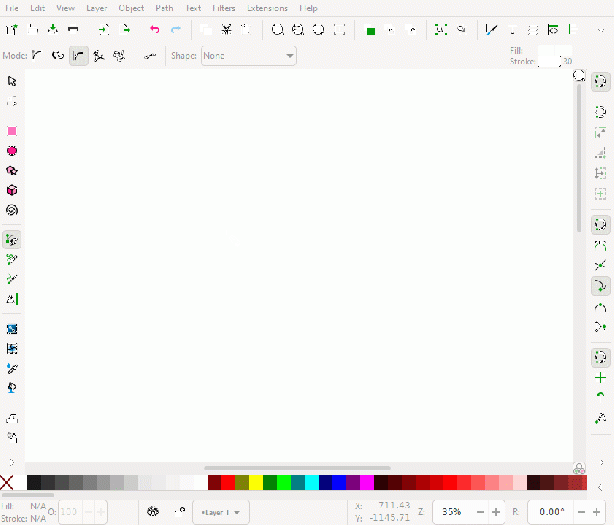
==== PowerPencil ==== | ==== PowerPencil <span id="powerpencil"></span>==== | ||
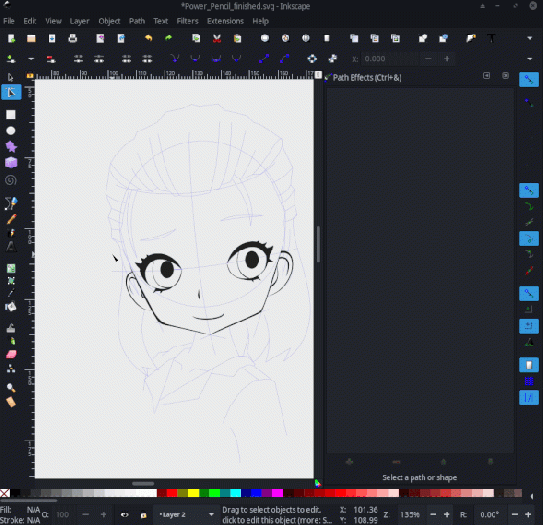
Pressure sensitivity can now be enabled for the Pencil tool. This feature makes use of the PowerStroke Live Path Effect (LPE). | Pressure sensitivity can now be enabled for the Pencil tool. This feature makes use of the PowerStroke Live Path Effect (LPE). | ||
| Line 298: | Line 295: | ||
New settings for the tool are available for tweaking the behavior of the PowerStroke LPE when it is being created with the Pencil tool (and a graphics tablet/stylus): | New settings for the tool are available for tweaking the behavior of the PowerStroke LPE when it is being created with the Pencil tool (and a graphics tablet/stylus): | ||
* '''Use pressure input''' (in the tool controls bar): activates the PowerStroke feature, if a pressure sensitive device is available. | * '''Use pressure input''' (in the tool controls bar): activates the PowerStroke feature, if a pressure sensitive device is available. | ||
* '''Min/Max''' (in the tool controls bar): determines the minimal and maximal stroke width ( | * '''Min/Max''' (in the tool controls bar): determines the minimal and maximal stroke width (0–100%). This does not change the number of available pressure levels, but spreads them out in the available line width interval. | ||
* '''Caps''' (in the tool controls bar): choose between the options 'butt', 'square', 'round', 'peak' and 'zero width' for the end caps of the stroke. | |||
* Additionally, the PowerStroke LPE itself has been improved, to better work when used in this new way, see [[#PowerStroke_LPE_Improvements|the section about LPE updates]]. | * Additionally, the PowerStroke LPE itself has been improved, to better work when used in this new way, see [[#PowerStroke_LPE_Improvements|the section about LPE updates]]. | ||
'' | <gallery mode="packed" heights=350px> | ||
File:PowerPencil-smaller.gif|''Drawing with the PowerPencil''|alt=Drawing with the PowerPencil | |||
</gallery> | |||
=== Selection Tool === | === Selection Tool === | ||
==== On-Canvas Alignment ==== | ==== On-Canvas Alignment <span id="on-canvas-align"></span>==== | ||
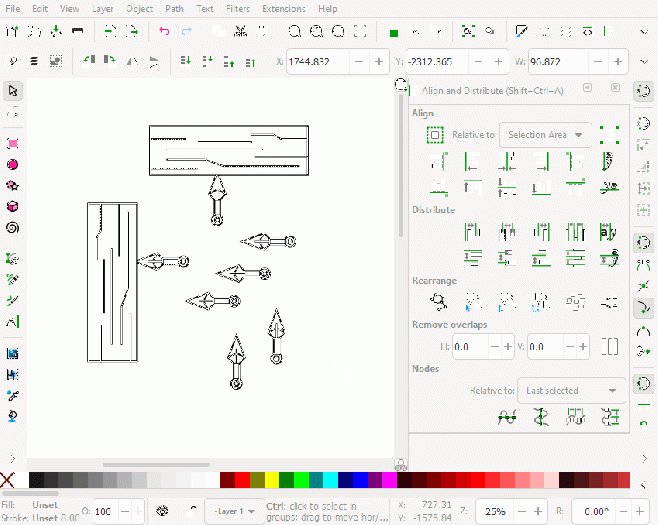
When the option "Enable on-canvas alignment" is active in the "Align and Distribute" dialog, a new set of handles will appear on canvas when an object is clicked three times (first click: scale handles, second click: rotation/skew handles). | When the option "Enable on-canvas alignment" is active in the "Align and Distribute" dialog, a new set of handles will appear on canvas when an object is clicked three times (first click: scale handles, second click: rotation/skew handles). | ||
| Line 312: | Line 311: | ||
The handles can be used to align the selected objects relative to the area of the current selection. | The handles can be used to align the selected objects relative to the area of the current selection. | ||
* Shift + click on the outer handles aligns on the outside of the selection area. | * '''<kbd>Shift + click</kbd>''' on the outer handles aligns on the outside of the selection area. | ||
* Clicking on the central handle will align the selected objects on the horizontal axis. On Shift + click objects will be aligned on the vertical axis. | * Clicking on the central handle will align the selected objects on the horizontal axis. On '''<kbd>Shift + click</kbd>''' objects will be aligned on the vertical axis. | ||
* | * With '''<kbd>Ctrl + Shift </kbd>''' the whole selection can be aligned to its outer boundaries / corners as a group (i.e. it is moved by its own <code>width</code> and / or <code>height</code>). | ||
<gallery mode="packed" heights=350px> | |||
File:Align-on canvas.gif|''On-canvas alignment''|alt=On-canvas alignment | |||
</gallery> | |||
=== Text Tool <span id="text-tool">=== | |||
==== More Compact Tool Controls Bar ==== | |||
* Some control buttons that have been mutually exclusive (e.g. right-aligned, left-aligned, justified) have been combined into drop-down lists, so they now take up less space. | |||
* Removed the 'Show style of outermost text element' button that made settings confusing. | |||
<gallery mode="packed" heights=250px> | |||
File:Text Tool controls1.0.png|''Tool controls for the text tool''|alt=Tool controls for the text tool | |||
</gallery> | |||
==== Better Line Height Settings <span id="line-height></span>==== | |||
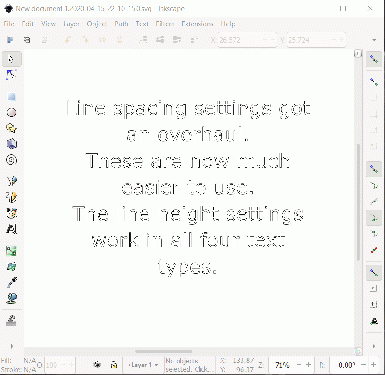
* Line spacing settings got an overhaul and are now much easier to use. Gone is the unwieldy <code>?</code> button; this is now handled by selecting text on canvas. | |||
* Setting line height works like this now: | |||
** For the whole text: click anywhere into the text without selecting anything, then adjust the line height in the tool controls bar. | |||
** For a specific line: select the text in that line, then adjust the line height in the tool controls bar. | |||
** Set the global line height first, and the specific line heights last. Changing global line height later will remove any line-specific line-heights (even just changing the unit will unset those <!-- remove this comment when https://gitlab.com/inkscape/inkscape/-/merge_requests/1762 has been cherry-picked into 1.0.x -->). | |||
** Line heights for single selected lines cannot go below the height set globally. | |||
** If more than one line is selected, the line height in between those lines can go below the line height set for the whole text. | |||
* The line height settings work in all four text types. | |||
<gallery mode="packed" heights=250px> | |||
File:Adjusting line height.gif|''Adjusting the line height for the whole text and for selected lines''|alt=Adjusting the line height for the whole text and for selected lines | |||
</gallery> | |||
==== Improved Text Selection ==== | ==== Improved Text Selection ==== | ||
When clicking on a text object, any click within the whole area of | When clicking on a text object, any click within the whole area of a text line now selects the text with both selection and text tool (previously, clicking into the space between two letters did not select the text). | ||
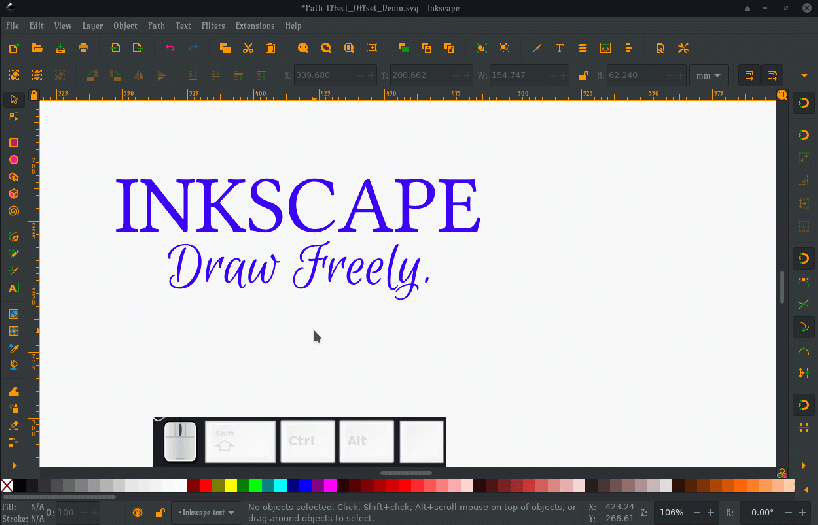
==== Variable Font Support <span id="variable-fonts"></span>==== | |||
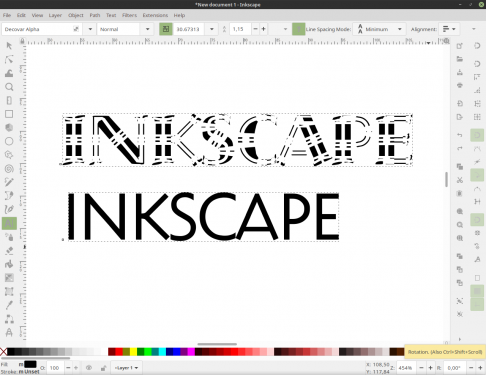
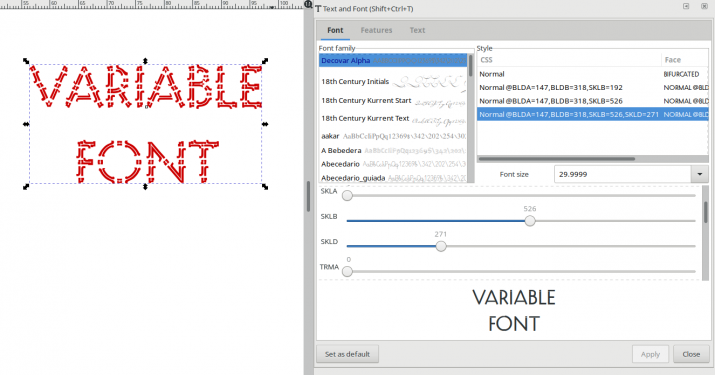
If Inkscape has been compiled with a Pango library version that is at least 1.41.1 (which is the case for the Windows and macOS versions, and for Ubuntu versions starting from 19.04), it comes with [[Variable Fonts support | support for variable fonts]] ([https://www.patreon.com/posts/font-variations-17644963 more info about how this looks]). These are fonts that do not come with different faces, but often with various sliding scales for different font properties, like 'boldness', or 'condensing', or even playful features. | |||
[https://activdesign.eu/uploads/gallery/inkscape-variable-fonts-en.mp4 How to use Variable Fonts in Inkscape 1.0 in 10 steps (Video)] | |||
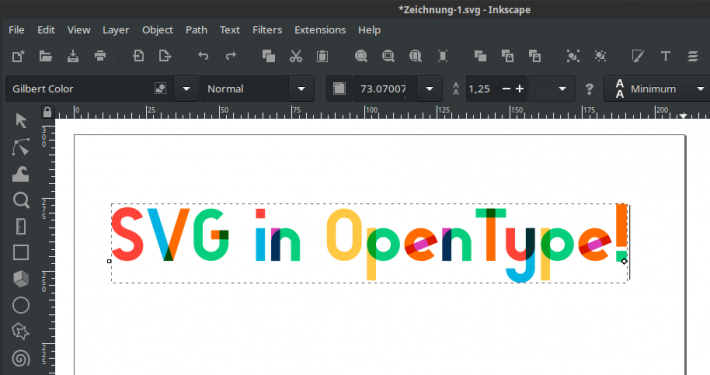
==== Basic Support for SVG in OpenType ==== | ==== Basic Support for SVG in OpenType ==== | ||
| Line 335: | Line 360: | ||
Some OpenType fonts with glyphs saved as SVG render now in Inkscape. | Some OpenType fonts with glyphs saved as SVG render now in Inkscape. | ||
<gallery> | <gallery mode="packed" heights=250px> | ||
File:Variable fonts Decovar.png|''Variable font - both texts use the same font (Decovar)''|alt=Variable font - both texts use the same font (Decovar) | File:Variable fonts Decovar.png|''Variable font - both texts use the same font (Decovar)''|alt=Variable font - both texts use the same font (Decovar) | ||
File:Variable Font w dialog.png|''Variable font - dialog with sliders for the font styles''|alt=Variable font - dialog with sliders for the font styles | |||
File:SVG in OpenType.png|''SVG Color font (Gilbert Color)''|alt=SVG Color font (Gilbert Color) | File:SVG in OpenType.png|''SVG Color font (Gilbert Color)''|alt=SVG Color font (Gilbert Color) | ||
</gallery> | </gallery> | ||
==== Browser-compatible flowed text ==== | ==== Flow order ==== | ||
With <code>Text → Flow into Frame</code>, text now flows into the selected frames in selection order (instead of reversed order previously). | |||
==== Browser-compatible flowed text <span id="flowed-text"></span>==== | |||
'''Flowed text''' (created by clicking and dragging a text frame) in previous Inkscape versions was not compatible with browsers, and rendered as 'black boxes' in web browsers and other SVG viewers, or was just missing. | |||
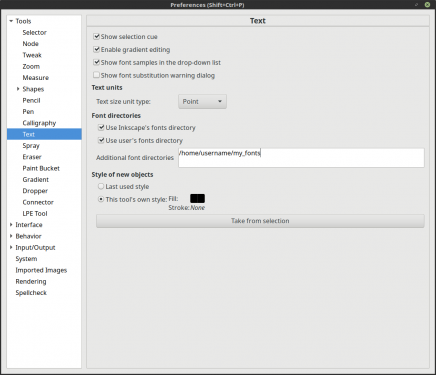
The old flowed text can still be enabled by unchecking <code>Edit → Preferences → Tools → Text: Use SVG2 auto-flowed text</code>. | |||
''' | Now, Inkscape offers to use '''two new types of flowed text''', that have a compatible fallback for use with modern web browsers: | ||
# '''SVG 2 text using the CSS <code>shape-inside</code> property:''' This new flowed text automatically '''includes a fallback option''' (in SVG 1.1), and will show up in web browsers and other software. This type of text can be created by '''clicking and dragging a box''' on canvas, '''if the option 'Use SVG 2 auto-flowed text' is enabled''' in the Text tool's preferences. When the option is enabled, it will also be used for <code>Text → Flow into frame</code>. Kerning and letter rotation do not work with this type of text. | |||
# '''SVG 2 text with <code>inline-size</code> property:''' This is the new "Column mode" of the text tool, that can be created by clicking on the canvas, typing, and then dragging the diamond-shaped handle at the end of the text to determine the width of the text. It creates flowed text columns without a predetermined height. Note that this text can be left-, center- or right-aligned, but that justification is not possible. Kerning and letter rotation also do not work with this type of text. These texts include an SVG 1.1 fallback, too. To convert the text back to SVG 1.1 text, '''<kbd>Ctrl-click</kbd>''' on the diamond (this will result in all the text being placed on a single line). | |||
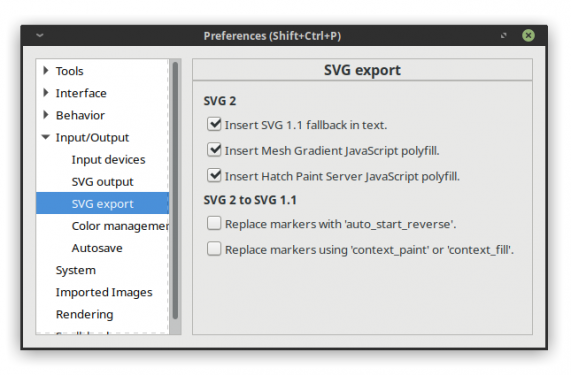
The fallback option can be disabled in <code>Edit → Preferences → Input/Output → SVG export: SVG 2: Insert SVG 1.1 fallback in text</code>. | |||
==== Overview of available text types ==== | |||
<gallery mode="packed" heights=250px> | |||
File:Text normal.gif|''Normal text with manual line breaks (click + type, browser-compatible)''|alt=Normal text with manual line breaks (click + type, browser-compatible) | |||
File:Text in-a-shape.gif|''Text in-a-shape with automatic line breaks (click + drag + type, browser-compatible, new in Inkscape 1.0)''|alt=Text in-a-shape with automatic line breaks (click + drag + type, browser-compatible, new in Inkscape 1.0) | |||
File:Text inline size.gif|''Flowed text with adjustable width (click + type + drag diamond handle, browser-compatible, new in Inkscape 1.0)''|alt=Flowed text with adjustable width (click + type + drag diamond handle, browser-compatible, new in Inkscape 1.0) | |||
File:SVG1.2 text.gif|''Flowed text of the type that was used in previous versions (click + drag + type, not browser-compatible) can still be activated in the preferences.''|alt=Flowed text of the type that was used in previous versions (click + drag + type, not browser-compatible) can still be activated in the preferences. | |||
File:Text flowed into frame.gif|''Flowing text into a series of frames in selection order''|alt=Flowing text into a series of frames in selection order | |||
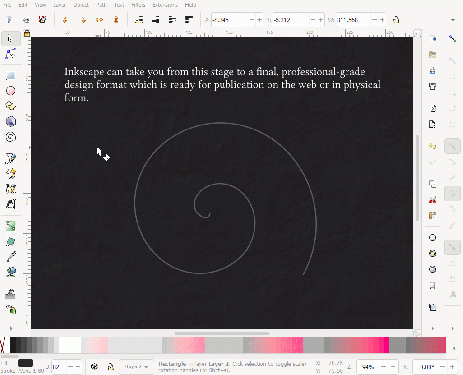
File:Text on Path.gif|''Spiral text as a result of putting text on a path''|alt=Spiral text as a result of putting text on a path | |||
</gallery> | |||
==== SVG 2 Text Support in Detail ==== | ==== SVG 2 Text Support in Detail ==== | ||
| Line 359: | Line 400: | ||
There are several types of SVG 2 text: | There are several types of SVG 2 text: | ||
===== Multi-line text via the CSS ' | ===== 1. Multi-line text via the CSS 'inline-size' property ===== | ||
The CSS property <code>inline-size</code> defines the width (height) of a block of horizontal (vertical) text. | |||
Inkscape supports both rendering and generating multi-line text via this property. Flowed text using 'inline-size' is not justifiable (it uses the 'text-anchor' property). This text type has an SVG 1.1 fallback, that is included by default. | |||
===== 2. Multi-line text via the CSS 'shape-inside' property ===== | |||
The CSS property <code>shape-inside</code> allows placing text inside a shape. Inkscape supports this property in both rendering and creating. Inkscape also supports in rendering the CSS <code>shape-subtract</code>, <code>shape-margin</code>, and <code>shape-padding</code> properties. | |||
Multi-line text via the <code>shape-inside</code> property is a direct replacement for SVG 1.2 flowed text. SVG 1.2 never became a final W3C standard and only the Batik SVG renderer besides Inkscape provided any support for SVG 1.2 flowed text. SVG 2 is not yet a final W3C standard but SVG 2 flowed text has one very important advantage over SVG 1.2 flowed text in that it is easy to structure the SVG 2 text such that it will be rendered (almost) correctly by an SVG 1.1 renderer. This means that browsers which do not support SVG 2 text will still render the text. | |||
Inkscape | |||
===== Multi-line text via the CSS ' | ===== 3. Multi-line text via the CSS 'white-space' property (only rendering) ===== | ||
The CSS property ' | The CSS property [https://developer.mozilla.org/en-US/docs/Web/CSS/white-space 'white-space'] controls how white space is handled. By default, SVG collapses all adjacent white-space including newlines into a single space. By setting the <code>white-space</code> value to <code>pre</code>, <code>pre-line</code>, or <code>pre-wrap</code>, Inkscape will respect newlines and generate multi-line text. At the moment, one must use the XML Editor dialog to change the <code>white-space</code> property value. (Supported by Firefox. No SVG 1.1 fallback created by Inkscape.) | ||
One disadvantage of using SVG 2 text is that it will not be editable as multi-line text in Inkscape 0.92 (it will still be editable as single lines of text). | |||
== Clipping / Masking == | == Clipping / Masking == | ||
| Line 378: | Line 421: | ||
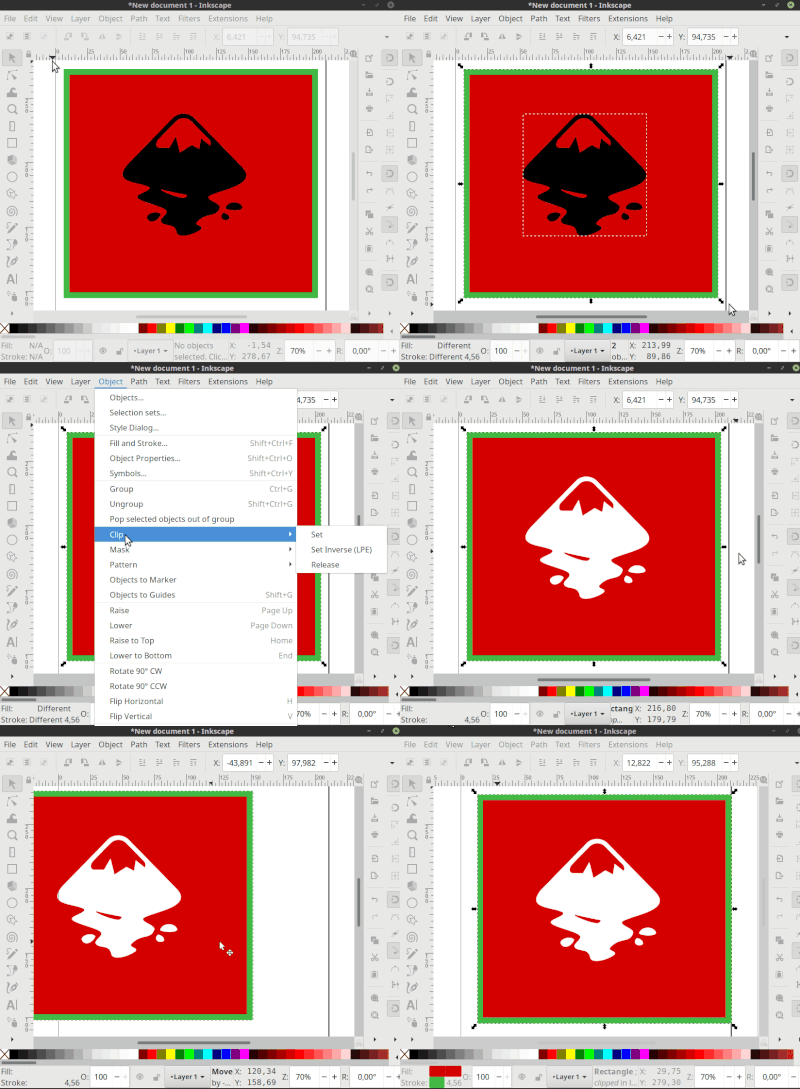
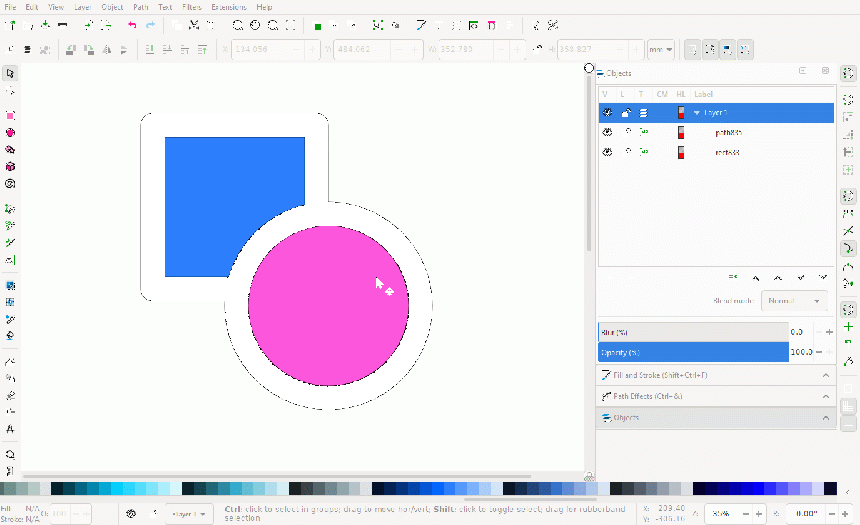
Clip paths and masks now have an inverse mode in the menu, using the PowerClip and PowerMask LPEs. | Clip paths and masks now have an inverse mode in the menu, using the PowerClip and PowerMask LPEs. | ||
<gallery mode="packed" heights=250px> | |||
File:Inverse clip 400.gif|''Setting an inverse clip''|alt=Setting an inverse clip | |||
</gallery> | |||
== Filters == | == Filters == | ||
| Line 384: | Line 429: | ||
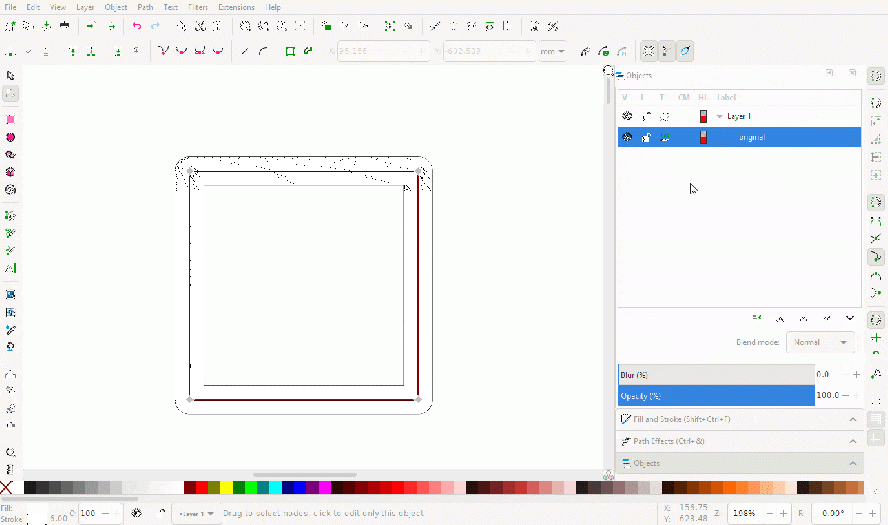
The size of the filter region can now be adjusted by dragging on two new diamond-shaped nodes with the node tool. This is especially useful for blur filters, whose area has been affected by a transformation of the filtered object. | The size of the filter region can now be adjusted by dragging on two new diamond-shaped nodes with the node tool. This is especially useful for blur filters, whose area has been affected by a transformation of the filtered object. | ||
<gallery mode="packed" heights=250px> | |||
File:Filter region.gif|''Modifying the filter region on canvas''|alt=Modifying the filter region on canvas | |||
</gallery> | |||
== Live Path Effects == | == Live Path Effects == | ||
| Line 392: | Line 439: | ||
Live Path Effects received a major overhaul, with lots of improvements and new features. The main changes are: | Live Path Effects received a major overhaul, with lots of improvements and new features. The main changes are: | ||
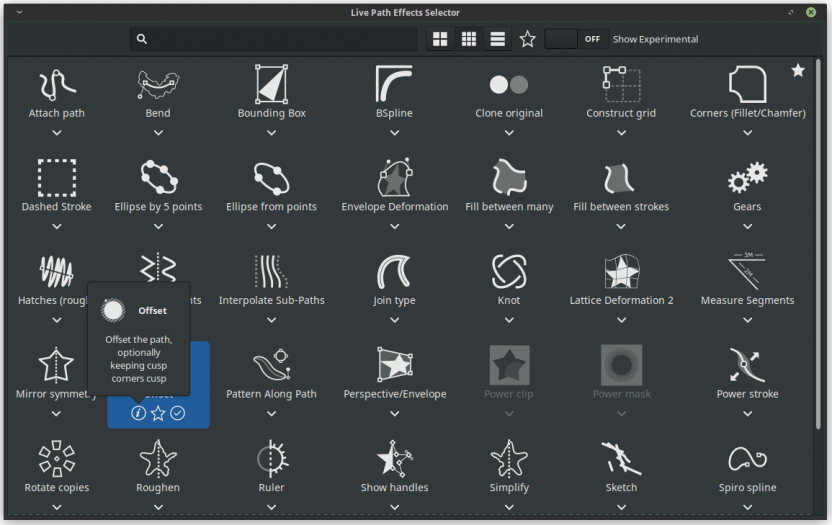
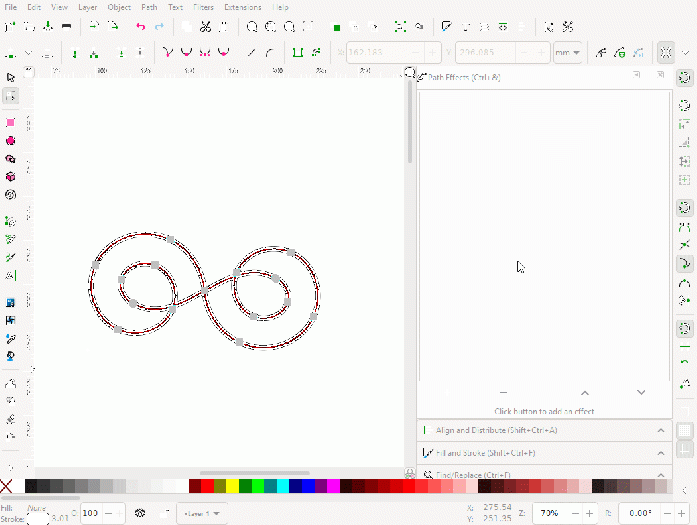
* '''New LPE selection dialog''': the LPE list is now made available as a searchable dialog with an icon for each path effect, and options to favorite, to switch between list and tile view, to display info about the selected effect and to apply it. Several additional, experimental path effects are available after the corresponding switch has been activated. | * '''New LPE selection dialog'''<span id="lpe-dialog"></span>: the LPE list is now made available as a searchable dialog with an icon for each path effect, and options to favorite, to switch between list and tile view, to display info about the selected effect and to apply it. Several additional, experimental path effects are available after the corresponding switch has been activated. | ||
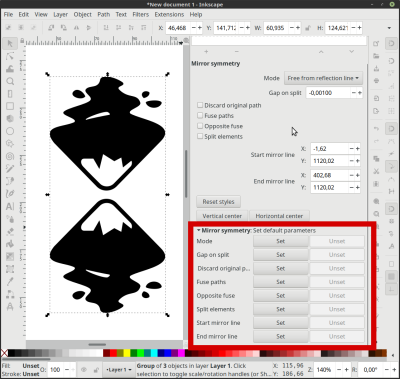
* '''Set default parameters''': default values for any LPE can be set in the respective LPE's dialogue, when it is applied to an object | * '''Set default parameters''': default values for any LPE can be set in the respective LPE's dialogue, when it is applied to an object | ||
(''Note: we have the 'multiple desktop preferences' problem here: If you have multiple Inkscape windows open, the last one will determine what will be saved to the preferences file, as preferences changes are only saved when Inkscape is closed, and the settings are only loaded from file when a new window is opened.'') | (''Note: we have the 'multiple desktop preferences' problem here: If you have multiple Inkscape windows open, the last one will determine what will be saved to the preferences file, as preferences changes are only saved when Inkscape is closed, and the settings are only loaded from file when a new window is opened.'') | ||
* '''Clip and Mask''': improved handling | * '''Clip and Mask''': improved handling | ||
* '''Fix multiple LPE BBox''': a problem with the size of the bounding box when applying multiple LPEs to an object has been fixed | * '''Fix multiple LPE BBox''': a problem with the size of the bounding box when applying multiple LPEs to an object has been fixed. Sometimes you need to add a intermediate LPE bounding box between. | ||
* '''Knots on shapes''': show edit knots in LPE shapes | * '''Knots on shapes''': show edit knots in LPE shapes | ||
* '''Switch knots''': change the handles to the correct LPE handles when one selects an LPE in the list of active LPEs for the selected object. | * '''Switch knots''': change the handles to the correct LPE handles when one selects an LPE in the list of active LPEs for the selected object. | ||
<gallery> | <gallery mode="packed" heights=350px> | ||
File:LPE set defaults.png|''Set default values for Mirror LPE''|alt=Set default values for Mirror LPE | File:LPE set defaults.png|''Set default values for Mirror LPE''|alt=Set default values for Mirror LPE | ||
File:Add LPE dialog.png|''New LPE selection dialog''|alt=New LPE selection dialog | File:Add LPE dialog.png|''New LPE selection dialog''|alt=New LPE selection dialog | ||
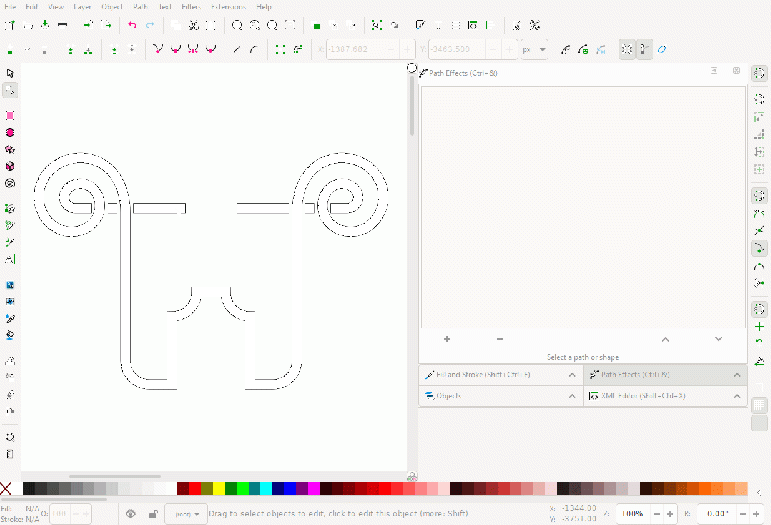
File:Auto switing of knot types.gif|''LPE handles are automatically adjusted for the currently edited LPE''|alt=LPE handles are automatically adjusted for the currently edited LPE | |||
</gallery> | </gallery> | ||
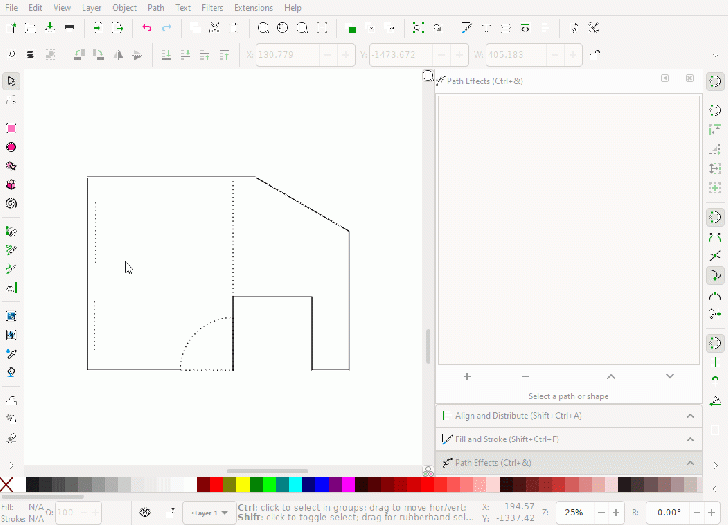
=== New Live Path Effects <span id="lpes></span>=== | |||
==== Dashed Stroke LPE ==== | ==== Dashed Stroke LPE ==== | ||
| Line 429: | Line 460: | ||
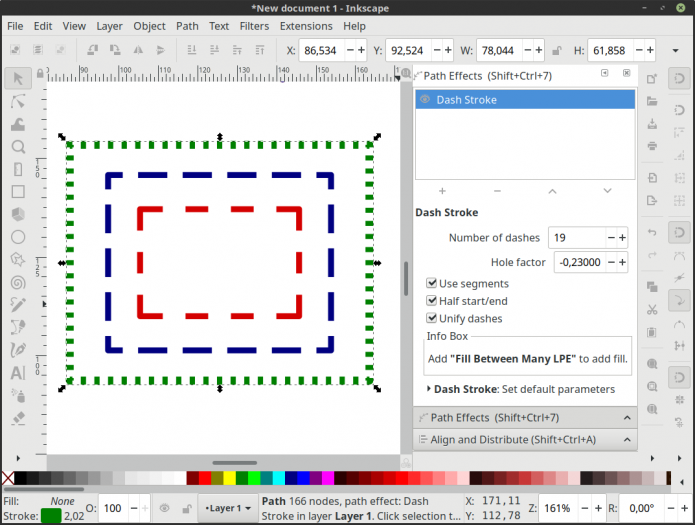
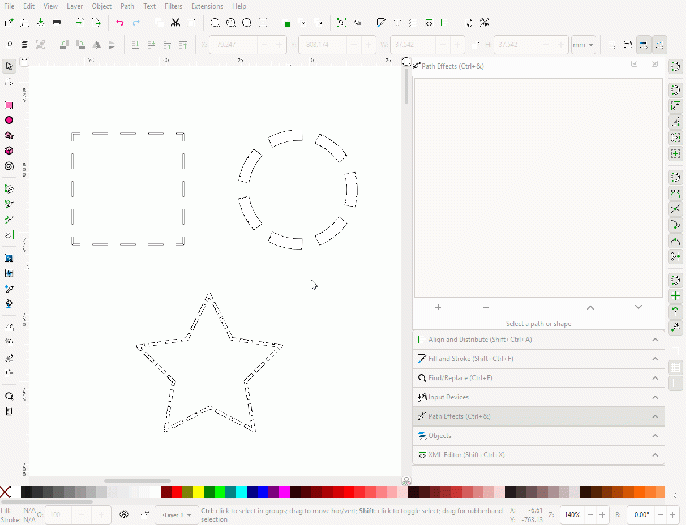
This new LPE creates uniformly dashed paths, optionally by subdividing the path's segments, or including dashes that are symmetrically wrapped around corners. | This new LPE creates uniformly dashed paths, optionally by subdividing the path's segments, or including dashes that are symmetrically wrapped around corners. | ||
<gallery> | [https://archive.org/details/dash-stroke-lpe Demo Video] | ||
<gallery mode="packed" heights=350px> | |||
File:Dash stroke LPE.png|''Rectangles with dashed stroke LPE with various settings''|alt=Rectangles with dash stroke LPE with various settings | File:Dash stroke LPE.png|''Rectangles with dashed stroke LPE with various settings''|alt=Rectangles with dash stroke LPE with various settings | ||
File:LPE dash.gif|''Modifying dash pattern interactively with the dashed stroke LPE''|alt=Modifying dash pattern interactively with the dashed stroke LPE | |||
</gallery> | </gallery> | ||
==== Ellipse from Points ==== | ==== Ellipse from Points ==== | ||
| Line 439: | Line 471: | ||
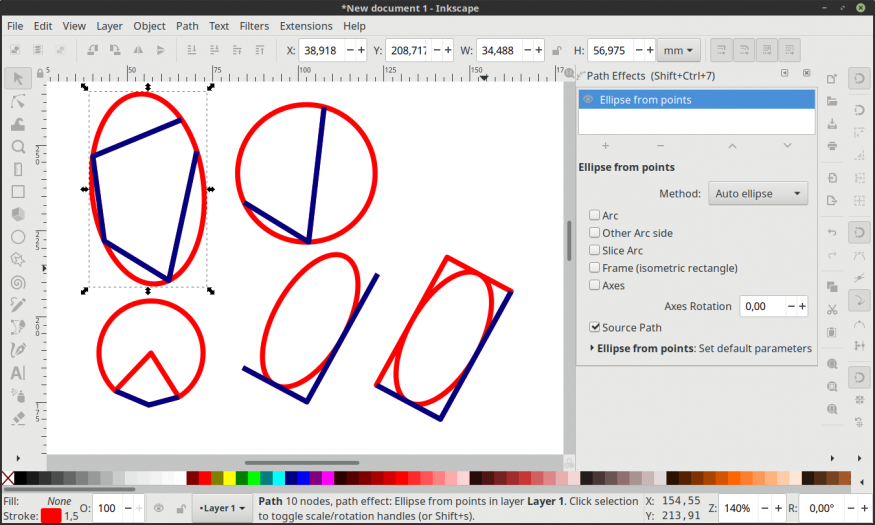
This new LPE creates an optimally fitted ellipse from a path's nodes. | This new LPE creates an optimally fitted ellipse from a path's nodes. | ||
In contrast to the already existing LPE "Ellipse by 5 points" this LPE is more flexible (since, depending on the number of points available, it can fit both circles and ellipses) and has more features. | In contrast to the already existing LPE "Ellipse by 5 points", this LPE is more flexible (since, depending on the number of points available, it can fit both circles and ellipses) and has more features). Technical illustrators in particular can benefit from these features. | ||
See [[LPE:_Ellipse_from_Points]] for | See [[LPE:_Ellipse_from_Points]] for more documentation. | ||
<gallery> | <gallery mode="packed" heights=350px> | ||
File:Ellipse from points LPE.png|''Ellipse (5 nodes), circle (3 nodes), circle segment (3 nodes), isometric circle (3 nodes), isometric circle with frame (3 nodes)''|alt=Ellipse (5 nodes), circle (3 nodes), circle segment (3 nodes), isometric circle (3 nodes), isometric circle with frame (3 nodes) | File:Ellipse from points LPE.png|''Ellipse (5 nodes), circle (3 nodes), circle segment (3 nodes), isometric circle (3 nodes), isometric circle with frame (3 nodes)''|alt=Ellipse (5 nodes), circle (3 nodes), circle segment (3 nodes), isometric circle (3 nodes), isometric circle with frame (3 nodes) | ||
</gallery> | </gallery> | ||
<!-- disabled in 1.0 because non-functional | |||
==== Embroidery Stitch LPE ==== | ==== Embroidery Stitch LPE ==== | ||
This new LPE can add nodes to your paths and create jump stitches, to create data that can be converted for use with a stitching machine. | This new LPE can add nodes to your paths and create jump stitches, to create data that can be converted for use with a stitching machine. | ||
To view the stitches that you added, activate the 'Show stitches' checkbox, and, if necessary, adjust the 'Show stitch gap' value, so you can see the single stitches. | To view the stitches that you added, activate the 'Show stitches' checkbox, and, if necessary, adjust the 'Show stitch gap' value, so you can see the single stitches. | ||
There are various options for calculating the order of the stitching, for connecting the parts of the drawing and 3 different stitch patterns available. It is suggested to play around with these until you like the result. | There are various options for calculating the order of the stitching, for connecting the parts of the drawing and 3 different stitch patterns available. It is suggested to play around with these until you like the result. | ||
For exporting your data, you can, for example, use the HPGL file format and go from there. | For exporting your data, you can, for example, use the HPGL file format and go from there. | ||
<gallery> | <gallery mode="packed" heights=350px> | ||
File:Embroidery stitch lpe.png|''Inkscape Logo with Embroidery LPE (stitches made visible)''|alt=Inkscape Logo with Embroidery LPE (stitches made visible) | File:Embroidery stitch lpe.png|''Inkscape Logo with Embroidery LPE (stitches made visible)''|alt=Inkscape Logo with Embroidery LPE (stitches made visible) | ||
File:Embroidery stitch lpe options.png|''Available options: left: methods to order subpaths, right: methods to connect end points of subpaths''|alt=Options: left: methods to order subpaths, right: methods to connect end points of subpaths | File:Embroidery stitch lpe options.png|''Available options: left: methods to order subpaths, right: methods to connect end points of subpaths''|alt=Options: left: methods to order subpaths, right: methods to connect end points of subpaths | ||
</gallery> | </gallery> | ||
--> | |||
==== Fillet/Chamfer LPE ==== | ==== Corners (Fillet/Chamfer) LPE ==== | ||
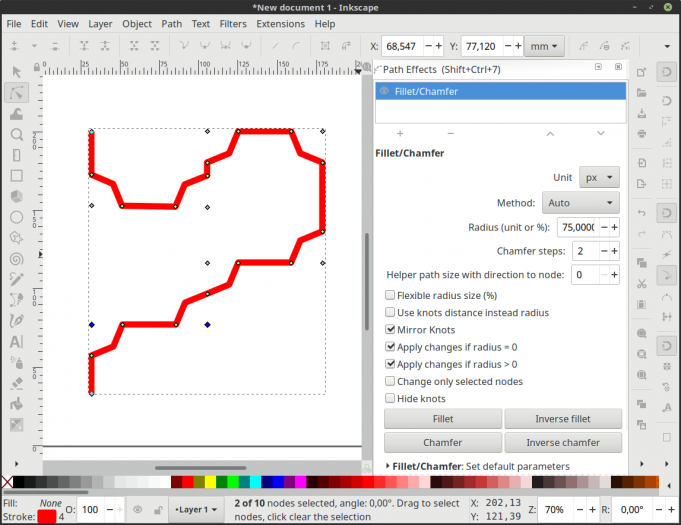
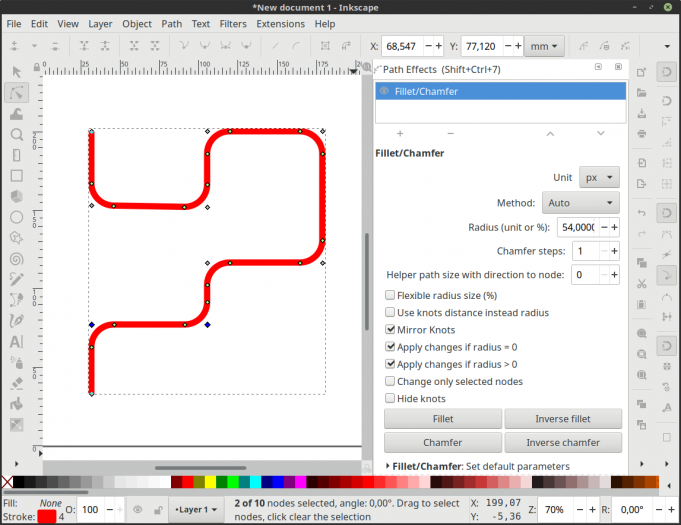
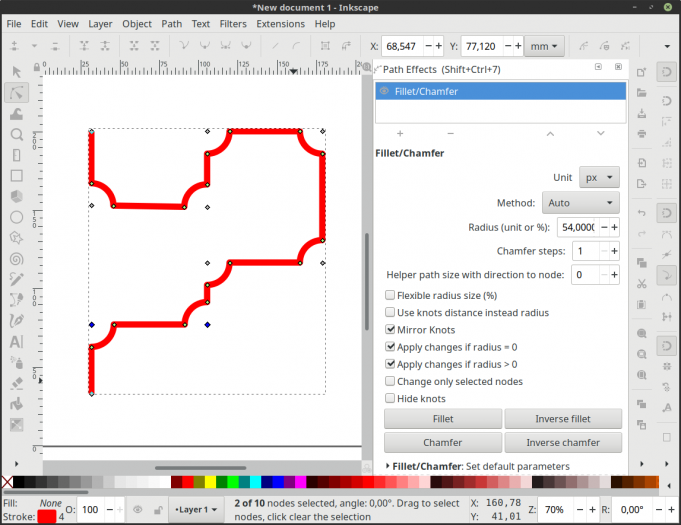
This new LPE adds fillet and chamfer to paths. Also adds a new internal class that allows to handle extra info per node, the LPE itself is an example of use the new classes. | This new LPE adds fillet and chamfer to paths. Also adds a new internal class that allows to handle extra info per node, the LPE itself is an example of use the new classes. | ||
| Line 467: | Line 500: | ||
[https://www.youtube.com/watch?v=wJKzGhJULfc Demo video] | [https://www.youtube.com/watch?v=wJKzGhJULfc Demo video] | ||
<gallery> | <gallery mode="packed" heights=350px> | ||
File:Chamfer lpe.png|''Chamfer with LPE''|alt=Chamfer by LPE | File:Chamfer lpe.png|''Chamfer with LPE''|alt=Chamfer by LPE | ||
File:Chamfer with steps.png|''Chamfer with 2 steps''|alt=Chamfer with 2 steps | File:Chamfer with steps.png|''Chamfer with 2 steps''|alt=Chamfer with 2 steps | ||
| Line 481: | Line 514: | ||
[https://www.youtube.com/watch?v=ppgt2GPm1IY Demo video] | [https://www.youtube.com/watch?v=ppgt2GPm1IY Demo video] | ||
<gallery> | <gallery mode="packed" heights=350px> | ||
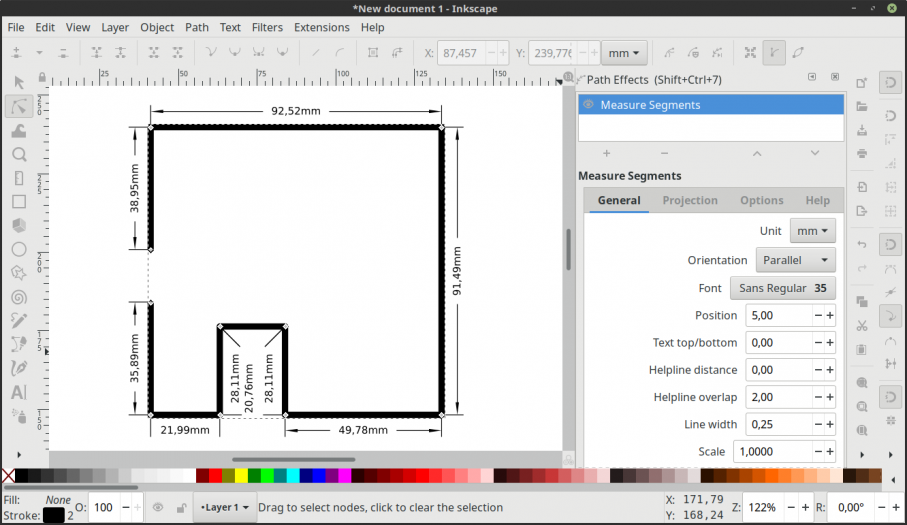
File:Measure segment LPE.png|''Measure Segments LPE''|alt=Measure Segments LPE | File:Measure segment LPE.png|''Measure Segments LPE''|alt=Measure Segments LPE | ||
File:Measure Segments LPE.gif|''Adjusting distances for, and copying the Measure Segments LPE interactively''|alt='Adjusting distances for, and copying the Measure Segments LPE interactively | |||
</gallery> | </gallery> | ||
| Line 489: | Line 523: | ||
Use this to add an offset to your paths, shapes and groups. Compared with the 'Dynamic Offset' available from the menu, this allows you to: | Use this to add an offset to your paths, shapes and groups. Compared with the 'Dynamic Offset' available from the menu, this allows you to: | ||
* define the offset distance numerically, e.g. to offset an object by 3 mm. | * define the offset distance numerically and to choose the unit, e.g. to offset an object by 3 mm. | ||
* keep sharp corners sharp (or to make them round, or | * keep sharp corners sharp (or to make them round, or beveled, if you want to), by using different methods for calculating the corners. | ||
* same on-canvas control handle for changing the offset when using the node tool | |||
<gallery mode="packed" heights=350px> | |||
File:Offset Path Effect text outline.gif|''Using the Offset LPE to add an outline to a text''|alt=Using the Offset LPE to add an outline to a text | |||
File:Offset LPE sharp corners.gif|''Specifying an offset numerically and choosing a corner type''|alt=Specifying an offset numerically and choosing a corner type | |||
</gallery> | |||
==== Power Clip and Power Mask ==== | ==== Power Clip and Power Mask ==== | ||
These two new LPEs can be applied to objects by choosing <code>Object → Clip → Set Inverse (LPE)</code> or <code>Object → Mask → Set Inverse (LPE)</code>. | |||
They can also be used to invert a clip that is already set on an object, by adding the LPE to that object via <code>Path → Path Effects → + → Power Clip / Power Mask</code> | |||
An Inversed Clip is cut out from the object it's applied to. With an Inversed Mask it's possible to modify only the parts of the object that are directly below the mask, and to leave the rest of the object unchanged (and visible). | |||
=== New Experimental LPEs === | === New Experimental LPEs === | ||
| Line 502: | Line 545: | ||
Draws a line that halves the angle between the first three nodes of the path. | Draws a line that halves the angle between the first three nodes of the path. | ||
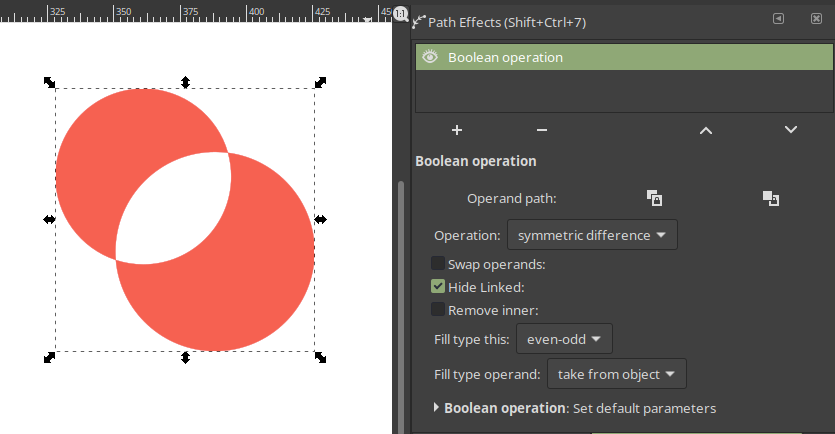
==== Boolean Operation LPE ==== | |||
The Boolean Operation LPE finally makes non-destructive boolean operations available in Inkscape. That way, two paths can be combined to a single shape, and both are still editable: | |||
# Start with two paths. Rectangles or other shapes are also okay. Groups are not yet supported ([https://gitlab.com/inkscape/inkscape/-/issues/1352 Issue #1352]). | |||
# Copy the second path into the clipboard (<code>Edit → Copy</code>). | |||
# Select the first path and add the Boolean Operation LPE (<code>Path → Path Effects → Add path effect (Plus) → Boolean operation</code>). | |||
# Link the second path to the LPE by clicking on <code>Operand Path - Link to path in clipboard</code>. | |||
Available options: | |||
* union | |||
* symmetric difference | |||
* intersection | |||
* division | |||
* difference | |||
<!--* cut outside | |||
* cut inside --> | |||
* cut | |||
<gallery mode="packed" heights=350px> | |||
File:Boolops LPE.png|''Boolean Operation LPE''|alt=Boolean Operation LPE | |||
File:Boolean Operations LPE.gif|''Interactive adjustments for Boolean Operation LPE''|alt=Interactive adjustments for Boolean Operation LPE | |||
</gallery> | |||
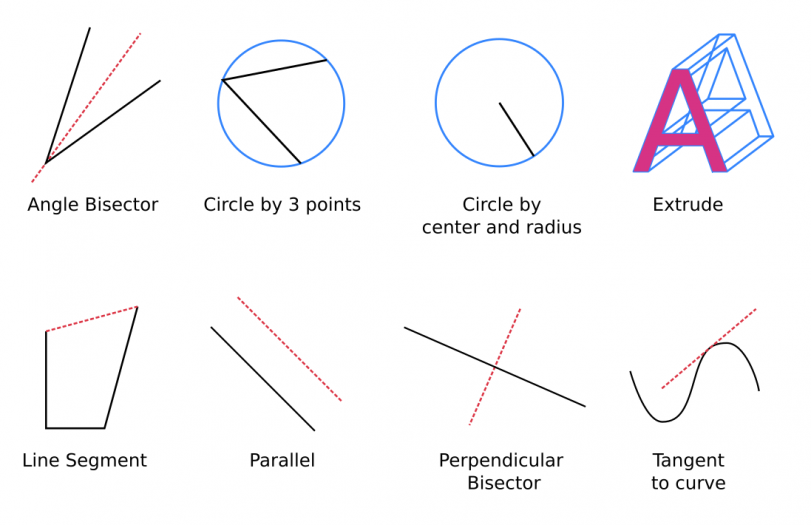
==== Circle by 3 points ==== | ==== Circle by 3 points ==== | ||
| Line 531: | Line 598: | ||
Draws a tangent with variable length and an additional angle that can be moved along the path. | Draws a tangent with variable length and an additional angle that can be moved along the path. | ||
<gallery> | <gallery mode="packed" heights=350px> | ||
File:New experimental lpes.png|''New experimental Live Path Effects (overview)''|alt=New experimental Live Path Effects | File:New experimental lpes.png|''New experimental Live Path Effects (overview)''|alt=New experimental Live Path Effects | ||
</gallery> | </gallery> | ||
| Line 539: | Line 606: | ||
==== BSPline and Spiro ==== | ==== BSPline and Spiro ==== | ||
Improvements in Pen/Pencil mode. With | Improvements in Pen/Pencil mode. With '''<kbd>Alt</kbd>''', you can move the previous node. | ||
<gallery mode="packed" heights=350px> | |||
File:B spline - moving last created point with ALT.gif|''Creating a BSpline, using the Alt key to move the previous node''|alt=Creating a BSpline, using the Alt key to move the previous node | |||
</gallery> | |||
==== Clone Original ==== | ==== Clone Original ==== | ||
| Line 548: | Line 618: | ||
[https://ia601501.us.archive.org/34/items/00003303/0000-3303.ogv Demo Video] | [https://ia601501.us.archive.org/34/items/00003303/0000-3303.ogv Demo Video] | ||
<gallery mode="packed" heights=350px> | |||
File:Clone Original LPE.gif|''Usage example for Clone Original LPE''|alt=Usage example for Clone Original LPE | |||
</gallery> | |||
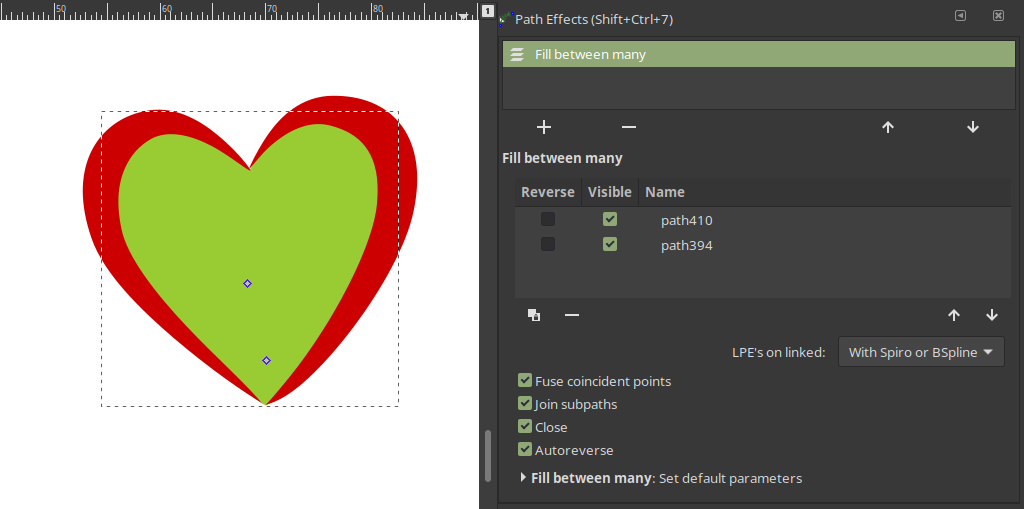
==== Fill Between Many / Fill Between Strokes LPE ==== | ==== Fill Between Many / Fill Between Strokes LPE ==== | ||
| Line 553: | Line 627: | ||
New options added: | New options added: | ||
* Fuse coincident points: | * Fuse coincident points <!-- option removed, MR pending: https://gitlab.com/inkscape/inkscape/-/merge_requests/1806 --> | ||
* Join subpaths: fill each path separately / connect all the fills | * Join subpaths: fill each path separately / connect all the fills | ||
* Close: close the fill path that is created, so it can have a stroke on all sides | * Close: close the fill path that is created, so it can have a stroke on all sides | ||
* LPEs on linked: take the applied live path effects of the filled paths into account (Fill Between Many only) | * LPEs on linked: take the applied live path effects of the filled paths into account (Fill Between Many only) | ||
<gallery> | <gallery mode="packed" heights=350px> | ||
File:Fill between many new options.png|''New options for the Fill Between Many LPE''|alt=New options for the Fill Between Many LPE | File:Fill between many new options.png|''New options for the Fill Between Many LPE''|alt=New options for the Fill Between Many LPE | ||
</gallery> | </gallery> | ||
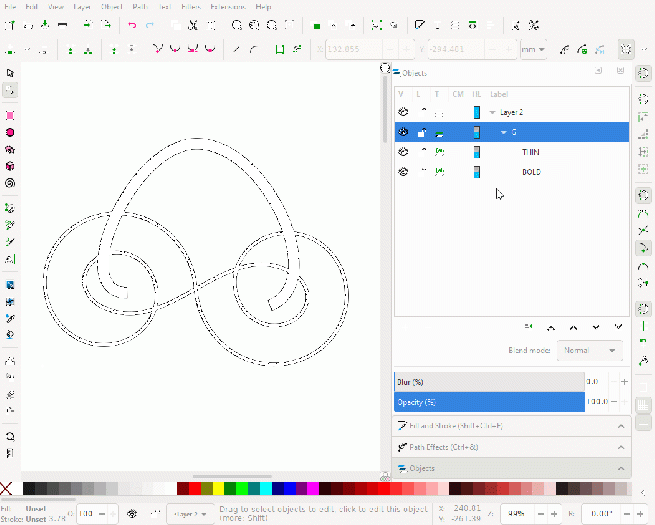
| Line 566: | Line 640: | ||
New options added: | New options added: | ||
* Inverse: use the stroke width of the other path as basis for calculating the gap length | * Inverse: use the stroke width ''of the other path'' as basis for calculating the gap length | ||
* Both gaps: interrupt both paths at a crossing | * Both gaps: interrupt both paths at a crossing | ||
<gallery mode="packed" heights=350px> | |||
File:Knot LPE.gif|''New Knot LPE options in Inkscape 1.0''|alt=New Knot LPE options in Inkscape 1.0 | |||
</gallery> | |||
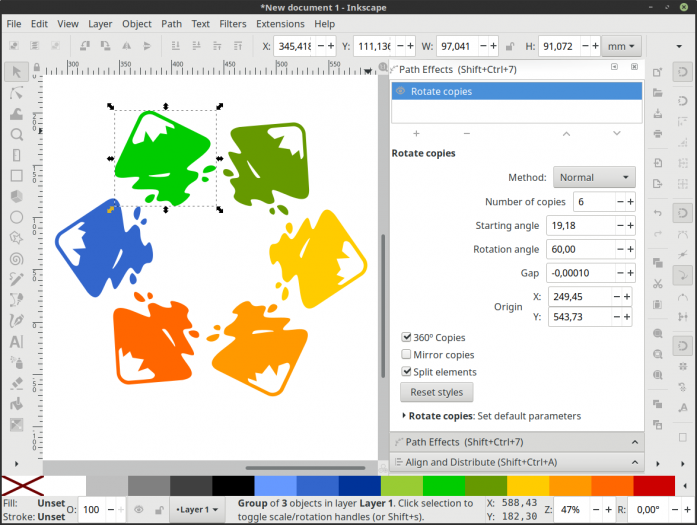
==== Mirror Symmetry and Rotate Copies LPE ==== | ==== Mirror Symmetry and Rotate Copies LPE ==== | ||
* Split feature: This new feature allows custom styles for each part of the resulting drawing without unlinking the LPE. [https://www.youtube.com/watch?v=mIzrQ2lpzuw Demo Video] | * Split feature: This new feature allows custom styles for each part of the resulting drawing without unlinking the LPE. [https://www.youtube.com/watch?v=mIzrQ2lpzuw Demo Video] | ||
* The LPE | * The LPE rendering on the canvas now updates accordingly when there are objects added or removed. | ||
<gallery> | <gallery mode="packed" heights=350px> | ||
File:Rotate copies LPE with style split.png|''Separate styles for rotated copies''|alt=Separate styles for rotated copies | File:Rotate copies LPE with style split.png|''Separate styles for rotated copies''|alt=Separate styles for rotated copies | ||
</gallery> | </gallery> | ||
| Line 582: | Line 660: | ||
* '''Width scale''' setting added: adjust the overall width of the stroke after it has been drawn. | * '''Width scale''' setting added: adjust the overall width of the stroke after it has been drawn. | ||
* '''Closed paths''': PowerStroke now works much better on closed paths. | * '''Closed paths''': PowerStroke now works much better on closed paths. | ||
<gallery mode="packed" heights=350px> | |||
File:Power stroke .gif|''Using PowerStroke on a closed path, moving a knot around effortlessly''|alt=Using PowerStroke on a closed path, moving a knot around effortlessly | |||
</gallery> | |||
== Import / Export == | == Import / Export == | ||
| Line 587: | Line 668: | ||
=== Linking and embedding SVG files === | === Linking and embedding SVG files === | ||
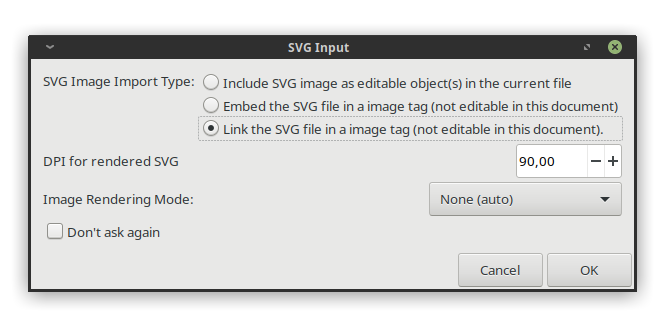
On import of an SVG file, there is now a dialog that asks | On import of an SVG file, there is now a dialog that asks whether | ||
* the user would like to link to the SVG file | |||
* to embed it (base64 encoded) into an <code><img></code> tag, | |||
* or if the objects in the SVG file should be imported into the document (which was how Inkscape handled importing SVG files previously). | |||
The dpi value for displaying embedded SVG files can be set in the import dialog or changed in the object properties dialog. | |||
This makes importing SVG files work (almost) the same as importing raster images. | This makes importing SVG files work (almost) the same as importing raster images. | ||
| Line 596: | Line 680: | ||
The 'Embed' and 'Extract' options in the context menu for linked SVG files work the same as they do for raster images. The 'Edit externally' option will open the linked SVG file with Inkscape per default. This setting can be changed in the preferences' 'Imported Images' section. | The 'Embed' and 'Extract' options in the context menu for linked SVG files work the same as they do for raster images. The 'Edit externally' option will open the linked SVG file with Inkscape per default. This setting can be changed in the preferences' 'Imported Images' section. | ||
The displaying of the | The displaying of the dialog can be disabled by checking the 'Don’t ask me again' option. | ||
Linked and embedded SVG images are displayed as their raster representations. | Linked and embedded SVG images are displayed as their raster representations, so they will become blurry when zoomed in too far. | ||
<gallery mode="packed" heights=250px> | |||
File:Link imported SVG.png|''New SVG import dialog''|alt=New SVG import dialog | |||
</gallery> | |||
=== Mesh Gradient Polyfill === | === Mesh Gradient Polyfill === | ||
| Line 608: | Line 695: | ||
=== SVG 1.1 compatibility === | === SVG 1.1 compatibility === | ||
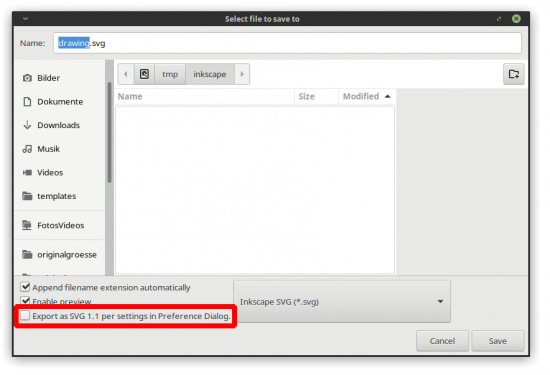
[ | Inkscape includes SVG 1.1 fallbacks for text by default (see [[#text-tool|the section about text tool updates]]). | ||
When exporting as SVG 1.1 explicitly, using the checkbox in the export dialog, some settings are available in <code>Edit → Preferences → Input/Output → SVG Export</code>, in order to allow for correct rendering of markers in other software. | |||
<gallery mode="packed" heights=250px> | |||
File:SVG1.1 export.png|''"Save as SVG" dialog with SVG 1.1 option''|alt="Save as SVG" dialog with SVG 1.1 option | |||
File:SVG export preferences.png|''SVG export preferences settings''|alt='SVG export preferences settings | |||
</gallery> | |||
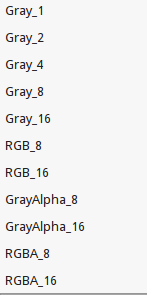
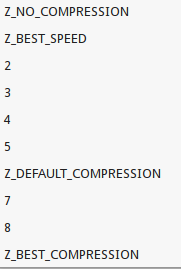
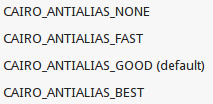
=== Export PNG images === | === Export PNG images <span id="png-export"></span>=== | ||
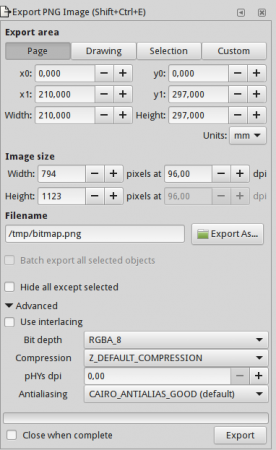
The export dialog has received several new options which are available when you expand the 'Advanced' section. | The export dialog has received several new options which are available when you expand the 'Advanced' section. | ||
* Enable interlacing (ADAM7): when loading images, they will be displayed faster | * Enable interlacing (ADAM7): when loading images, they will be displayed faster | ||
* Bit depth: set the number of bits that code for the color of a pixel, supports grayscale and up to | * Bit depth: set the number of bits that code for the color of a pixel, supports grayscale and up to 16-bit | ||
* Compression type: choose strength of lossless compression | * Compression type: choose strength of lossless compression | ||
* pHYs dpi: force-set a dpi value for the image | * pHYs dpi: force-set a dpi value for the image | ||
* Antialiasing: choose type of | * Antialiasing: choose type of anti-aliasing or disable it | ||
* The option for "Cairo PNG" has been removed from the "Save as" dialog, as it was often confused with the "Export PNG image" option, but only supported a small subset of PNG rendering features. | * The option for "Cairo PNG" has been removed from the "Save as" dialog, as it was often confused with the "Export PNG image" option, but only supported a small subset of PNG rendering features. | ||
<gallery> | <gallery mode="packed" heights=300px> | ||
File:Png-export-options 1.0.png|''PNG export options''|alt=PNG export options | File:Png-export-options 1.0.png|''PNG export options''|alt=PNG export options | ||
File:Bit depth options 1.0.png|''PNG bit depth options''|alt=PNG bit depth options | File:Bit depth options 1.0.png|''PNG bit depth options''|alt=PNG bit depth options | ||
| Line 632: | Line 726: | ||
* External links in the SVG file are now kept when the file is exported to pdf (requires Cairo in version 1.15.4 or higher). | * External links in the SVG file are now kept when the file is exported to pdf (requires Cairo in version 1.15.4 or higher). | ||
* Some Inkscape file metadata (File | * Some Inkscape file metadata (<code>File → Document properties : Metadata</code>) are now exported to PDF (title, subject, creator, keywords). | ||
=== (E)PS Export === | === (E)PS Export === | ||
| Line 638: | Line 732: | ||
* The title and copyright ('rights') info from the document's metadata is now exported to (E)PS. | * The title and copyright ('rights') info from the document's metadata is now exported to (E)PS. | ||
=== OpenClipart Import === | === OpenClipart Import Removed=== | ||
The dialog and settings for importing images from OpenClipart have been removed due to openclipart.org being non-functional since mid-April with no information about a return date. | The dialog and settings for importing images from OpenClipart have been removed due to the openclipart.org API being non-functional since mid-April 2019 with no information about a return date. | ||
== Extensions == | == Extensions == | ||
| Line 646: | Line 740: | ||
=== Extension dialogs === | === Extension dialogs === | ||
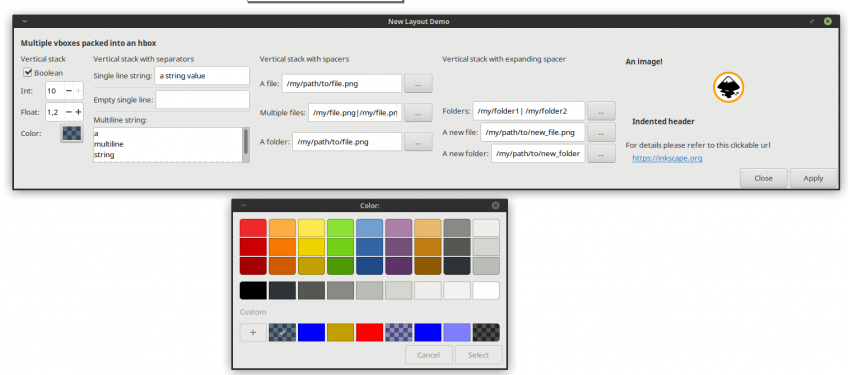
Extension dialogs can now have clickable links, images, a better layout with separators and indentation, multiline text fields, file chooser fields and more. For detailed info for development see the [[Release_notes/1.0#For_extension_writers|developer section]] above. | |||
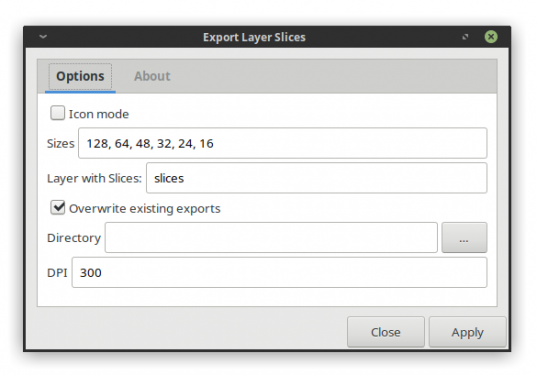
=== Export Layer Slices === | === Export Layer Slices === | ||
Extensions | <code>Extensions → Export → Export Layer Slices</code> | ||
The new 'Export Layer Slices' extension allows you to export PNG "slices" from your image by creating a new layer and drawing rectangles to denote the area of the export. | The new 'Export Layer Slices' extension allows you to export PNG "slices" from your image by creating a new layer and drawing rectangles to denote the area of the export. | ||
| Line 658: | Line 752: | ||
If you want to create (square) icons at different sizes, select "Icon mode". Icon mode will create a square export for each dimension in "Sizes". | If you want to create (square) icons at different sizes, select "Icon mode". Icon mode will create a square export for each dimension in "Sizes". | ||
<gallery mode="packed" heights=250px> | |||
File:Export Layer Slices extension.png|''Dialog for new Export Layer Slices extension''|alt=Dialog for new Export Layer Slices extension | |||
</gallery> | |||
=== Frame === | === Frame === | ||
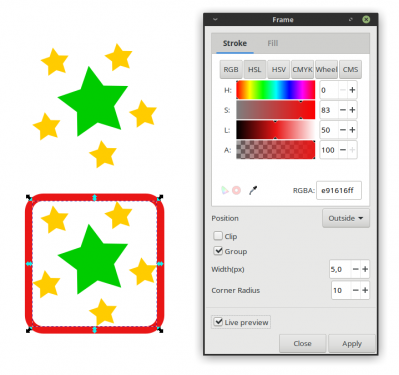
Extensions | <code>Extensions → Render → Frame</code> | ||
This new extension will add a rectangular frame with a specified stroke width, and specified stroke and fill colors to each object in the selection. Optionally, corners can be rounded, and the frame can be positioned inside or outside the selection. The result can be grouped with the frame, and the object can be clipped to the size of the frame (for further editing). | This new extension will add a rectangular frame with a specified stroke width, and specified stroke and fill colors to each object in the selection. Optionally, corners can be rounded, and the frame can be positioned inside or outside the selection. The result can be grouped with the frame, and the object can be clipped to the size of the frame (for further editing). | ||
<gallery mode="packed" heights=250px> | |||
File:Render Frame extension.png|''Live preview in the Render Frame extension''|alt=Live preview in the Render Frame extension | |||
</gallery> | |||
=== Hershey Text === | === Hershey Text === | ||
Extensions | <code>Extensions → Text → Hershey Text</code> | ||
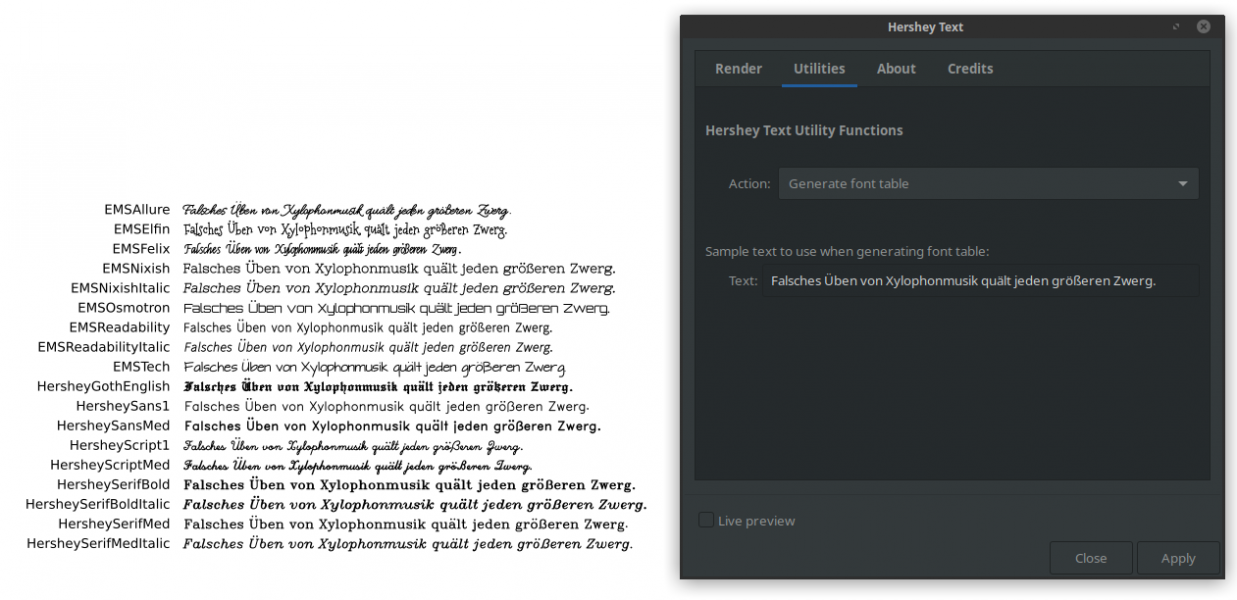
The "Hershey Text" extension, a utility for replacing text by stroke-based paths, has been rewritten. | The "Hershey Text" extension, a utility for replacing text by stroke-based paths, has been rewritten. | ||
| Line 676: | Line 778: | ||
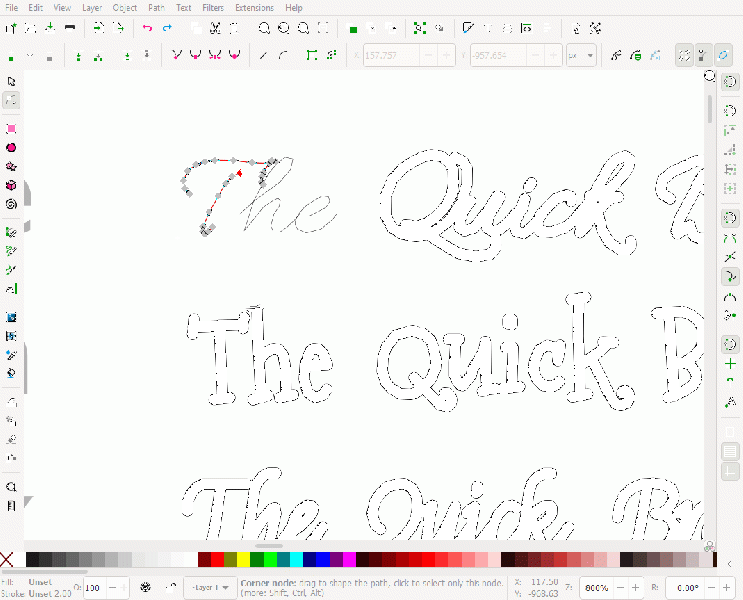
** Stroke fonts now support '''arbitrary curves''' rather than only straight segments. | ** Stroke fonts now support '''arbitrary curves''' rather than only straight segments. | ||
* '''Improved font selection''' with basic international characters | * '''Improved font selection''' with basic international characters | ||
* | * Automated '''font-mapping''': each text will be converted to the available Hershey font with the same font file name (e.g. 'Fancy Font.svg') as the current font (e.g. 'Fancy Font'), if one is available to the extension. The automated mapping overrides any other Hershey font settings. | ||
* An option to '''generate font samples''' in all available SVG fonts is available. | * An option to '''generate font samples''' in all available SVG fonts is available. | ||
* An '''extensive help text''' is built into the extension. | * An '''extensive help text''' is built into the extension. | ||
* Hershey Text is now located in the ''Extensions > | * Hershey Text is now located in the ''Extensions → Text'' sub-menu. | ||
<gallery mode="packed" heights=400px> | |||
[[File:Stroke fonts.gif|''Hershey font table (with non-ASCII characters)''|alt=Hershey font table (with non-ASCII characters)]] | |||
File:Hershey font table.png|''Hershey font table (with non-ASCII characters)''|alt=Hershey font table (with non-ASCII characters) | |||
File:Detail on stroke fonts.gif| | |||
</gallery> | |||
=== Interactive Mockup === | === Interactive Mockup === | ||
Extensions | <code>Extensions → Web → Interactive Mockup</code> | ||
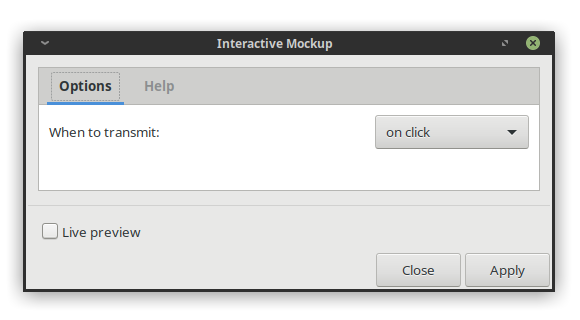
The new Interactive Mockup extension is intended for use by UI/UX designers. It can help to visualize mockups and create user flows to make interactive demos for approvals. | The new Interactive Mockup extension is intended for use by UI/UX designers. It can help to visualize mockups and create user flows to make interactive demos for approvals. | ||
| Line 690: | Line 799: | ||
Apply the extension, then save as SVG and open it in a browser for demonstrating the mockup to potential users. | Apply the extension, then save as SVG and open it in a browser for demonstrating the mockup to potential users. | ||
Usage instructions are also available [https://activdesign.eu/uploads/gallery/inkscape-webmockup-en.mp4 as a tutorial video from the extension's author]. | |||
<gallery mode="packed" heights=250px> | |||
File:Interactive Mockup extension.png|''Dialog for the Interactive Mockup extension''|alt=Dialog for the Interactive Mockup extension | |||
</gallery> | |||
<!-- | |||
=== Meshgradient to Path / Path to Meshgradient === | === Meshgradient to Path / Path to Meshgradient === | ||
Extensions | <code>Extensions → Modify Path → Mesh → Meshgradient to Path / Path to Meshgradient</code> [doesn't work: https://gitlab.com/inkscape/extensions/-/issues/216] | ||
A set of two extensions that convert mesh gradient geometry to paths and back. | A set of two extensions that convert mesh gradient geometry to paths and back. | ||
=== Plot extension === | --> | ||
Extensions | |||
<!-- === Plot extension === | |||
<code>Extensions → Export → Plot</code> | |||
The new option 'Convert objects to paths' will take care of converting everything to a path non-destructively before the data is sent to the plotter. [ | The new option 'Convert objects to paths' will take care of converting everything to a path non-destructively before the data is sent to the plotter. [Known issue: [https://gitlab.com/inkscape/extensions/-/issues/211 does not work]]--> | ||
=== QR Code === | <!-- === QR Code === | ||
Extensions | <code>Extensions → Render → Barcode → QR Code</code> | ||
Options for choosing the shape of single QR code dots were added. | Options for choosing the shape of single QR code dots were added ([https://gitlab.com/inkscape/extensions/-/issues/150 but do not work]). | ||
<gallery> | <gallery mode="packed" heights=250px> | ||
File:Barcode extension 1.0.png|''Barcode extension with new options for dot shape at the bottom''|alt=Barcode extension with new options for dot shape at the bottom | File:Barcode extension 1.0.png|''Barcode extension with new options for dot shape at the bottom''|alt=Barcode extension with new options for dot shape at the bottom | ||
</gallery> | </gallery> | ||
--> | |||
== Palettes == | == Palettes == | ||
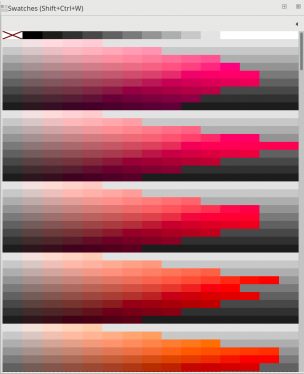
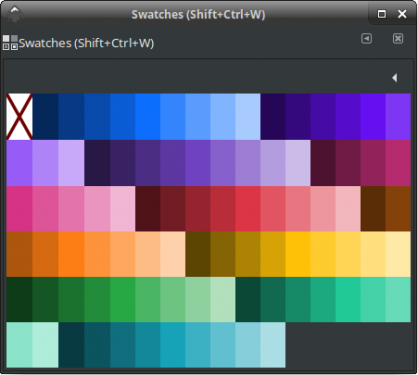
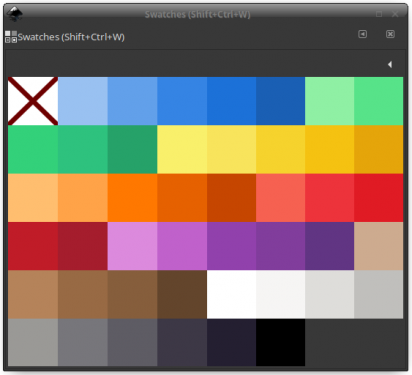
* The Munsell palette | New palettes: | ||
* The '''Munsell''' palette | |||
* the '''Bootstrap 5''' palette and | |||
* the palette for the '''new GNOME Human Interface Guidelines''' (GNOME HIG) | |||
have been added to Inkscape's set of stock palettes. | |||
Users can now also drag the <code>none</code> color field from the palette bar at the bottom onto objects to set their color to <code>none</code>. | |||
<gallery> | <gallery mode="packed" heights=250px> | ||
File:Munsell palette.png|''Munsell palette''|alt=Munsell palette | File:Munsell palette.png|''Munsell palette''|alt=Munsell palette | ||
File:Bootstrap 5 palette.png|''Bootstrap 5 palette''|Bootstrap 5 palette | File:Bootstrap 5 palette.png|''Bootstrap 5 palette''|alt=Bootstrap 5 palette | ||
File:Gnome HIG palette.png|''GNOME HIG palette''|alt=GNOME HIG palette | File:Gnome HIG palette.png|''GNOME HIG palette''|alt=GNOME HIG palette | ||
</gallery> | </gallery> | ||
| Line 723: | Line 849: | ||
== Templates == | == Templates == | ||
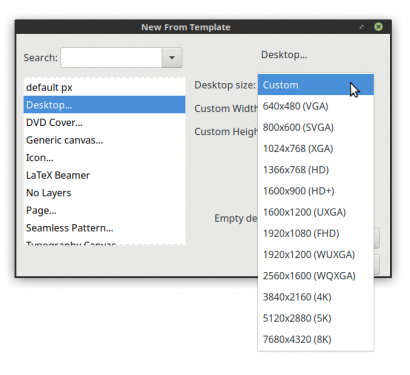
* The '''Desktop''' template has new options for 4k, 5k and 8k screens. | * The '''Desktop''' template has new options for 4k, 5k, and 8k screens. | ||
* Some new page sizes were added to the '''(Blank) Page''' template. | * Some new page sizes were added to the '''(Blank) Page''' template. | ||
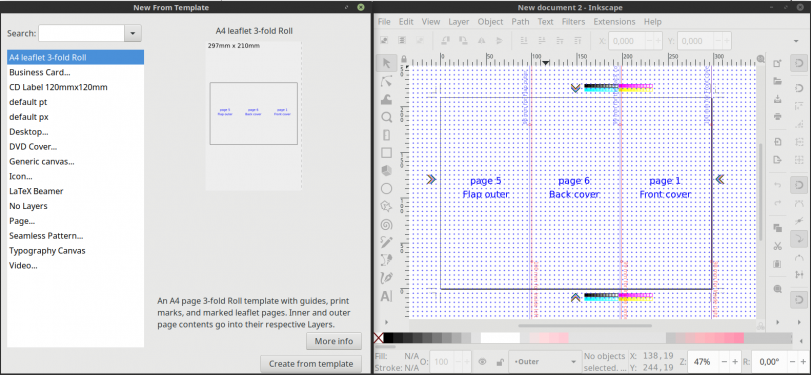
* New: template for an '''A4 3-fold roll flyer''' | * New: template for an '''A4 3-fold roll flyer''' | ||
* New: template for '''Envelope''' with 2 standard envelope formats | * New: template for '''Envelope''' with 2 standard envelope formats | ||
<gallery> | <gallery mode="packed" heights=250px> | ||
File:Desktop templates.png|''New template options for 'Desktop' template''|alt=New template options for 'Desktop' template | File:Desktop templates.png|''New template options for 'Desktop' template''|alt=New template options for 'Desktop' template | ||
File:A4 3fold roll template.png|''New A4 3-fold roll flyer template''|alt=New A4 3-fold roll flyer template | File:A4 3fold roll template.png|''New A4 3-fold roll flyer template''|alt=New A4 3-fold roll flyer template | ||
| Line 735: | Line 861: | ||
== SVG and CSS == | == SVG and CSS == | ||
* '''Dashes''': Inkscape can now load and display files with dashes and/or dash offsets defined in units other than the unitless user unit (e.g. %, mm) correctly. There is no user interface for editing these values currently, except for the XML editor. Values for <code>stroke-dasharray</code> that are entered in other units (except for %) will be converted to user units when the new values are set. | * '''Dashes''': Inkscape can now load and display files with dashes and/or dash offsets defined in units other than the unitless user unit (e.g. <code>%</code>, <code>mm</code>) correctly. There is no user interface for editing these values currently, except for the XML editor. Values for <code>stroke-dasharray</code> that are entered in other units (except for <code>%</code>) will be converted to user units when the new values are set. | ||
* '''Blend modes''' applied via Layers and Objects dialog no longer use SVG filters, but CSS blend modes. These can be exported to PDF without rasterization | * '''Blend modes''' applied via Layers and Objects dialog no longer use SVG filters, but CSS blend modes. These can be exported to PDF without rasterization. | ||
* '''Hairlines''' can now be rendered in Inkscape. There is currently no user interface for adding them yet, though. Hairlines can be specified by adding <code>stroke-width:1px; stroke-width: -ink-hairline; vector-effect:non-scaling-stroke;</code> into the <code><style></code> tag of the object via the XML editor or the Style dialog. Hairlines will be exported to PNG correctly. Export to PDF requires that the Cairo library that your Inkscape program was compiled with contains the additional code from https://gitlab.freedesktop.org/cairo/cairo/merge_requests/21 (as of | * '''Hairlines''' can now be rendered in Inkscape. There is currently no user interface for adding them yet, though. Hairlines can be specified by adding <code>stroke-width:1px; stroke-width: -ink-hairline; vector-effect:non-scaling-stroke;</code> into the <code><style></code> tag of the object via the XML editor or the Style dialog. Hairlines will be exported to PNG correctly. Export to PDF requires that the Cairo library that your Inkscape program was compiled with contains the additional code from https://gitlab.freedesktop.org/cairo/cairo/merge_requests/21 (as of April 29, 2020, there's no official Cairo version available yet that contains the patch). | ||
== Dialogs == | == Dialogs == | ||
=== About === | |||
<code>Help → About Inkscape</code> | |||
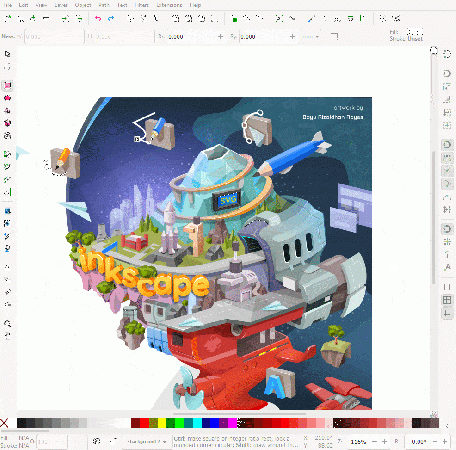
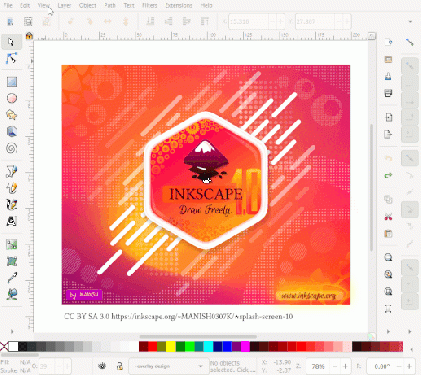
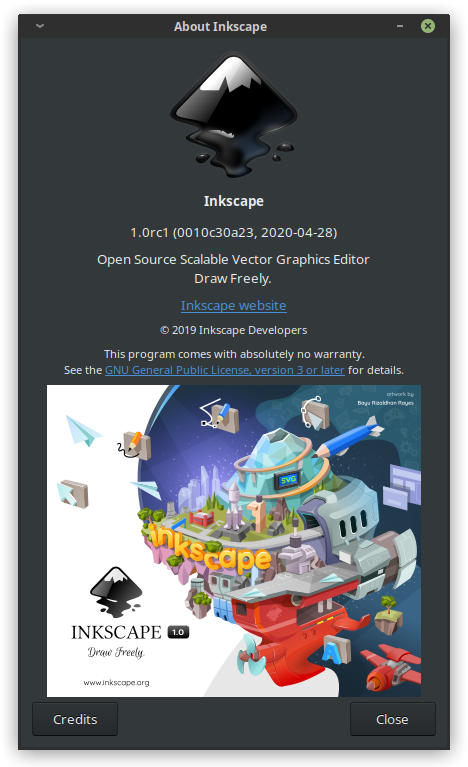
The Inkscape 1.0 About screen features the winning entry of the [https://inkscape.org/gallery/=about-screen-contest/contest-for-10/ Inkscape 1.0 About Screen Contest], [https://inkscape.org/~bayubayu/%E2%98%85island-of-creativity "Island of Creativity"] by [https://inkscape.org/news/2020/02/11/inkscape-brings-enjoyment-and-freedom-creativity/ Bayu Rizaldhan Rayes], and its layout has changed a little. | |||
<gallery mode="packed" heights=600px> | |||
File:About.1.0.png|''The Inkscape 1.0 About Screen''|alt=The Inkscape 1.0 About Screen | |||
</gallery> | |||
=== Arrange === | === Arrange === | ||
<code>Object → Arrange</code> | |||
The 'Polar coordinates' functionality now arranges objects clockwise (in selection order) around the circle/ellipse. This should better correspond to user expectations. | The 'Polar coordinates' functionality now arranges objects clockwise (in selection order) around the circle/ellipse. This should better correspond to user expectations. | ||
=== Document Properties === | === Document Properties === | ||
<code>File → Document Properties</code> | |||
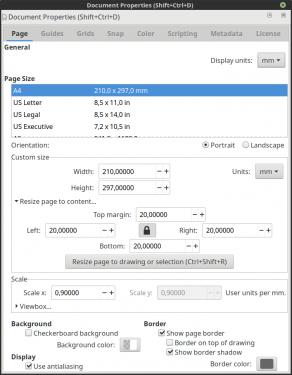
* When resizing the page, the page margin fields can now be '''locked''', so the same value will be used for all margins, but only needs to be entered once. | * When resizing the page, the page margin fields can now be '''locked''', so the same value will be used for all margins, but only needs to be entered once. | ||
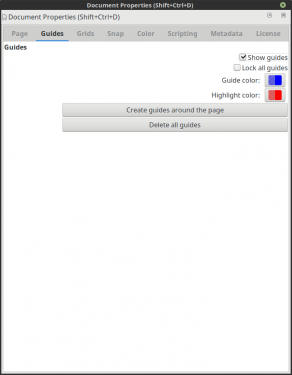
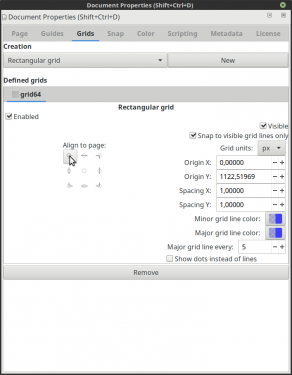
* The guides panel now has controls to lock or unlock all guides, create guides around the page, and delete all guides. These actions also appear on the Edit menu, making it possible to assign custom keyboard shortcuts. | * The guides panel now has controls to lock or unlock all guides, create guides around the page, and delete all guides. These actions also appear on the Edit menu, making it possible to assign custom keyboard shortcuts. | ||
* '''Grids can now be aligned''' to the corners, edge midpoints, or centre of the page with a button click in the grids panel. | * '''Grids can now be aligned''' to the corners, edge midpoints, or centre of the page with a button click in the grids panel. | ||
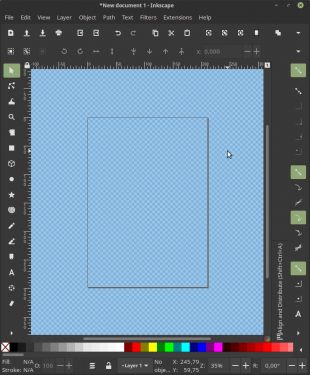
* Checkerboard patterns can now have a color ( | * Checkerboard patterns can now have a color (for updating the current view, check and uncheck the box for the checkerboard background, [https://gitlab.com/inkscape/inbox/-/issues/2561 Issue #2561]). This color will also be used as a (non-checkered) background for PNG export. | ||
* A set of new page formats for different Video resolutions (SD/PAL, SD-Widescreen/PAL, SD/NTSC, SD-Widescreen/NTSC, HD 720p, HD 1080p, DCI 2k (Full Frame), UHD 4k, DCI 4k (Full Frame), UHD 8k) has been added. | |||
<gallery> | |||
<gallery mode="packed" heights=250px> | |||
File:Lock margins doc props.png|''Lock to set same margins for page resizing''|alt=Lock to set same margins for page resizing | File:Lock margins doc props.png|''Lock to set same margins for page resizing''|alt=Lock to set same margins for page resizing | ||
File:New guide options doc props.png|''Document properties: Toggle guide lock for document, create page border guides, remove all guides''|alt=Document properties: Toggle guide lock for document, create page border guides, remove all guides | File:New guide options doc props.png|''Document properties: Toggle guide lock for document, create page border guides, remove all guides''|alt=Document properties: Toggle guide lock for document, create page border guides, remove all guides | ||
| Line 765: | Line 901: | ||
=== Fill and Stroke === | === Fill and Stroke === | ||
<code>Object → Fill and stroke</code> | |||
* The RGBA code entry field now also accepts values like <code>#123</code> and autocompletes them to <code>#112233</code>, automatically removes hash signs in pasted codes, and keeps the old alpha value if the pasted code does not contain any. | |||
* The blur slider is now scaled quadratically as you drag the slider. This makes it easier to apply and adjust smaller blur values. | |||
<!-- Moved to 1.1 * '''Hairlines''' option added for the stroke style: | <!-- Moved to 1.1 * '''Hairlines''' option added for the stroke style: | ||
** useful for laser cutters / plotters | ** useful for laser cutters / plotters | ||
| Line 775: | Line 913: | ||
=== Filter Editor === | === Filter Editor === | ||
<code>Filters → Filter Editor</code> | |||
The filter primitives now have a symbolic icon (one whose color can be changed). | The filter primitives now have a symbolic icon (one whose color can be changed). | ||
=== Objects === | === Objects === | ||
<code>Object → Objects</code> | |||
The context (right-click) menu now also contains an entry for '''deleting''' the selected object. | The context (right-click) menu now also contains an entry for '''deleting''' the selected object. | ||
=== Paint Servers === | === Paint Servers === | ||
<code>Object → Paint Servers</code> | |||
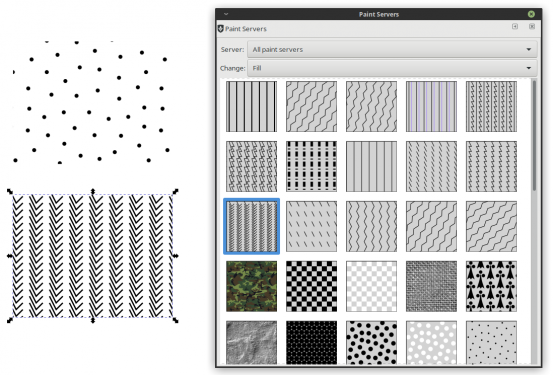
* New dialog that allows you to see a list of patterns and SVG2 hatch fills used in the current document and to assign those to objects. The hatch fills can be modified by their handles on canvas. | * New dialog that allows you to see a list of patterns and SVG2 hatch fills used in the current document (or available by default) and to assign those to objects. The hatch fills can be modified by their handles on canvas [https://gitlab.com/inkscape/inbox/-/issues/2526 in the future]. | ||
* <code>Server</code> field contains the following options: <code>All paint servers</code>, <code>Current Document</code> and each document's title from the user's <code>/paint</code> configuration folder. | |||
* The <code>Change</code> field decides whether the fill or the stroke of the object will be set to the paint server on click. | |||
* You can select multiple objects or a group of objects and they will all get their fill or stroke changed to the selected paint server. | |||
* To add a new paint server, you need to add an <code>.svg</code> document in the <code>/paint</code> user configuration folder with the following restrictions: | |||
** the svg must be valid | |||
** it must have a unique <code><title></code> property | |||
** and it must have patterns or hatches with unique ids in the <code><defs></code> section. | |||
This functionality was added to Inkscape as a Google Summer of Code project. More details on it are available [https://gitlab.com/vanntile/inkscape-gsoc-application#paint-servers-dialog in the project description] and our [https://inkscape.org/news/2020/02/21/valentin-wrangled-meshes-hatches-and-gtk-during-su/ news article]. | |||
<gallery mode="packed" heights=250px> | |||
File:Paint Servers dialog.png|''Paint Server dialog''|alt=Paint Server dialog | |||
</gallery> | |||
=== Preferences === | === Preferences === | ||
<code>Edit → Preferences</code> | |||
* The '''Bitmaps''' subsection has been renamed to '''Imported Images''', as it now applies to both imported (embedded or linked) raster images as well as to imported (embedded or linked) SVG images (i.e. to everything in <img> tags). | * The '''Bitmaps''' subsection has been renamed to '''Imported Images''', as it now applies to both imported (embedded or linked) raster images as well as to imported (embedded or linked) SVG images (i.e. to everything in <code><img></code> tags). | ||
* The '''System''' subsection lists more relevant folders and offers buttons to open those folders with the system's file browser. This makes it easier to find the correct folder, e.g. for resetting the preferences or for adding an extension or a new icon set. | * The '''System''' subsection lists more relevant folders and offers buttons to open those folders with the system's file browser. This makes it easier to find the correct folder, e.g. for resetting the preferences or for adding an extension or a new icon set. | ||
* The '''System''' subsection now has a button for quickly resetting all Inkscape preferences, which also automatically creates a backup of the current preferences. | * The '''System''' subsection now has a button for quickly resetting all Inkscape preferences, which also automatically creates a backup of the current preferences. | ||
* An option for '''scaling a stroke's dash pattern when scaling the stroke width''' has been added and can be found at | * An option for '''scaling a stroke's dash pattern when scaling the stroke width''' has been added and can be found at <code>Behaviour → Dashes</code>. It is activated by default. | ||
* '''Autosave''' is now enabled by default. The default directory has changed (the path is displayed in Edit | * '''Autosave''' is now enabled by default. The default directory has changed (the path is displayed in <code>Edit → Preferences → Input/Output → Autosave: Autosave directory</code>). | ||
* The setting for '''Handle size''' has been moved from '''Input devices''' to '''Interface''' to make it more discoverable. | |||
<gallery> | <gallery mode="packed" heights=250px> | ||
File:Open folders from preferences.png|''Important folders can be opened from the preferences''|alt=Important folders can be opened from the preferences | File:Open folders from preferences.png|''Important folders can be opened from the preferences''|alt=Important folders can be opened from the preferences | ||
File:Preferences Imported Images.png|''Imported Images section in the preferences with new SVG options''|alt=Imported Images section in the preferences with new SVG options | |||
</gallery> | </gallery> | ||
=== | === Selection Sets Dialog Hidden=== | ||
The '''Selection Sets''' dialog is deprecated and has been hidden from the menus. It will be removed in Inkscape 1.1 and sets created with this option might not work in a future Inkscape version. | |||
It can be un-hidden by assigning a keyboard shortcut to it in the Inkscape preferences, or by editing the file <code>menus.xml</code> in Inkscape's <code>ui</code> folder to uncomment the <code>DialogTags</code> entry, and saving the edited file in your user preferences' <code>ui</code> folder. | |||
<!-- [see https://gitlab.com/inkscape/inkscape/-/merge_requests/1665#note_317458802] --> | |||
=== Selectors and CSS [Experimental, hidden]=== | |||
* New dialog for adding classes and CSS styles to elements of the drawing | |||
[ | * It is currently in experimental status, thus hidden from the menu (<code>Edit → Selectors and CSS</code>) | ||
* The keyboard shortcut '''<kbd>Ctrl + Shift + Q</kbd>''' can be used to open the dialog | |||
* Among the [https://gitlab.com/groups/inkscape/-/issues?scope=all&utf8=%E2%9C%93&state=all&search=Selectors known issues], there are a couple crashes, which is the reason why the dialog has been hidden for the 1.0 release. | |||
=== Symbols === | <gallery mode="packed" heights=250px> | ||
File:Selectors and CSS dialog.png|''Selectors and CSS dialog''|alt=Selectors and CSS dialog | |||
</gallery> | |||
=== Symbols <span id="symbols"></span> === | |||
<code>Object → Symbols</code> | |||
The Symbols dialog can now handle a lot of symbols without delay on startup, and also allows searching. Symbols and symbol sets are now displayed in alphabetical order. | The Symbols dialog can now handle a lot of symbols without delay on startup, and also allows searching. Symbols and symbol sets are now displayed in alphabetical order. | ||
<gallery> | <gallery mode="packed" heights=250px> | ||
File:Symbols list.png|''Symbol sets ordered alphabetically''|alt=Symbol sets ordered alphabetically | File:Symbols list.png|''Symbol sets ordered alphabetically''|alt=Symbol sets ordered alphabetically | ||
File:Symbols search.png|''Searching for symbols''|alt=Searching for symbols | File:Symbols search.png|''Searching for symbols''|alt=Searching for symbols | ||
</gallery> | </gallery> | ||
=== Trace Bitmap === | === Trace Bitmap <span id="centerline"></span>=== | ||
<code>Path → Trace Bitmap</code> | |||
A new, unified dialog for vectorizing raster graphics is now available from <code>Path → Trace Bitmap</code>. It contains the previously separate '''Trace pixelart''' dialog and comes with a new option for '''centerline tracing'''. | |||
<gallery mode="packed" heights=250px> | |||
File:Centerline tracing.png|''Unified Trace Bitmap dialog with Centerline Tracing option''|alt=Unified Trace Bitmap dialog with Centerline Tracing option | |||
</gallery> | |||
=== Unicode Characters === | === Unicode Characters === | ||
| Line 832: | Line 998: | ||
* Each character now has a '''tooltip''' that shows a larger version of the character, so one can more easily find the correct character. | * Each character now has a '''tooltip''' that shows a larger version of the character, so one can more easily find the correct character. | ||
<gallery> | <gallery mode="packed" heights=250px> | ||
File:Unicode character dialog.png|''Unicode characters dialog with large tooltip''|alt=Unicode characters dialog with large tooltip | File:Unicode character dialog.png|''Unicode characters dialog with large tooltip''|alt=Unicode characters dialog with large tooltip | ||
</gallery> | </gallery> | ||
=== XML Editor === | === XML Editor === | ||
<code>Edit → XML Editor</code> | |||
The side of the editor that allows one to set, edit or delete attributes can now be | The side of the editor that allows one to set, edit or delete attributes can now be panned both horizontally and vertically, or be hidden entirely. | ||
Long items can more easily be edited in a little popup dialog with a new monospaced font. | |||
<gallery> | <gallery mode="packed" heights=350px> | ||
File:Xml_editor_popup.png|''XML Editor with editing popup''|alt=XML Editor with editing popup | File:Xml_editor_popup.png|''XML Editor with editing popup''|alt=XML Editor with editing popup | ||
</gallery> | </gallery> | ||
| Line 847: | Line 1,014: | ||
== Menus == | == Menus == | ||
* New option to | * New option to <code>Unlink clones recursively</code> added into sub-menu at <code>Edit → Clone</code> | ||
== Customization == | == Customization <span id="customization"></span>== | ||
=== Customize | === Customize many files in the share folder === | ||
Many files in <code>/share</code> can be over-ridden by placing files in the user's configuration folder (e.g. <code>~/.config/inkscape</code>). | |||
Configurable contents now includes extensions, filters, fonts, gradients, icons, keyboard shortcuts, [preset markers (not yet: [https://gitlab.com/inkscape/inbox/issues/ | Configurable contents now includes extensions, filters, fonts, gradients, icons, keyboard shortcuts, [preset markers (not yet: [https://gitlab.com/inkscape/inbox/-/issues/211 Issue #211])], user paint servers (SVG hatches, patterns, ...), palettes, about screen, symbol sets, templates, tutorials and some user interface configuration files. Only the file 'units.xml' cannot be overridden. | ||
=== Fonts === | === Fonts === | ||
| Line 860: | Line 1,027: | ||
==== Load additional fonts ==== | ==== Load additional fonts ==== | ||
Inkscape can now load fonts that are not installed on the system. By default Inkscape will load additional fonts from Inkscape's share folder (<code>/share/inkscape/fonts</code>) and the user's configuration folder (<code>~/.config/inkscape/fonts</code>). Custom folders can be set in preferences (see | Inkscape can now load fonts that are not installed on the system. By default Inkscape will load additional fonts from Inkscape's share folder (<code>/share/inkscape/fonts</code>) and the user's configuration folder (<code>~/.config/inkscape/fonts</code>). Custom folders can be set in preferences (see <code>Tools → Text → Additional font directories</code>). | ||
<gallery> | <gallery mode="packed" heights=250px> | ||
File:Custom font folders.png|''Set custom font folders''|alt=Set custom font folders | File:Custom font folders.png|''Set custom font folders''|alt=Set custom font folders | ||
</gallery> | </gallery> | ||
| Line 878: | Line 1,045: | ||
* The contents of the menus can be configured by customising the <code>menus.xml</code> file. | * The contents of the menus can be configured by customising the <code>menus.xml</code> file. | ||
* Toolbar contents for the command bar (<code>commands-toolbar.ui</code>), the snap bar (<code>snap-toolbar.ui</code>), the tool controls bars for each tool (<code>select-toolbar.ui</code>), the toolbox (<code>tool-toolbar.ui</code>) is now configurable. | * Toolbar contents for the command bar (<code>commands-toolbar.ui</code>), the snap bar (<code>snap-toolbar.ui</code>), the tool controls bars for each tool (<code>select-toolbar.ui</code>), the toolbox (<code>tool-toolbar.ui</code>) is now configurable. | ||
* The interface colors and some more UI styles can be customized in <code><preferences folder>/ui/style.css</code> (very raw | * The interface colors and some more UI styles can be customized in <code><preferences folder>/ui/style.css</code> (very raw theming support). | ||
=== Theme selection === | === Theme selection === | ||
In | In <code>Edit → Preferences → User Interface → Theme</code>, users can set a custom GTK3 theme for Inkscape. If the theme comes with a dark variant, activating the 'Use dark theme' checkbox will result in the dark variant being used. The new theme will be applied immediately. | ||
New themes can be installed on your system to be made available in the list to choose from. A large selection of (more or less current) GTK3 themes are available for download at [https://www.gnome-look.org/browse/cat/135/ord/top/ gnome-look.org] . On Windows, the new themes can be placed in <code>%AppData%\Local\themes\</code>, so that the full path to the theme's CSS files will be <code>%AppData%\Local\themes\<theme name>\gtk-3.0\</code>. | New themes can be installed on your system to be made available in the list to choose from. A large selection of (more or less current) GTK3 themes are available for download at [https://www.gnome-look.org/browse/cat/135/ord/top/ gnome-look.org] . On Windows, the new themes can be placed in <code><var>%AppData%</var>\Local\themes\</code>, so that the full path to the theme's CSS files will be <code><var>%AppData%</var>\Local\themes\<theme name>\gtk-3.0\</code>. | ||
=== Icon set selection === | === Icon set selection === | ||
In | In <code>Edit → Preferences → User Interface → Theme</code>, the icon set to use can be selected. By default, Inkscape comes with 'hicolor', 'Tango', and the new 'Multicolor' icons. In addition to this, it offers to use the system's icons. | ||
The symbolic icon set that is part of the 'hicolor' icon set as well as the new Multicolor icons can be colorized with custom colors. | |||
<gallery> | <gallery mode="packed" heights=450px> | ||
File:Themes.gif|''Switching themes on-the-fly''|alt=Switching themes on-the-fly | |||
File:Tango icons.png|''Light theme with Tango icon set''|alt=Light theme and Tango icon set | File:Tango icons.png|''Light theme with Tango icon set''|alt=Light theme and Tango icon set | ||
File:Hicolor icons.png|''Light theme with hicolor icon set''|alt=Light theme and hicolor icon set | File:Hicolor icons.png|''Light theme with hicolor icon set''|alt=Light theme and hicolor icon set | ||
File:Dark with symbolic icons.png|''Dark theme with symbolic icon set''|alt=Dark theme and symbolic icon set | File:Dark with symbolic icons.png|''Dark theme with symbolic icon set''|alt=Dark theme and symbolic icon set | ||
File:Dark symbolic custom color.png|''Dark theme with symbolic icon set and a custom icon color''|alt=Dark theme with custom colored symbolic icon set | File:Dark symbolic custom color.png|''Dark theme with symbolic icon set and a custom icon color''|alt=Dark theme with custom colored symbolic icon set | ||
File:Multicolor icon set.png|''New Multicolor icon set on dark theme''|alt=New Multicolor icon set on dark theme | |||
</gallery> | </gallery> | ||
=== Saving the current file as template === | === Saving the current file as template === | ||
A new entry for saving the current file as a template has been added to the | A new entry for saving the current file as a template has been added to the <code>File</code> menu. You need to specify a name for it, and optionally, you can add the template's author, a description and some keywords. A checkbox allows you to set the new template as the default template. | ||
<gallery> | <gallery mode="packed" heights=180px> | ||
File:Save as templage.png|''Save current file as a template''|alt=Save current file as a template | File:Save as templage.png|''Save current file as a template''|alt=Save current file as a template | ||
</gallery> | </gallery> | ||
| Line 912: | Line 1,078: | ||
=== Custom page sizes in Document Properties === | === Custom page sizes in Document Properties === | ||
Inkscape now creates a CSV file (comma separated values) called | Inkscape now creates a CSV file (comma separated values) called <code>pages.csv</code>. It is located in your Inkscape user preferences folder, next to your <code>preferences.xml</code> file. This file contains the default page sizes that you can choose from in the 'Page' tab of the 'Document properties' dialog. You can edit the <code>pages.csv</code> file to remove the page sizes you won't use, or to add new ones. | ||
== Command Line <span id="Command_Line"></span>== | |||
The Inkscape command line has undergone a major overhaul with the goal of making it more powerful and flexible for the user and easier to enhance for the developer. The most important changes are: | The Inkscape command line has undergone a major overhaul with the goal of making it more powerful and flexible for the user and easier to enhance for the developer. The most important changes are: | ||
| Line 930: | Line 1,086: | ||
* Each command-line argument can now be used only once. To specify multiple ''actions'' (''verbs''), use semicolons (e.g. <code>--actions='ObjectFlipVertically;FileSave;FileClose'</code>). | * Each command-line argument can now be used only once. To specify multiple ''actions'' (''verbs''), use semicolons (e.g. <code>--actions='ObjectFlipVertically;FileSave;FileClose'</code>). | ||
* Many ''actions'' can now take arguments (separated from the ''action'' name by a colon. | * Many ''actions'' can now take arguments (separated from the ''action'' name by a colon. | ||
* [[Using xverbs|xverbs]] have been removed from Inkscape (command line commands that take parameters from a file, e.g. for saving the selection under a specified filename as | * [[Using xverbs|xverbs]] have been removed from Inkscape (command line commands that take parameters from a file, e.g. for saving the selection under a specified filename as SVG file) ([https://sourceforge.net/p/inkscape/mailman/inkscape-devel/thread/33487d06-e3c1-a4e5-1496-7b370d672d2f%40gmail.com/#msg35392523 mailing list thread]). | ||
* Files can also be saved as Inkscape SVG without calling the GUI save dialog (new command: --export-inkscape-svg) | * Files can also be saved as Inkscape SVG without calling the GUI save dialog (new command: <code>--export-inkscape-svg</code>) | ||
* Multiple objects in single file can be saved into individual files by giving a comma separated list of objects to the command: --export-id. | * Multiple objects in single file can be saved into individual files by giving a comma separated list of objects to the command: <code>--export-id</code>. | ||
* Inkscape can now import a specific page of a PDF file from the command line, for batch processing (new option: --pdf-page N). | * Inkscape can now import a specific page of a PDF file from the command line, for batch processing (new option: <code>--pdf-page <var>N</var></code>). | ||
* For importing a | * For importing a PDF, the option to import via poppler is now available for the command line as <code>pdf-poppler</code>. | ||
* New verb allows one to swap fill and stroke style from the command line: <code>EditSwapFillStroke</code> (a keyboard shortcut can now be assigned to it) ([https://bugs.launchpad.net/inkscape/+bug/675690 | * New verb allows one to swap fill and stroke style from the command line: <code>EditSwapFillStroke</code> (a keyboard shortcut can now be assigned to it) ([https://bugs.launchpad.net/inkscape/+bug/675690 Issue #675690 (lp)]) | ||
* The shell mode syntax has changed, too. | |||
* The file name can now be specified with <code>--export-filename</code> | |||
* The command <code>-x</code> / <code>--extension-directory</code> has been removed. Replaced with: <code>--system-data-directory</code> and <code>--user-data-directory</code>. | |||
More information can be found at [[Using the Command Line]]. | More information about usage and how to update your commands can be found at [[Using the Command Line]]. | ||
== Tutorials / Documentation == | == Tutorials / Documentation == | ||
* Some small updates were made to tutorial texts | * Some small updates were made to tutorial texts | ||
* | * Tutorial files got a new header / footer design, using [https://inkscape.org/~esteban/%E2%98%85inksscreen-10-by-esteban-capella Esteban Capella's entry] for our About Screen Contest. | ||
== Translations [as of 2019-12-18] == | == Translations [as of 2019-12-18] == | ||
| Line 977: | Line 1,136: | ||
* Urdu | * Urdu | ||
* Swedish | * Swedish | ||
Tutorial translations were added for: | Tutorial translations were added for: | ||
| Line 992: | Line 1,147: | ||
== Notable Bugfixes == | == Notable Bugfixes == | ||
* Symbols: Visio Stencils loaded from .vss files now use their actual name instead of a placeholder derived from the symbol file's name ([https://bugs.launchpad.net/inkscape/+bug/1676144 | * Symbols: Visio Stencils loaded from <code>.vss</code> files now use their actual name instead of a placeholder derived from the symbol file's name ([https://bugs.launchpad.net/inkscape/+bug/1676144 Issue #1676144 (lp)]) | ||
* Shapes on Pen and Pencil tools now retain color and width ([https://bugs.launchpad.net/inkscape/+bug/1707899 | * Shapes on Pen and Pencil tools now retain color and width ([https://bugs.launchpad.net/inkscape/+bug/1707899 Issue #1707899 (lp)]). | ||
* Text and Font dialog: The font selection no longer jumps to the top of the list when clicking Apply. | * Text and Font dialog: The font selection no longer jumps to the top of the list when clicking Apply. | ||
* Docked dialogs now open on their own when the corresponding functionality is called from a menu or button | * Docked dialogs now open on their own when the corresponding functionality is called from a menu or button | ||
* The icon preview dialog now correctly shows the page background ( | * The icon preview dialog now correctly shows the page background (Issue #[https://bugs.launchpad.net/inkscape/+bug/1537497 1537497 (lp)]). | ||
* As of Windows 10 (version 1809) fonts are installed into a new user-specific folder by default. Allow Inkscape to recognize those fonts. ([https://gitlab.com/inkscape/inkscape/issues/50 Iusse #50]) | |||
* The default Perl interpreter executable on Windows was changed from <code>perl.exe</code> to <code>wperl.exe</code> which should usually avoid flashing a console window. ([https://gitlab.com/inkscape/inkscape/issues/66 Issue #66]) | |||
* Some printers who don't correctly recognize the page formats sent by Inkscape, printed only square excerpts of the whole image that was supposed to be printed. Now they print the whole image ([https://gitlab.com/inkscape/inkscape/merge_requests/407 Merge request #407]). | |||
* As of Windows 10 (version 1809) fonts are installed into a new user-specific folder by default. Allow Inkscape to recognize those fonts. ([https://gitlab.com/inkscape/inkscape/issues/50 #50]) | |||
* The default Perl interpreter executable on Windows was changed from | |||
* Some printers who don't correctly recognize the page formats sent by Inkscape, printed only square excerpts of the whole image that was supposed to be printed. Now they print the whole image ([https://gitlab.com/inkscape/inkscape/merge_requests/407 Merge request]). | |||
For an exhaustive list of bugs that have been fixed, please see the [https://launchpad.net/inkscape/1.0.x milestones page for Inkscape 1.0 on Launchpad] and the [https://gitlab.com/inkscape/inkscape/issues?scope=all&utf8=%E2%9C%93&state=closed&milestone_title=Inkscape%201.0 list of milestoned issues on GitLab]. | For an exhaustive list of bugs that have been fixed, please see the [https://launchpad.net/inkscape/1.0.x milestones page for Inkscape 1.0 on Launchpad] and the [https://gitlab.com/inkscape/inkscape/issues?scope=all&utf8=%E2%9C%93&state=closed&milestone_title=Inkscape%201.0 list of milestoned issues on GitLab]. | ||
<div class="mw-translate-fuzzy"> | |||
== Wichtige Änderungen == | |||
</div> | |||
=== Für Benutzer === | |||
<div class="mw-translate-fuzzy"> | |||
==== Benutzerdefinierte Icons ==== | |||
</div> | |||
Icon sets no longer consist of a single file containing all icons. Instead each icon is allocated its own file. The directory structure must follow the [https://developer.gnome.org/icon-theme-spec/ standard structure for Gnome icons]. | |||
If you would like to create or convert your own icon set to the new format, please compare the 'hicolor' and 'Tango' icon theme folders, in your Inkscape installation's 'share' directory for suitable examples and check out [[Creating a new multicolor icon theme | our guide to making a new multicolor icon theme]]. | |||
As a side effect of a bug fix to the icon preview dialog (see below), custom UI icon SVG files need to be updated to have their background color alpha channel set to 0 so that they display correctly (see Issue #[https://bugs.launchpad.net/inkscape/+bug/1661989 1661989 (lp)]). | |||
<div class="mw-translate-fuzzy"> | |||
==== Erweiterungen von Drittanbietern ==== | |||
</div> | |||
<div class="mw-translate-fuzzy"> | |||
Erweiterungen von Drittanbietern müssen aktualisiert werden, damit sie mit dieser Inkscape-Version funktionieren. | |||
</div> | |||
==== Dropped / Replaced Extensions <span id="dropped_extensions"></span>==== | |||
Extensions that previously used the UniConvertor library for saving/opening various file formats have been removed, as well as some extensions that depended on third-party programs: | |||
'''''Import extensions that have been removed:''''' | |||
<!-- Hopefully, we'll get info about correctness here: https://gitlab.com/inkscape/inbox/issues/1213#note_273045677 --> | |||
* Adobe Illustrator 8.0 and below (UC) (<code>*.ai</code>) (Workaround: rename the file extension to <code>.eps</code>. Newer versions can still be imported if they contain an embedded PDF.) | |||
* Corel DRAW Compressed Exchange files (UC) (<code>*.ccx</code>) | |||
* Corel DRAW 7-X4 files (UC) (<code>*.cdr</code>) (<code>*.cdr</code> in general can still be imported) | |||
* Corel DRAW 7-13 template files (UC) (<code>*.cdt</code>) | |||
* Computer Graphics Metafile files (UC) (<code>*.cgm</code>) <!-- confirmed --> | |||
* Corel DRAW Presentation Exchange files (UC) (<code>*.cmx</code>) | |||
* HP Graphics Language Plot file [AutoCAD] (UC) (<code>*.plt</code>) <!-- confirmed --> | |||
* sK1 vector graphics files (UC) (<code>*.sk1</code>) <!-- confirmed --> | |||
* Dia Diagram (<code>*.dia</code>) (Workaround: export as a different format from [https://wiki.gnome.org/Apps/Dia/Download Dia]) <!-- confirmed --> | |||
'''''Export extensions that have been removed:''''' | |||
* HP Graphics Language Plot file [AutoCAD] (UC) (<code>*.plt</code>) <!-- confirmed --> | |||
* sK1 vector graphics files (UC) (<code>*.sk1</code>) <!-- confirmed --> | |||
'''''Extensions that have been replaced:''''' | |||
* <code>Render → LaTeX</code>: The [https://www.julienvitard.eu/en/eqtexsvg_en.html EQTeXSVG extension] (<code>Render → LaTeX</code>) that could be used to convert an inline LaTeX equation into SVG paths using Python was dropped, due to its external dependencies. It has been replaced by the extension <code>Render → Mathematics → LaTeX (pdflatex)</code> which serves the same purpose. | |||
==== Command line changes ==== | |||
The Inkscape command line options [[#Command Line|have changed significantly (see below)]]. Any command line scripts that you have used will need to be updated for Inkscape 1.0. | |||
=== For extension writers <span id="extension_updates"></span>=== | |||
Extensions have undergone some fundamental changes. | |||
Inkscape's stock extensions '''have been moved to [https://gitlab.com/inkscape/extensions their own repository]''' and have been updated for compatibility with '''Python 3'''. Internally, extensions have been reorganized, many functions have been deprecated, and new functions have been added. | |||
==== General ==== | |||
* <span id="python3"></span>Extensions were updated to be compatible with Python 3. While we'll be migrating away from Python 2, extension writers should aim for support of Python 2.7 and Python 3.5+ for maximum compatibility. | |||
* Windows packages now ship with Python 3 (currently Python 3.7). Python 2 is not bundled anymore, so make sure to update your extension to be compatible. | |||
* Inkscape now adds itself to search path on startup, so you should always be able to call it from your extension by simply calling <code>inkscape</code>, without the need to add it to search path manually, or worrying about other potentially incompatible versions of Inkscape being available on search path. | |||
* The folder structure of Windows packages was updated: Binaries were moved from the installation root to <code>bin/</code>, Inkscape's shared files where moved from <code>share/</code> to a <code>share/inkscape</code> subfolder. | |||
* The underscores that were previously necessary to mark elements as translatable are no longer needed. Elements that are usually translated are now by default included in translations. Elements that are usually not translated, are not included. This can be overridden by setting the <code>translatable="yes/no"</code> attribute. | |||
* Extensions (including their <code>.inx</code> files) can now be put into a subdirectory of the <code>extensions/</code> folder to allow for better structuring and separation of extensions. | |||
==== Extension dialogs ==== | |||
Extension dialogs have some new input types and layout options: | |||
* new multiline text fields | |||
* new file chooser fields | |||
* new <code>appearance="url"</code> for [[INX Parameters]] of type <code>"description"</code>. You can now add clickable links to your extension UI. | |||
* a simpler version of the color chooser field has been added | |||
* new layout options (separator, table-like layouts) | |||
* all [[INX Parameters]] now have the common attribute <code>indent="<var>n</var>"</code> where <code><var>n</var></code> specifies the level of indentation in the extension UI. | |||
* new <code>label</code> parameter | |||
* new option to include an image | |||
* some confusing options have been merged | |||
* new effect extension attribute <code>implements-custom-gui</code> is [http://wiki.inkscape.org/wiki/index.php/INX_extension_descriptor_format#Attributes_description available] to hide the 'Extension is working' dialog. | |||
<gallery mode="packed" heights=250px> | |||
File:New extension dialog fields.png|''Demo extension dialog with new fields and layout options''|alt=Demo extension dialog with new fields and layout options | |||
</gallery> | |||
==== More info ==== | |||
Please also note the changed [[#Command Line|command line options]], if your extension calls another instance of Inkscape. | |||
More detailed instructions for updating old extensions are available at [[Updating your Extension for 1.0]]. Also check the [https://inkscape.gitlab.io/extensions/documentation/ extension (<code>inkex</code>) API documentation] and the [https://gitlab.com/inkscape/extensions stock extensions repository] for finding comparable extensions. If you have questions about extension development, you can join us in our [https://chat.inkscape.org/channel/inkscape_extensions extension development chat channel]. | |||
=== For packagers and those who compile Inkscape <span id="packaging_updates"></span>=== | |||
* <code>autotools</code> builds have been dropped. Please use <code>CMake</code> for building Inkscape from now on. More info is available [https://inkscape.org/develop/getting-started/#092-onwards on our website]. | |||
* <code>libsoup</code> dependency added: we use <code>libsoup</code> for making HTTP requests without a need for <code>dbus</code> and <code>gvfs</code>. | |||
* double-conversion [https://github.com/google/double-conversion] dependency added: <code>lib2geom</code> now depends on an external version of the library. | |||
* Inkscape now uses a git submodule for the <code>extensions/</code> directory. If you have cloned the repository and are not building from the release source code tarball, please note the [https://inkscape.org/en/develop/getting-started/ updated build instructions] | |||
* On Ubuntu 18.04, Gnome's fallback icon set (package 'adwaita-icon-theme-full'), that is needed to display Inkscape's default icons completely, is no longer automatically installed. It has been added as a 'recommends' level dependency. | |||
* lib2geom: [insert up-to-date info here] | |||
* The environment variable <code>INKSCAPE_PORTABLE_PROFILE_DIR</code> has been removed. Please use the equivalent <code>INKSCAPE_PROFILE_DIR</code> instead for changing the location of the profile directory at run time. (see also [https://gitlab.com/inkscape/inkscape/issues/114 #114]) | |||
* Inkscape extensions have been updated to work with Python 3, they no longer depend on Python 2 (but still work with it) | |||
== Known Issues== | == Known Issues== | ||
[as of | The Inkscape team has been working hard behind the scenes to fix as many bugs as possible for 1.0. See [https://gitlab.com/inkscape/inkscape/issues our list of confirmed and ready-to-be-worked-on issues] and [https://gitlab.com/inkscape/inbox/issues the list of new user submitted issues, questions and feature requests]. | ||
Among these, the following issues will probably be noticed when using Inkscape 1.0: | |||
* Texts are not accepted as operand for boolean operations and similar functions, such as nested offset. You now need to convert to path, ungroup, and union before using in Boolean operations. See [https://gitlab.com/inkscape/inkscape/-/issues/589 #589]. | |||
* For both Text-inside-shape and Text-on-path, selecting the text and path/shape and using Align & Distribute -> Align (e.g. on page center) changes the relative position between text and shape. As a workaround, group them first. | |||
* Manual Kerning, Text angle etc. are not supported for SVG2 flowed text by means of the specification. However, the corresponding spinbuttons in the Text toolbar are not inactive, and changing them will have no effect. [https://gitlab.com/inkscape/inkscape/-/issues/703 #703] | |||
* The popover to edit attributes in the XML Editor is truncated when dialog is undocked or floating. See [https://gitlab.com/inkscape/inkscape/-/issues/1255 #1255]. | |||
* Grid origin is dependent on y-axis direction. For old files with grids, flip the y-axis direction, or correct the origin in those files. See [https://gitlab.com/inkscape/inbox/-/issues/933 #933]. | |||
* Dialogs not showing/hiding properly on small windows or some window configurations. Workaround is to resize the window or change focus to a different window. See [https://gitlab.com/inkscape/inkscape/-/issues/604 #604]. | |||
* Certain Live Path Effects are known to interact poorly. For example, Powerstroke creates a path with a lot of additional nodes, and Fillet/Chamfer then tries to change all these nodes. See [https://gitlab.com/inkscape/inbox/-/issues/885 885]. | |||
'''Windows specific issues''' | |||
* Some tablets are not registered on some Windows 10 machines, see [https://gitlab.com/inkscape/inkscape/-/issues/832 #832] | |||
* Windows Store fonts not discoverable by Inkscape, see [https://gitlab.com/inkscape/inkscape/-/issues/1400 #1400]. Fonts have to be installed for all users to be used in Inkscape. | |||
In case you notice any issues with Inkscape 1.0, please make sure to [http://inkscape.org/report report them], so we can fix them in one of the next releases! | |||
== Inkview == | |||
'''Inkview''' (a simple SVG viewer) was considerably improved and got some new features: | |||
* Support folders as input (will load all SVG files from the specified folder)<br/>The <code>-r</code> or <code>--recursive</code> option will even allow to search subfolders recursively. | |||
* Implement <code>-t</code> or <code>--timer</code> option which allows to set a time after which the next file will be automatically loaded. | |||
* Add <code>-s</code> or <code>--scale</code> option to set a factor by which to scale the displayed image. | |||
* Add <code>-f</code> or <code>--fullscreen</code> option to launch Inkview in fullscreen mode | |||
* Many smaller fixes and improvements | |||
== Previous releases == | == Previous releases == | ||
* [[Release notes/0.92]] ([[Release_notes/0.92.1 |0.92.1]], [[Release_notes/0.92.2 |0.92.2]], [[Release_notes/0.92.3 |0.92.3]], [[Release_notes/0.92.4 |0.92.4]]) | * [[Release notes/0.92]] ([[Release_notes/0.92.1 |0.92.1]], [[Release_notes/0.92.2 |0.92.2]], [[Release_notes/0.92.3 |0.92.3]], [[Release_notes/0.92.4 |0.92.4]], [[Release_notes/0.92.5 |0.92.5]]) | ||
* [[Release notes/0.91]] | * [[Release notes/0.91]] | ||
* [[Release notes/0.48]] ([[Release notes/0.48.1 |0.48.1]], [[Release notes/0.48.2 | 0.48.2]], [[Release notes/0.48.3 | 0.48.3]], [[Release notes/0.48.4 | 0.48.4]], [[Release notes/0.48.5 | 0.48.5]]) | * [[Release notes/0.48]] ([[Release notes/0.48.1 |0.48.1]], [[Release notes/0.48.2 | 0.48.2]], [[Release notes/0.48.3 | 0.48.3]], [[Release notes/0.48.4 | 0.48.4]], [[Release notes/0.48.5 | 0.48.5]]) | ||
Revision as of 14:00, 2 May 2020
Other languages: العربية Català Česky Deutsch English Español Français Italiano 日本語 한국어 Polski Português Português do Brasil Русский Slovenčina 中文
Inkscape 1.0
(definitely not released yet - AnnouncePlanning1.0)
Released on «YYYY-MM-DD».
Release highlights
- Theming support and more new customization options
- Better HiDPI (high resolution) screen support
- Native support for macOS with a signed and notarized .dmg file
- Coordinate origin in top left corner by default
- Canvas rotation and mirroring
- On-Canvas alignment of objects
- Split view and X-Ray modes
- PowerPencil for drawing editable, variable width strokes with a pressure sensitive graphics tablet
- New PNG export options
- Integrated centerline tracing for vectorizing line drawings
- Searchable Symbols dialog
- New Live Path Effect (LPE) selection dialog
- New Corners (Fillet/chamfer) LPE, (lossless) Boolean Operation LPE (experimental), Offset LPE and Measure Segments LPE (and more!)
- Path operations, deselection of a large number of paths as well as grouping/ungrouping are much faster now
- Much improved text line-height settings
- Variable fonts support (only if compiled with pango library version >= 1.41.1)
- Browser-compatible flowed text
- Extensions programming interface updated, with many new options - Note: this introduces breaking changes, some third-party extensions will have to be updated to work with Inkscape 1.0
- Python 3 support for extensions
General: Application
Performance
Lots of small performance improvements in various areas combine to make Inkscape run smoother than before:
- Accelerated breaking apart of paths and Boolean operations (by disabling intermittent canvas rendering during these operations).
- Accelerated "deselect" speed (by improving internal data structure algorithms).
- Faster grouping and ungrouping of groups with a large number of objects
- Speed boost to operations on large sets of objects in the Objects dialog (Issue #392)
- Faster lookup of attributes (MR #448)
Mac Application
Inkscape is now a first-rate native macOS application, and no longer requires XQuartz to operate. The minimum required operating system version is OS X El Capitan 10.11.
It has a standard Mac-style menu bar (rather than a menu bar within the window). Keyboard shortcuts now use the command (⌘) key rather than the control key. Retina display screen resolution is now supported. The build is now cleanly 64-bit, a prerequisite for macOS Catalina 10.15 and beyond. It comes bundled with Python 3 to power Inkscape extensions.
General User Interface
Modernized GUI Toolkit
The user interface has been changed to utilize a more recent version of GTK+ (GTK+ 3). This is a collection of user interface building blocks that Inkscape uses to draw the user interface on the screen. This new version brings many improvements, especially for users of HiDPI (high resolution) screens.
Bringing the newer GTK+ toolkit to Inkscape has been an eagerly anticipated goal for a long time. It has taken much effort by the team involved and it was a focus point of the Boston Hackfest.
Window position / size / behavior
Improvements and fixes to the code for handling/restoring window size and position [1] were made. The window manager handles most of the jobs now, which should make it much more robust. If you still encounter problems with this, please report those to our bug tracker.
The dialog opacity options have been removed, because they were causing crashes that could not be fixed otherwise.
High Resolution Screens
Inkscape now supports HiDPI (high resolution) screens natively. This means that icons and node handles will no longer be tiny on monitors with large pixel dimensions, and the canvas will no longer look blurry.
Tool box
The tools have been reordered and grouped into more logical groups. Groups from top to bottom:
- Edit tools
- Create Shapes
- Create Shapes from scratch
- Color Editing
- Other tools
- Canvas tools.
Users can customize the order of the tools by putting a customized version of the file inkscape/share/ui/toolbar-tool.ui into a folder named ui in their Inkscape user configuration folder, if they prefer a different order.
Improved number entry fields
Many numeric entry fields no longer change their value when scrolling while the mouse is hovering over them. They now need to be selected (clicked into). Then scrolling will change the value as previously. This change was made, because scrolling docked dialogs easily led to accidental change of values.
Additionally, Ctrl + Scroll on a selected numeric entry field will now change the value in larger steps.
Canvas
Y-Axis Inversion
During the Inkscape Hackfest in Kiel, a significant change by Thomas Holder was integrated into the Inkscape codebase. It sets the origin of the document to the top left corner of the page. This finally makes the coordinates that a user can see in the interface match the ones that are saved in the SVG data (unit conversions/transformations may be required), and makes working in Inkscape more comfortable for people who are used to this more standard behavior. The old behavior can be reactivated in the preferences, at Edit → Preferences → Interface (disable 'Origin in upper left with y-axis pointing down').
Canvas Rotation
With Ctrl + Shift + Scroll wheel or Ctrl + Scroll wheel dragging the drawing area can be rotated and viewed from different angles. In the bottom right corner of the window, the viewing angle can be entered manually. Right-click to select between a set of preset values. You can also reset canvas rotation in View → Canvas orientation → Reset Rotation. Keyboard shortcuts for clockwise/counter-clockwise/no rotation can be set in the preferences.
Canvas Mirroring
The canvas can now be flipped, to ensure that the drawing does not lean to one side, and looks good either way.
The vertical/horizontal flipping is available from the menu View → Canvas orientation → Flip horizontally / Flip vertically. Keyboard shortcuts for flipping the canvas can be set in the preferences (Edit → Preferences → Interface → Keyboard shortcuts).
Pinch-to-zoom
On supported hardware (trackpad, touchpad, multi-touch screen), the canvas can be zoomed with the two-finger pinch gesture.
Duplicate Guides
A new option for duplicating guides was added to the 'Guideline' dialog (access by double-clicking on a guide line). This new feature, when used before the 'relative change' option (dialog needs to be opened once for each step), makes it easier to create guides that are offset by a certain distance / angle from an existing guide.
The menu that appears after a right-click on the canvas has been extended with the following items, which makes locking/unlocking and hiding/unhiding individual objects much more comfortable:
- Hide selected objects
- Unhide objects below (the mouse cursor)
- Lock selected objects
- Unlock objects below (the mouse cursor)
Snapping
- In
Edit → Preferences → Behavior → Snapping, a new option was added to disable snapping in new documents or files that are opened with Inkscape for the first time.
View
Center view on page
You can now center the view on the page, without changing the zoom level.
This function is available via:
View → Zoom- the Zoom tool's tool controls bar
- Keyboard shortcut Ctrl + 4
Split View Mode
The new Split View Mode features a draggable separator that becomes visible as soon as the Split view mode has been activated. On one side of the separator, the canvas will look just like before, while on the other side, everything will be displayed in outline mode, and objects can more easily be grabbed with the mouse or edited with the node tool.
It can be moved on the canvas by grabbing either the separation line or the central handle. The sides can be switched by clicking on one of the little arrows on the handle.
Activate it with one of:
View → Split View Mode- Ctrl + 6
To deativate the mode, either deactivate the checkbox in the menu again, use the keyboard shortcut a second time, or drag the separator off the canvas.
X-Ray Mode
When the X-Ray mode is active, a circular area that shows objects on the canvas in outline mode will follow the mouse pointer. This makes editing complex drawings with many objects layered on top of one another much easier, and is especially useful when used with the node tool.
Activate it with:
View → XRay Mode- Alt + 6
The size of the X-Ray circle can be adjusted in Edit → Preferences → Rendering → Rendering XRay radius.
To deactivate the mode, either deactivate the checkbox in the menu again, or use the keyboard shortcut a second time.
Visible Hairlines Display Mode
This new display mode is available in the menu under View → Display Mode → Visible Hairlines. It ensures that all lines of nonzero width are visible (with a minimum visible line width), regardless of zoom level, while still drawing everything else normally.
This is especially useful if you need to assign very small line widths for use with CNC machines like laser cutters and vinyl cutters which use hairlines to denote cut lines. In that case, you will still be able to see the lines, even when zoomed out.
Paths
Changed behavior of Stroke to Path
The 'Stroke to Path' command now not only converts the stroke of a shape to path, but effectively splits it into its components.
In the case of applying it to a path that only has a stroke, the behavior is unchanged.
For paths that don't only have a stroke, but also a fill and/or markers, the result will be a group consisting of:
- Stroke outline turned to path
- Fill (if there was one)
- A group of all markers (if applicable; one group per marker, consisting of its outline and its fill turned into a path)
Unlinking Clones for Path Operations
Clones and Symbols are now automatically unlinked, before a Boolean operation (union, difference, etc.), or one of the Path operations 'Combine', 'Break apart', or 'Stroke to Path' is performed.
A setting in the preferences at Behavior → Clones → Unlink Clones allows the User to disable the automatic unlinking.
Tools
Bézier Tool
The tool mode 'Create sequence of paraxial segments', which previously would only draw lines parallel to the x and y axis of the document, now supports arbitrary starting angles. After the first segment, all further angles will use the current angle ±90°. If you want your first segment to work as in previous versions, you need to press Ctrl after the first click. This will restrict your options to (by default) 15° steps.
Calligraphy Tool
A new option to add dots has been added to the tool. Click in place without moving the mouse to create a dot, Shift + Click to create a larger dot [Known issues: inbox#2368, inbox#2342].
Circle Tool
The circle tool can now also create closed ("filleted") circle shapes (closed arcs) with the click of a button.
Eraser
- Added option to control eraser width with a pressure sensitive input device.
- Added thinning, caps, and tremor options (as used for calligraphy tool).
- New option to erase as clip, which allows the User to non-destructively erase (parts of) various types of elements, including raster images and clones.
Measurement Tool
Hovering over a path with the tool now displays the length, height, width, and position of the path. If you hover over a group, it will show the width, height, and position of the group. Holding Shift switches to showing info about the constituents of the group.
The tool also has a new option to only measure selected objects when using click-and-drag.
Pencil Tool
PowerPencil
Pressure sensitivity can now be enabled for the Pencil tool. This feature makes use of the PowerStroke Live Path Effect (LPE).
New settings for the tool are available for tweaking the behavior of the PowerStroke LPE when it is being created with the Pencil tool (and a graphics tablet/stylus):
- Use pressure input (in the tool controls bar): activates the PowerStroke feature, if a pressure sensitive device is available.
- Min/Max (in the tool controls bar): determines the minimal and maximal stroke width (0–100%). This does not change the number of available pressure levels, but spreads them out in the available line width interval.
- Caps (in the tool controls bar): choose between the options 'butt', 'square', 'round', 'peak' and 'zero width' for the end caps of the stroke.
- Additionally, the PowerStroke LPE itself has been improved, to better work when used in this new way, see the section about LPE updates.
Selection Tool
On-Canvas Alignment
When the option "Enable on-canvas alignment" is active in the "Align and Distribute" dialog, a new set of handles will appear on canvas when an object is clicked three times (first click: scale handles, second click: rotation/skew handles).
The handles can be used to align the selected objects relative to the area of the current selection.
- Shift + click on the outer handles aligns on the outside of the selection area.
- Clicking on the central handle will align the selected objects on the horizontal axis. On Shift + click objects will be aligned on the vertical axis.
- With Ctrl + Shift the whole selection can be aligned to its outer boundaries / corners as a group (i.e. it is moved by its own
widthand / orheight).
Text Tool
More Compact Tool Controls Bar
- Some control buttons that have been mutually exclusive (e.g. right-aligned, left-aligned, justified) have been combined into drop-down lists, so they now take up less space.
- Removed the 'Show style of outermost text element' button that made settings confusing.
Better Line Height Settings
- Line spacing settings got an overhaul and are now much easier to use. Gone is the unwieldy
?button; this is now handled by selecting text on canvas. - Setting line height works like this now:
- For the whole text: click anywhere into the text without selecting anything, then adjust the line height in the tool controls bar.
- For a specific line: select the text in that line, then adjust the line height in the tool controls bar.
- Set the global line height first, and the specific line heights last. Changing global line height later will remove any line-specific line-heights (even just changing the unit will unset those ).
- Line heights for single selected lines cannot go below the height set globally.
- If more than one line is selected, the line height in between those lines can go below the line height set for the whole text.
- The line height settings work in all four text types.
Improved Text Selection
When clicking on a text object, any click within the whole area of a text line now selects the text with both selection and text tool (previously, clicking into the space between two letters did not select the text).
Variable Font Support
If Inkscape has been compiled with a Pango library version that is at least 1.41.1 (which is the case for the Windows and macOS versions, and for Ubuntu versions starting from 19.04), it comes with support for variable fonts (more info about how this looks). These are fonts that do not come with different faces, but often with various sliding scales for different font properties, like 'boldness', or 'condensing', or even playful features.
How to use Variable Fonts in Inkscape 1.0 in 10 steps (Video)
Basic Support for SVG in OpenType
Some OpenType fonts with glyphs saved as SVG render now in Inkscape.
Flow order
With Text → Flow into Frame, text now flows into the selected frames in selection order (instead of reversed order previously).
Browser-compatible flowed text
Flowed text (created by clicking and dragging a text frame) in previous Inkscape versions was not compatible with browsers, and rendered as 'black boxes' in web browsers and other SVG viewers, or was just missing.
The old flowed text can still be enabled by unchecking Edit → Preferences → Tools → Text: Use SVG2 auto-flowed text.
Now, Inkscape offers to use two new types of flowed text, that have a compatible fallback for use with modern web browsers:
- SVG 2 text using the CSS
shape-insideproperty: This new flowed text automatically includes a fallback option (in SVG 1.1), and will show up in web browsers and other software. This type of text can be created by clicking and dragging a box on canvas, if the option 'Use SVG 2 auto-flowed text' is enabled in the Text tool's preferences. When the option is enabled, it will also be used forText → Flow into frame. Kerning and letter rotation do not work with this type of text. - SVG 2 text with
inline-sizeproperty: This is the new "Column mode" of the text tool, that can be created by clicking on the canvas, typing, and then dragging the diamond-shaped handle at the end of the text to determine the width of the text. It creates flowed text columns without a predetermined height. Note that this text can be left-, center- or right-aligned, but that justification is not possible. Kerning and letter rotation also do not work with this type of text. These texts include an SVG 1.1 fallback, too. To convert the text back to SVG 1.1 text, Ctrl-click on the diamond (this will result in all the text being placed on a single line).
The fallback option can be disabled in Edit → Preferences → Input/Output → SVG export: SVG 2: Insert SVG 1.1 fallback in text.
Overview of available text types
SVG 2 Text Support in Detail
Inkscape supports SVG 2 text (multi-line and text in a shape), both rendering and creating.
There are several types of SVG 2 text:
1. Multi-line text via the CSS 'inline-size' property
The CSS property inline-size defines the width (height) of a block of horizontal (vertical) text.
Inkscape supports both rendering and generating multi-line text via this property. Flowed text using 'inline-size' is not justifiable (it uses the 'text-anchor' property). This text type has an SVG 1.1 fallback, that is included by default.
2. Multi-line text via the CSS 'shape-inside' property
The CSS property shape-inside allows placing text inside a shape. Inkscape supports this property in both rendering and creating. Inkscape also supports in rendering the CSS shape-subtract, shape-margin, and shape-padding properties.
Multi-line text via the shape-inside property is a direct replacement for SVG 1.2 flowed text. SVG 1.2 never became a final W3C standard and only the Batik SVG renderer besides Inkscape provided any support for SVG 1.2 flowed text. SVG 2 is not yet a final W3C standard but SVG 2 flowed text has one very important advantage over SVG 1.2 flowed text in that it is easy to structure the SVG 2 text such that it will be rendered (almost) correctly by an SVG 1.1 renderer. This means that browsers which do not support SVG 2 text will still render the text.
3. Multi-line text via the CSS 'white-space' property (only rendering)
The CSS property 'white-space' controls how white space is handled. By default, SVG collapses all adjacent white-space including newlines into a single space. By setting the white-space value to pre, pre-line, or pre-wrap, Inkscape will respect newlines and generate multi-line text. At the moment, one must use the XML Editor dialog to change the white-space property value. (Supported by Firefox. No SVG 1.1 fallback created by Inkscape.)
One disadvantage of using SVG 2 text is that it will not be editable as multi-line text in Inkscape 0.92 (it will still be editable as single lines of text).
Clipping / Masking
Clip paths and masks now have an inverse mode in the menu, using the PowerClip and PowerMask LPEs.
Filters
The size of the filter region can now be adjusted by dragging on two new diamond-shaped nodes with the node tool. This is especially useful for blur filters, whose area has been affected by a transformation of the filtered object.
Live Path Effects
General
Live Path Effects received a major overhaul, with lots of improvements and new features. The main changes are:
- New LPE selection dialog: the LPE list is now made available as a searchable dialog with an icon for each path effect, and options to favorite, to switch between list and tile view, to display info about the selected effect and to apply it. Several additional, experimental path effects are available after the corresponding switch has been activated.
- Set default parameters: default values for any LPE can be set in the respective LPE's dialogue, when it is applied to an object
(Note: we have the 'multiple desktop preferences' problem here: If you have multiple Inkscape windows open, the last one will determine what will be saved to the preferences file, as preferences changes are only saved when Inkscape is closed, and the settings are only loaded from file when a new window is opened.)
- Clip and Mask: improved handling
- Fix multiple LPE BBox: a problem with the size of the bounding box when applying multiple LPEs to an object has been fixed. Sometimes you need to add a intermediate LPE bounding box between.
- Knots on shapes: show edit knots in LPE shapes
- Switch knots: change the handles to the correct LPE handles when one selects an LPE in the list of active LPEs for the selected object.
New Live Path Effects
Dashed Stroke LPE
This new LPE creates uniformly dashed paths, optionally by subdividing the path's segments, or including dashes that are symmetrically wrapped around corners.
Ellipse from Points
This new LPE creates an optimally fitted ellipse from a path's nodes.
In contrast to the already existing LPE "Ellipse by 5 points", this LPE is more flexible (since, depending on the number of points available, it can fit both circles and ellipses) and has more features). Technical illustrators in particular can benefit from these features.
See LPE:_Ellipse_from_Points for more documentation.
Corners (Fillet/Chamfer) LPE
This new LPE adds fillet and chamfer to paths. Also adds a new internal class that allows to handle extra info per node, the LPE itself is an example of use the new classes.
Measure Segments LPE
This new path effect adds DIN and custom style measuring lines to "straight" segments in a path.
Offset
Use this to add an offset to your paths, shapes and groups. Compared with the 'Dynamic Offset' available from the menu, this allows you to:
- define the offset distance numerically and to choose the unit, e.g. to offset an object by 3 mm.
- keep sharp corners sharp (or to make them round, or beveled, if you want to), by using different methods for calculating the corners.
- same on-canvas control handle for changing the offset when using the node tool
Power Clip and Power Mask
These two new LPEs can be applied to objects by choosing Object → Clip → Set Inverse (LPE) or Object → Mask → Set Inverse (LPE).
They can also be used to invert a clip that is already set on an object, by adding the LPE to that object via Path → Path Effects → + → Power Clip / Power Mask
An Inversed Clip is cut out from the object it's applied to. With an Inversed Mask it's possible to modify only the parts of the object that are directly below the mask, and to leave the rest of the object unchanged (and visible).
New Experimental LPEs
Angle Bisector
Draws a line that halves the angle between the first three nodes of the path.
Boolean Operation LPE
The Boolean Operation LPE finally makes non-destructive boolean operations available in Inkscape. That way, two paths can be combined to a single shape, and both are still editable:
- Start with two paths. Rectangles or other shapes are also okay. Groups are not yet supported (Issue #1352).
- Copy the second path into the clipboard (
Edit → Copy). - Select the first path and add the Boolean Operation LPE (
Path → Path Effects → Add path effect (Plus) → Boolean operation). - Link the second path to the LPE by clicking on
Operand Path - Link to path in clipboard.
Available options:
- union
- symmetric difference
- intersection
- division
- difference
- cut
Circle by 3 points
Draws a circle whose circumference passes through the first three nodes of the path.
Circle (by center and radius)
Draws a circle where the first node of the path is the center, and the last node determines the radius.
Extrude
Extrudes the path, creating a face for each path segment.
Line segment
Draws a straight line that connects the first and last node of the path.
Parallel
Creates a draggable line that will always be parallel to a two-node path.
Perpendicular Bisector
Draws a perpendicular line in the middle of the (imaginary) line that connects the start and end nodes.
Tangent to Curve
Draws a tangent with variable length and an additional angle that can be moved along the path.
Improved LPEs
BSPline and Spiro
Improvements in Pen/Pencil mode. With Alt, you can move the previous node.
Clone Original
This path effect now allows various objects instead of only paths and is even more powerful.
Fill Between Many / Fill Between Strokes LPE
New options added:
- Fuse coincident points
- Join subpaths: fill each path separately / connect all the fills
- Close: close the fill path that is created, so it can have a stroke on all sides
- LPEs on linked: take the applied live path effects of the filled paths into account (Fill Between Many only)
Knot LPE
New options added:
- Inverse: use the stroke width of the other path as basis for calculating the gap length
- Both gaps: interrupt both paths at a crossing
Mirror Symmetry and Rotate Copies LPE
- Split feature: This new feature allows custom styles for each part of the resulting drawing without unlinking the LPE. Demo Video
- The LPE rendering on the canvas now updates accordingly when there are objects added or removed.
PowerStroke LPE Improvements
- Width scale setting added: adjust the overall width of the stroke after it has been drawn.
- Closed paths: PowerStroke now works much better on closed paths.
Import / Export
Linking and embedding SVG files
On import of an SVG file, there is now a dialog that asks whether
- the user would like to link to the SVG file
- to embed it (base64 encoded) into an
<img>tag, - or if the objects in the SVG file should be imported into the document (which was how Inkscape handled importing SVG files previously).
The dpi value for displaying embedded SVG files can be set in the import dialog or changed in the object properties dialog.
This makes importing SVG files work (almost) the same as importing raster images.
The 'Embed' and 'Extract' options in the context menu for linked SVG files work the same as they do for raster images. The 'Edit externally' option will open the linked SVG file with Inkscape per default. This setting can be changed in the preferences' 'Imported Images' section.
The displaying of the dialog can be disabled by checking the 'Don’t ask me again' option.
Linked and embedded SVG images are displayed as their raster representations, so they will become blurry when zoomed in too far.
Mesh Gradient Polyfill
SVG files that include a mesh gradient now automatically include a Javascript polyfill that allows the mesh gradient to display correctly in web browsers.
SVG 1.1 compatibility
Inkscape includes SVG 1.1 fallbacks for text by default (see the section about text tool updates).
When exporting as SVG 1.1 explicitly, using the checkbox in the export dialog, some settings are available in Edit → Preferences → Input/Output → SVG Export, in order to allow for correct rendering of markers in other software.
Export PNG images
The export dialog has received several new options which are available when you expand the 'Advanced' section.
- Enable interlacing (ADAM7): when loading images, they will be displayed faster
- Bit depth: set the number of bits that code for the color of a pixel, supports grayscale and up to 16-bit
- Compression type: choose strength of lossless compression
- pHYs dpi: force-set a dpi value for the image
- Antialiasing: choose type of anti-aliasing or disable it
- The option for "Cairo PNG" has been removed from the "Save as" dialog, as it was often confused with the "Export PNG image" option, but only supported a small subset of PNG rendering features.
PDF Export
- External links in the SVG file are now kept when the file is exported to pdf (requires Cairo in version 1.15.4 or higher).
- Some Inkscape file metadata (
File → Document properties : Metadata) are now exported to PDF (title, subject, creator, keywords).
(E)PS Export
- The title and copyright ('rights') info from the document's metadata is now exported to (E)PS.
OpenClipart Import Removed
The dialog and settings for importing images from OpenClipart have been removed due to the openclipart.org API being non-functional since mid-April 2019 with no information about a return date.
Extensions
Extension dialogs
Extension dialogs can now have clickable links, images, a better layout with separators and indentation, multiline text fields, file chooser fields and more. For detailed info for development see the developer section above.
Export Layer Slices
Extensions → Export → Export Layer Slices
The new 'Export Layer Slices' extension allows you to export PNG "slices" from your image by creating a new layer and drawing rectangles to denote the area of the export.
If you create a layer (default name "slices") with rectangles in it, this extension will export a PNG file for each rectangle into the directory with the name of the {rectangle ID}.png (use Object Properties to set this).
If the export already exists, it will skip it and color the rectangle GREY. If the "Overwrite existing exports" checkbox is selected, and the file was previously generated, it will color the rectangle RED. For new exports that did not previously exist, the rectangle will be GREEN.
If you want to create (square) icons at different sizes, select "Icon mode". Icon mode will create a square export for each dimension in "Sizes".
Frame
Extensions → Render → Frame
This new extension will add a rectangular frame with a specified stroke width, and specified stroke and fill colors to each object in the selection. Optionally, corners can be rounded, and the frame can be positioned inside or outside the selection. The result can be grouped with the frame, and the object can be clipped to the size of the frame (for further editing).
Hershey Text
Extensions → Text → Hershey Text
The "Hershey Text" extension, a utility for replacing text by stroke-based paths, has been rewritten. The most significant improvements are:
- The new version converts all or only the selected text objects in place. This means that it is possible to convert text with paragraphs and to convert multiple text objects at once.
- It now uses SVG fonts. This means that:
- It is now possible to easily add and use custom stroke fonts.
- Unicode characters are now supported.
- Stroke fonts now support arbitrary curves rather than only straight segments.
- Improved font selection with basic international characters
- Automated font-mapping: each text will be converted to the available Hershey font with the same font file name (e.g. 'Fancy Font.svg') as the current font (e.g. 'Fancy Font'), if one is available to the extension. The automated mapping overrides any other Hershey font settings.
- An option to generate font samples in all available SVG fonts is available.
- An extensive help text is built into the extension.
- Hershey Text is now located in the Extensions → Text sub-menu.
Interactive Mockup
Extensions → Web → Interactive Mockup
The new Interactive Mockup extension is intended for use by UI/UX designers. It can help to visualize mockups and create user flows to make interactive demos for approvals.
To use it, select two or more objects: the first one(s) will be the active one (button, area, image, link…), and the last selected will be the element that should be displayed after activation.
Apply the extension, then save as SVG and open it in a browser for demonstrating the mockup to potential users.
Usage instructions are also available as a tutorial video from the extension's author.
Palettes
New palettes:
- The Munsell palette
- the Bootstrap 5 palette and
- the palette for the new GNOME Human Interface Guidelines (GNOME HIG)
have been added to Inkscape's set of stock palettes.
Users can now also drag the none color field from the palette bar at the bottom onto objects to set their color to none.
Templates
- The Desktop template has new options for 4k, 5k, and 8k screens.
- Some new page sizes were added to the (Blank) Page template.
- New: template for an A4 3-fold roll flyer
- New: template for Envelope with 2 standard envelope formats
SVG and CSS
- Dashes: Inkscape can now load and display files with dashes and/or dash offsets defined in units other than the unitless user unit (e.g.
%,mm) correctly. There is no user interface for editing these values currently, except for the XML editor. Values forstroke-dasharraythat are entered in other units (except for%) will be converted to user units when the new values are set.
- Blend modes applied via Layers and Objects dialog no longer use SVG filters, but CSS blend modes. These can be exported to PDF without rasterization.
- Hairlines can now be rendered in Inkscape. There is currently no user interface for adding them yet, though. Hairlines can be specified by adding
stroke-width:1px; stroke-width: -ink-hairline; vector-effect:non-scaling-stroke;into the<style>tag of the object via the XML editor or the Style dialog. Hairlines will be exported to PNG correctly. Export to PDF requires that the Cairo library that your Inkscape program was compiled with contains the additional code from https://gitlab.freedesktop.org/cairo/cairo/merge_requests/21 (as of April 29, 2020, there's no official Cairo version available yet that contains the patch).
Dialogs
About
Help → About Inkscape
The Inkscape 1.0 About screen features the winning entry of the Inkscape 1.0 About Screen Contest, "Island of Creativity" by Bayu Rizaldhan Rayes, and its layout has changed a little.
Arrange
Object → Arrange
The 'Polar coordinates' functionality now arranges objects clockwise (in selection order) around the circle/ellipse. This should better correspond to user expectations.
Document Properties
File → Document Properties
- When resizing the page, the page margin fields can now be locked, so the same value will be used for all margins, but only needs to be entered once.
- The guides panel now has controls to lock or unlock all guides, create guides around the page, and delete all guides. These actions also appear on the Edit menu, making it possible to assign custom keyboard shortcuts.
- Grids can now be aligned to the corners, edge midpoints, or centre of the page with a button click in the grids panel.
- Checkerboard patterns can now have a color (for updating the current view, check and uncheck the box for the checkerboard background, Issue #2561). This color will also be used as a (non-checkered) background for PNG export.
- A set of new page formats for different Video resolutions (SD/PAL, SD-Widescreen/PAL, SD/NTSC, SD-Widescreen/NTSC, HD 720p, HD 1080p, DCI 2k (Full Frame), UHD 4k, DCI 4k (Full Frame), UHD 8k) has been added.
Fill and Stroke
Object → Fill and stroke
- The RGBA code entry field now also accepts values like
#123and autocompletes them to#112233, automatically removes hash signs in pasted codes, and keeps the old alpha value if the pasted code does not contain any. - The blur slider is now scaled quadratically as you drag the slider. This makes it easier to apply and adjust smaller blur values.
Filter Editor
Filters → Filter Editor
The filter primitives now have a symbolic icon (one whose color can be changed).
Objects
Object → Objects
The context (right-click) menu now also contains an entry for deleting the selected object.
Paint Servers
Object → Paint Servers
- New dialog that allows you to see a list of patterns and SVG2 hatch fills used in the current document (or available by default) and to assign those to objects. The hatch fills can be modified by their handles on canvas in the future.
Serverfield contains the following options:All paint servers,Current Documentand each document's title from the user's/paintconfiguration folder.- The
Changefield decides whether the fill or the stroke of the object will be set to the paint server on click. - You can select multiple objects or a group of objects and they will all get their fill or stroke changed to the selected paint server.
- To add a new paint server, you need to add an
.svgdocument in the/paintuser configuration folder with the following restrictions:- the svg must be valid
- it must have a unique
<title>property - and it must have patterns or hatches with unique ids in the
<defs>section.
This functionality was added to Inkscape as a Google Summer of Code project. More details on it are available in the project description and our news article.
Preferences
Edit → Preferences
- The Bitmaps subsection has been renamed to Imported Images, as it now applies to both imported (embedded or linked) raster images as well as to imported (embedded or linked) SVG images (i.e. to everything in
<img>tags). - The System subsection lists more relevant folders and offers buttons to open those folders with the system's file browser. This makes it easier to find the correct folder, e.g. for resetting the preferences or for adding an extension or a new icon set.
- The System subsection now has a button for quickly resetting all Inkscape preferences, which also automatically creates a backup of the current preferences.
- An option for scaling a stroke's dash pattern when scaling the stroke width has been added and can be found at
Behaviour → Dashes. It is activated by default. - Autosave is now enabled by default. The default directory has changed (the path is displayed in
Edit → Preferences → Input/Output → Autosave: Autosave directory). - The setting for Handle size has been moved from Input devices to Interface to make it more discoverable.
Selection Sets Dialog Hidden
The Selection Sets dialog is deprecated and has been hidden from the menus. It will be removed in Inkscape 1.1 and sets created with this option might not work in a future Inkscape version.
It can be un-hidden by assigning a keyboard shortcut to it in the Inkscape preferences, or by editing the file menus.xml in Inkscape's ui folder to uncomment the DialogTags entry, and saving the edited file in your user preferences' ui folder.
- New dialog for adding classes and CSS styles to elements of the drawing
- It is currently in experimental status, thus hidden from the menu (
Edit → Selectors and CSS) - The keyboard shortcut Ctrl + Shift + Q can be used to open the dialog
- Among the known issues, there are a couple crashes, which is the reason why the dialog has been hidden for the 1.0 release.
Symbols
Object → Symbols
The Symbols dialog can now handle a lot of symbols without delay on startup, and also allows searching. Symbols and symbol sets are now displayed in alphabetical order.
Trace Bitmap
Path → Trace Bitmap
A new, unified dialog for vectorizing raster graphics is now available from Path → Trace Bitmap. It contains the previously separate Trace pixelart dialog and comes with a new option for centerline tracing.
Unicode Characters
- The 'Glyphs' dialog has been renamed to 'Unicode Characters'.
- The characters in the dialog's character list now use the selected font.
- Each character now has a tooltip that shows a larger version of the character, so one can more easily find the correct character.
XML Editor
Edit → XML Editor
The side of the editor that allows one to set, edit or delete attributes can now be panned both horizontally and vertically, or be hidden entirely. Long items can more easily be edited in a little popup dialog with a new monospaced font.
Menus
- New option to
Unlink clones recursivelyadded into sub-menu atEdit → Clone
Customization
Many files in /share can be over-ridden by placing files in the user's configuration folder (e.g. ~/.config/inkscape).
Configurable contents now includes extensions, filters, fonts, gradients, icons, keyboard shortcuts, [preset markers (not yet: Issue #211)], user paint servers (SVG hatches, patterns, ...), palettes, about screen, symbol sets, templates, tutorials and some user interface configuration files. Only the file 'units.xml' cannot be overridden.
Fonts
Load additional fonts
Inkscape can now load fonts that are not installed on the system. By default Inkscape will load additional fonts from Inkscape's share folder (/share/inkscape/fonts) and the user's configuration folder (~/.config/inkscape/fonts). Custom folders can be set in preferences (see Tools → Text → Additional font directories).
Keyboard shortcuts
- Allow to use "Super", "Hyper" and "Meta" modifier keys
- Improve shortcut handling code. This should fix a lot of issues and allow the use of many shortcuts which were inaccessible before, especially on non-English keyboard layouts.
- The Keyboard shortcut editor now issues a warning when the entered shortcut is already in use.
- It is now possible to assign keyboard shortcuts that align an object to the top-left, top-right, bottom-left or bottom-right corners of the anchor (determined via the 'relative to:' field), or to align the objects' top-left, top-right, bottom-left or bottom-right corners with the opposite corner of the anchor.
User interface customization
- Inkscape is starting to use glade files for its dialogues, so they can be reconfigured by users. Only one is currently supported (filter editor).
- The contents of the menus can be configured by customising the
menus.xmlfile. - Toolbar contents for the command bar (
commands-toolbar.ui), the snap bar (snap-toolbar.ui), the tool controls bars for each tool (select-toolbar.ui), the toolbox (tool-toolbar.ui) is now configurable. - The interface colors and some more UI styles can be customized in
<preferences folder>/ui/style.css(very raw theming support).
Theme selection
In Edit → Preferences → User Interface → Theme, users can set a custom GTK3 theme for Inkscape. If the theme comes with a dark variant, activating the 'Use dark theme' checkbox will result in the dark variant being used. The new theme will be applied immediately.
New themes can be installed on your system to be made available in the list to choose from. A large selection of (more or less current) GTK3 themes are available for download at gnome-look.org . On Windows, the new themes can be placed in %AppData%\Local\themes\, so that the full path to the theme's CSS files will be %AppData%\Local\themes\<theme name>\gtk-3.0\.
Icon set selection
In Edit → Preferences → User Interface → Theme, the icon set to use can be selected. By default, Inkscape comes with 'hicolor', 'Tango', and the new 'Multicolor' icons. In addition to this, it offers to use the system's icons.
The symbolic icon set that is part of the 'hicolor' icon set as well as the new Multicolor icons can be colorized with custom colors.
Saving the current file as template
A new entry for saving the current file as a template has been added to the File menu. You need to specify a name for it, and optionally, you can add the template's author, a description and some keywords. A checkbox allows you to set the new template as the default template.
Custom page sizes in Document Properties
Inkscape now creates a CSV file (comma separated values) called pages.csv. It is located in your Inkscape user preferences folder, next to your preferences.xml file. This file contains the default page sizes that you can choose from in the 'Page' tab of the 'Document properties' dialog. You can edit the pages.csv file to remove the page sizes you won't use, or to add new ones.
Command Line
The Inkscape command line has undergone a major overhaul with the goal of making it more powerful and flexible for the user and easier to enhance for the developer. The most important changes are:
- Each command-line argument can now be used only once. To specify multiple actions (verbs), use semicolons (e.g.
--actions='ObjectFlipVertically;FileSave;FileClose'). - Many actions can now take arguments (separated from the action name by a colon.
- xverbs have been removed from Inkscape (command line commands that take parameters from a file, e.g. for saving the selection under a specified filename as SVG file) (mailing list thread).
- Files can also be saved as Inkscape SVG without calling the GUI save dialog (new command:
--export-inkscape-svg) - Multiple objects in single file can be saved into individual files by giving a comma separated list of objects to the command:
--export-id. - Inkscape can now import a specific page of a PDF file from the command line, for batch processing (new option:
--pdf-page N). - For importing a PDF, the option to import via poppler is now available for the command line as
pdf-poppler. - New verb allows one to swap fill and stroke style from the command line:
EditSwapFillStroke(a keyboard shortcut can now be assigned to it) (Issue #675690 (lp)) - The shell mode syntax has changed, too.
- The file name can now be specified with
--export-filename - The command
-x/--extension-directoryhas been removed. Replaced with:--system-data-directoryand--user-data-directory.
More information about usage and how to update your commands can be found at Using the Command Line.
Tutorials / Documentation
- Some small updates were made to tutorial texts
- Tutorial files got a new header / footer design, using Esteban Capella's entry for our About Screen Contest.
Translations [as of 2019-12-18]
Translations were updated for:
- Basque
- British English
- Brazilian Portuguese
- Catalan
- Croatian
- Czech
- Dutch
- Finnish
- French
- German
- Greek
- Hindi
- Hungarian
- Icelandic
- Indonesian
- Italian
- Korean
- Latvian
- Norwegian (Bokmål)
- Polish
- Romanian
- Russian
- Slovak
- Spanish
- Swedish
- Turkish
- Ukrainian
- Urdu
- Swedish
Tutorial translations were added for:
- Korean
Translations were dropped for:
- Amharic
Notable Bugfixes
- Symbols: Visio Stencils loaded from
.vssfiles now use their actual name instead of a placeholder derived from the symbol file's name (Issue #1676144 (lp)) - Shapes on Pen and Pencil tools now retain color and width (Issue #1707899 (lp)).
- Text and Font dialog: The font selection no longer jumps to the top of the list when clicking Apply.
- Docked dialogs now open on their own when the corresponding functionality is called from a menu or button
- The icon preview dialog now correctly shows the page background (Issue #1537497 (lp)).
- As of Windows 10 (version 1809) fonts are installed into a new user-specific folder by default. Allow Inkscape to recognize those fonts. (Iusse #50)
- The default Perl interpreter executable on Windows was changed from
perl.exetowperl.exewhich should usually avoid flashing a console window. (Issue #66) - Some printers who don't correctly recognize the page formats sent by Inkscape, printed only square excerpts of the whole image that was supposed to be printed. Now they print the whole image (Merge request #407).
For an exhaustive list of bugs that have been fixed, please see the milestones page for Inkscape 1.0 on Launchpad and the list of milestoned issues on GitLab.
Wichtige Änderungen
Für Benutzer
Benutzerdefinierte Icons
Icon sets no longer consist of a single file containing all icons. Instead each icon is allocated its own file. The directory structure must follow the standard structure for Gnome icons.
If you would like to create or convert your own icon set to the new format, please compare the 'hicolor' and 'Tango' icon theme folders, in your Inkscape installation's 'share' directory for suitable examples and check out our guide to making a new multicolor icon theme.
As a side effect of a bug fix to the icon preview dialog (see below), custom UI icon SVG files need to be updated to have their background color alpha channel set to 0 so that they display correctly (see Issue #1661989 (lp)).
Erweiterungen von Drittanbietern
Erweiterungen von Drittanbietern müssen aktualisiert werden, damit sie mit dieser Inkscape-Version funktionieren.
Dropped / Replaced Extensions
Extensions that previously used the UniConvertor library for saving/opening various file formats have been removed, as well as some extensions that depended on third-party programs:
Import extensions that have been removed:
- Adobe Illustrator 8.0 and below (UC) (
*.ai) (Workaround: rename the file extension to.eps. Newer versions can still be imported if they contain an embedded PDF.) - Corel DRAW Compressed Exchange files (UC) (
*.ccx) - Corel DRAW 7-X4 files (UC) (
*.cdr) (*.cdrin general can still be imported) - Corel DRAW 7-13 template files (UC) (
*.cdt) - Computer Graphics Metafile files (UC) (
*.cgm) - Corel DRAW Presentation Exchange files (UC) (
*.cmx) - HP Graphics Language Plot file [AutoCAD] (UC) (
*.plt) - sK1 vector graphics files (UC) (
*.sk1) - Dia Diagram (
*.dia) (Workaround: export as a different format from Dia)
Export extensions that have been removed:
- HP Graphics Language Plot file [AutoCAD] (UC) (
*.plt) - sK1 vector graphics files (UC) (
*.sk1)
Extensions that have been replaced:
Render → LaTeX: The EQTeXSVG extension (Render → LaTeX) that could be used to convert an inline LaTeX equation into SVG paths using Python was dropped, due to its external dependencies. It has been replaced by the extensionRender → Mathematics → LaTeX (pdflatex)which serves the same purpose.
Command line changes
The Inkscape command line options have changed significantly (see below). Any command line scripts that you have used will need to be updated for Inkscape 1.0.
For extension writers
Extensions have undergone some fundamental changes.
Inkscape's stock extensions have been moved to their own repository and have been updated for compatibility with Python 3. Internally, extensions have been reorganized, many functions have been deprecated, and new functions have been added.
General
- Extensions were updated to be compatible with Python 3. While we'll be migrating away from Python 2, extension writers should aim for support of Python 2.7 and Python 3.5+ for maximum compatibility.
- Windows packages now ship with Python 3 (currently Python 3.7). Python 2 is not bundled anymore, so make sure to update your extension to be compatible.
- Inkscape now adds itself to search path on startup, so you should always be able to call it from your extension by simply calling
inkscape, without the need to add it to search path manually, or worrying about other potentially incompatible versions of Inkscape being available on search path. - The folder structure of Windows packages was updated: Binaries were moved from the installation root to
bin/, Inkscape's shared files where moved fromshare/to ashare/inkscapesubfolder. - The underscores that were previously necessary to mark elements as translatable are no longer needed. Elements that are usually translated are now by default included in translations. Elements that are usually not translated, are not included. This can be overridden by setting the
translatable="yes/no"attribute. - Extensions (including their
.inxfiles) can now be put into a subdirectory of theextensions/folder to allow for better structuring and separation of extensions.
Extension dialogs
Extension dialogs have some new input types and layout options:
- new multiline text fields
- new file chooser fields
- new
appearance="url"for INX Parameters of type"description". You can now add clickable links to your extension UI. - a simpler version of the color chooser field has been added
- new layout options (separator, table-like layouts)
- all INX Parameters now have the common attribute
indent="n"wherenspecifies the level of indentation in the extension UI. - new
labelparameter - new option to include an image
- some confusing options have been merged
- new effect extension attribute
implements-custom-guiis available to hide the 'Extension is working' dialog.
More info
Please also note the changed command line options, if your extension calls another instance of Inkscape.
More detailed instructions for updating old extensions are available at Updating your Extension for 1.0. Also check the extension (inkex) API documentation and the stock extensions repository for finding comparable extensions. If you have questions about extension development, you can join us in our extension development chat channel.
For packagers and those who compile Inkscape
autotoolsbuilds have been dropped. Please useCMakefor building Inkscape from now on. More info is available on our website.libsoupdependency added: we uselibsoupfor making HTTP requests without a need fordbusandgvfs.- double-conversion [2] dependency added:
lib2geomnow depends on an external version of the library. - Inkscape now uses a git submodule for the
extensions/directory. If you have cloned the repository and are not building from the release source code tarball, please note the updated build instructions - On Ubuntu 18.04, Gnome's fallback icon set (package 'adwaita-icon-theme-full'), that is needed to display Inkscape's default icons completely, is no longer automatically installed. It has been added as a 'recommends' level dependency.
- lib2geom: [insert up-to-date info here]
- The environment variable
INKSCAPE_PORTABLE_PROFILE_DIRhas been removed. Please use the equivalentINKSCAPE_PROFILE_DIRinstead for changing the location of the profile directory at run time. (see also #114) - Inkscape extensions have been updated to work with Python 3, they no longer depend on Python 2 (but still work with it)
Known Issues
The Inkscape team has been working hard behind the scenes to fix as many bugs as possible for 1.0. See our list of confirmed and ready-to-be-worked-on issues and the list of new user submitted issues, questions and feature requests.
Among these, the following issues will probably be noticed when using Inkscape 1.0:
- Texts are not accepted as operand for boolean operations and similar functions, such as nested offset. You now need to convert to path, ungroup, and union before using in Boolean operations. See #589.
- For both Text-inside-shape and Text-on-path, selecting the text and path/shape and using Align & Distribute -> Align (e.g. on page center) changes the relative position between text and shape. As a workaround, group them first.
- Manual Kerning, Text angle etc. are not supported for SVG2 flowed text by means of the specification. However, the corresponding spinbuttons in the Text toolbar are not inactive, and changing them will have no effect. #703
- The popover to edit attributes in the XML Editor is truncated when dialog is undocked or floating. See #1255.
- Grid origin is dependent on y-axis direction. For old files with grids, flip the y-axis direction, or correct the origin in those files. See #933.
- Dialogs not showing/hiding properly on small windows or some window configurations. Workaround is to resize the window or change focus to a different window. See #604.
- Certain Live Path Effects are known to interact poorly. For example, Powerstroke creates a path with a lot of additional nodes, and Fillet/Chamfer then tries to change all these nodes. See 885.
Windows specific issues
- Some tablets are not registered on some Windows 10 machines, see #832
- Windows Store fonts not discoverable by Inkscape, see #1400. Fonts have to be installed for all users to be used in Inkscape.
In case you notice any issues with Inkscape 1.0, please make sure to report them, so we can fix them in one of the next releases!
Inkview
Inkview (a simple SVG viewer) was considerably improved and got some new features:
- Support folders as input (will load all SVG files from the specified folder)
The-ror--recursiveoption will even allow to search subfolders recursively. - Implement
-tor--timeroption which allows to set a time after which the next file will be automatically loaded. - Add
-sor--scaleoption to set a factor by which to scale the displayed image. - Add
-for--fullscreenoption to launch Inkview in fullscreen mode - Many smaller fixes and improvements
Previous releases
- Release notes/0.92 (0.92.1, 0.92.2, 0.92.3, 0.92.4, 0.92.5)
- Release notes/0.91
- Release notes/0.48 (0.48.1, 0.48.2, 0.48.3, 0.48.4, 0.48.5)
- Release notes/0.47
- Release notes/0.46
- Release notes/0.45
- Release notes/0.44
- Release notes/0.43
- Release notes/0.42
- Release notes/0.41
- Release notes/0.40
- Release notes/0.39
- Release notes/0.38
- Release notes/0.37
- Release notes/0.36
- Release notes/0.35
