Using Visual Studio
Microsoft Visual Studio is a popular development tool used primarily with C, C++, and C#. Visual Studio (community edition) can be downloaded for free but it requires a plugin called VisualGDB. This plugin is not free, but a fully functional evaluation version is available.
This page will help you set up Visual Studio for coding, building, and stepping through code in Inkcape.
Installation
- Follow all steps of guide Compiling Inkscape on Windows.
- Make sure Inkcape compiles correctly using the console first.
- Install Visual Studio.
- Install VisualGDB.
- Set the Environment variables in the Windows System settings as described here: Compiling Inkscape on Windows. Do not use mingwenv.bat to set the environment variables.
Note: It is assumed the required packages are installed in the following directories:
- c:\mingw
- c:\devlibs
- c:\src\inkscape\trunk
Create project in Visual Studio
- Open Visual Studio.
- Select File->New->Project->Installed->Templates->VisualGDB->MinGW/Cygwin Project Wizard.
- For the project location, do not use a path with spaces.
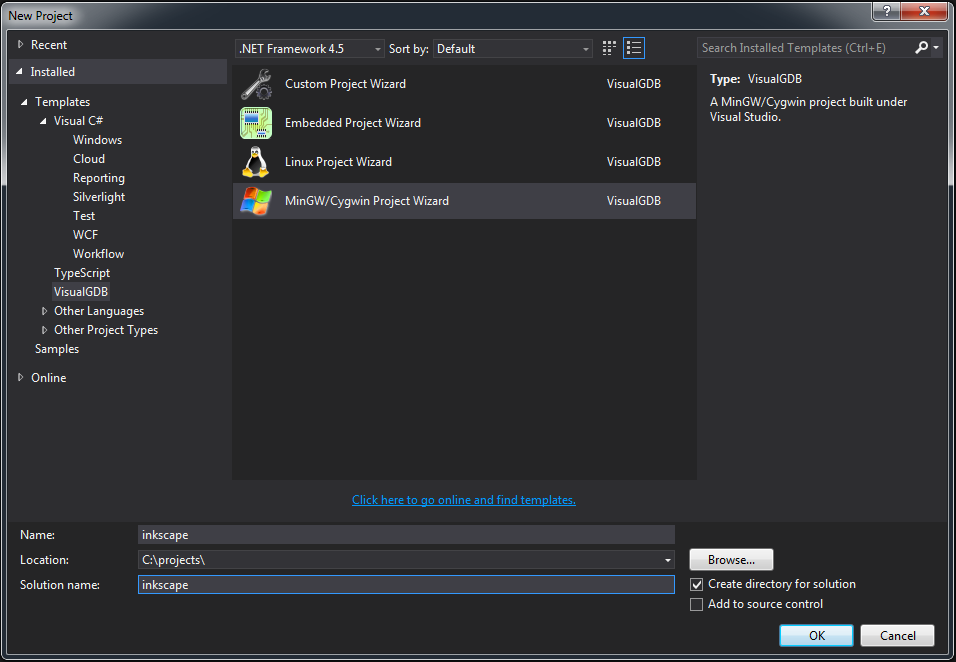
- Give the project a name, and click OK.
- At the wizard, select Project Type->Import a project build with command-line tools.
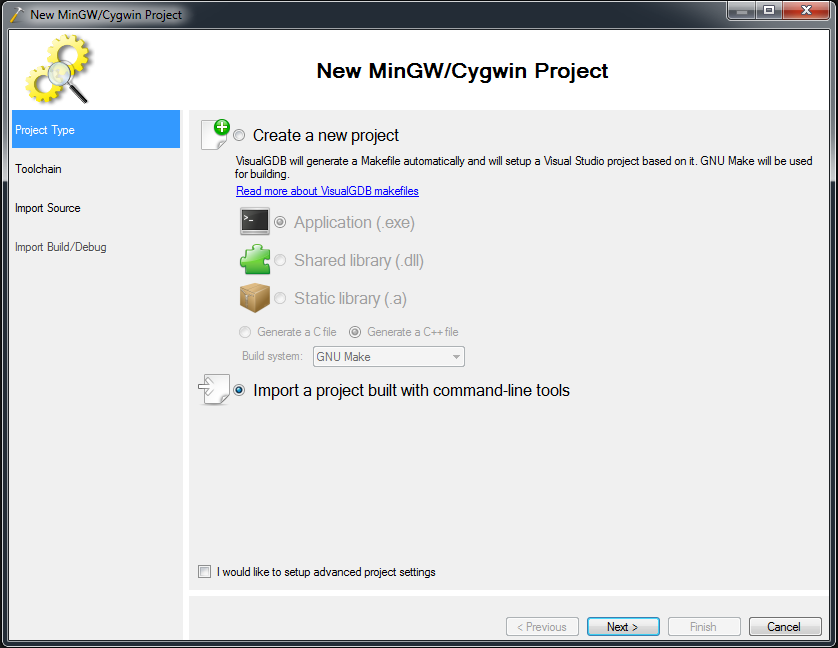
- Click Next.
- Check the path to MinGW is correct.
- Click Next.
- Set the Inkscape source directory to:
- c:\src\inkscape\trunk
- Select Import preserving directory structure.
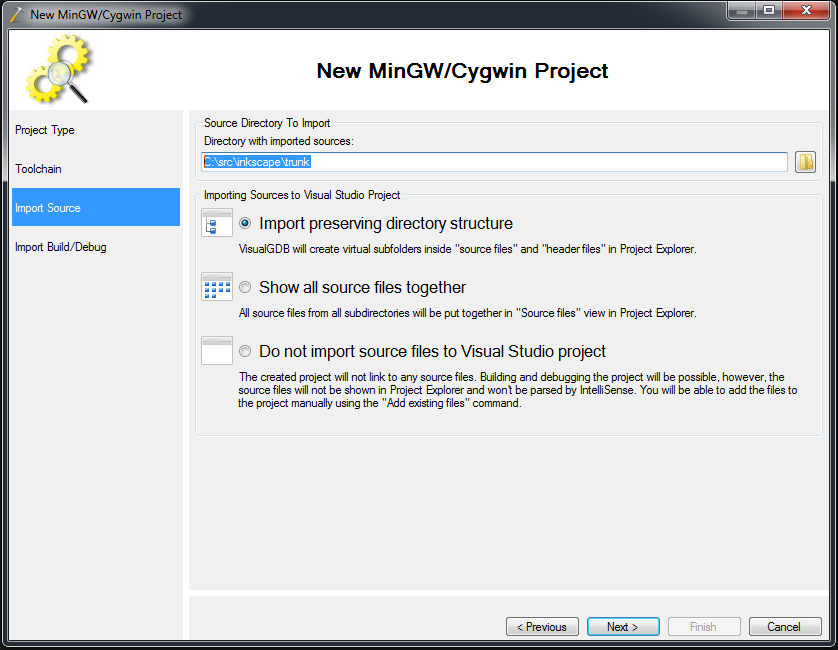
- Click Next.
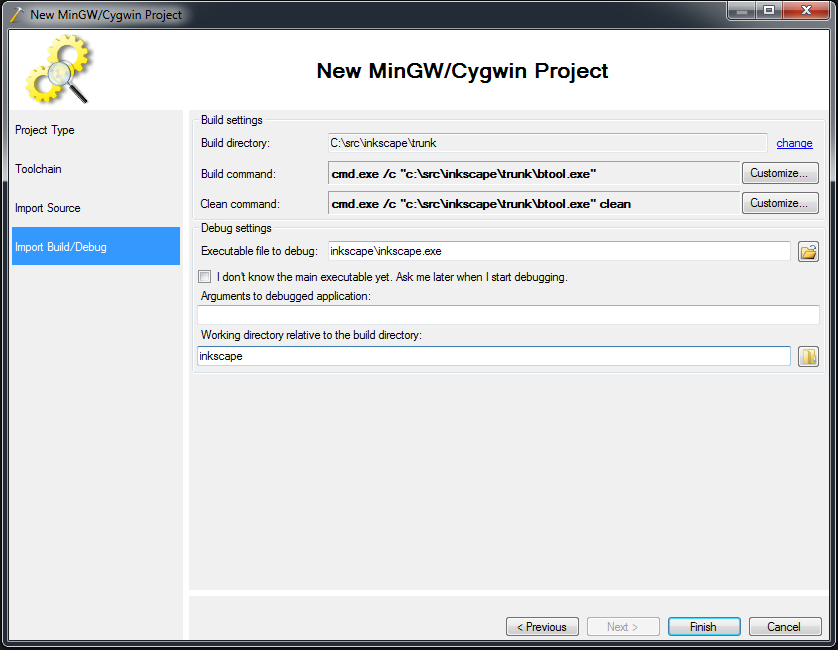
- At Build Command, select Customize.
- Set Arguments to:
- /c "c:\src\inkscape\trunk\btool.exe"
- Select OK.
- At Clean Command, select Customize.
- Set Arguments to:
- /c "c:\src\inkscape\trunk\btool.exe" clean
- Select OK.
- At Debug Settings->Executable file to debug, browse to:
- C:\src\inkscape\trunk\inkscape\inkscape.exe
- C:\src\inkscape\trunk\inkscape\inkscape.exe
- Click Finish and wait for the project generation to finish.


Note: VisualGDB will not copy the source files to the Visual Studio project directory, so you can still use Version Control the usual way.
Enable debugging
In Explorer, open build.xml located in:
- c:\src\inkscape\trunk
Then look for the "T A R G E T : C O M P I L E" section, go to the <flags> section, and change
-O2
to
-O0
Also add this flag:
-g

Then search for this:
strip="true" symfile="${build}/inkscape.dbg"
And change to this:
strip="false" symfile="${build}/inkscape.dbg"

Note: these changes will make Inkscape very slow to compile.
Building Inkscape
- In Visual Studio, select Build->Clean Solution.
- Then select Build->Build Solution.
- Come back later. This will take a while.
Note: The compiler will seem to be stuck at this for a while, but that is normal:
1> --- compile / cc
Stepping through code
- In Visual Studio, go to Solution Explorer->Inkscape->Source Files->src->main.cpp, and set a breakpoint here:

- Select Debug->Start Debugging With GDB.
- If you get a "GDB command timeout" window, be patient.
- Inkscape will stop the breakpoint. Happy debugging.

Trouble shooting
In case Visual Studio cannot break at a certain breakpoint (most likely no debugging symbols present), you can diagnose breakpoint problems using the VisualGDB diagnose tool:
