Scratchpad paintbuckettutorial
| This is a tutorial scratchpad. When this tutorial gets to a level of "completeness" it will be converted into DocBook XML format and commited to SVN.
If you edit or add anything, feel free to add your name to the authors list, so you get credit where credit is due!
Please do not translate this tutorial yet, it is still in the early stages of development and will be modified drastically. Translations can be done once it has been migrated to SVN.
Please upload images in SVG format. If you use text in the illustrations, don't split sentences or phrases into multiple text objects, as this will make a proper translation impossible. Use a flowtext area and leave enough overflow room for languages which require more space to express the same thing. If appropriate, center the text. Please also start your images in the top left corner; don't leave space until the page border.
the automatically generated PNG thumbs are not working properly on this wiki right now, so just provide a link to the uploaded SVG on the wiki. Try to keep the naming of the images similar, but don't worry too much about the image numbering order, that can be resolved later. |
Title
Paint Bucket Tool
Author(s)
ryan lerch, ryanlerch at gmail dot com
Abstract
This tutorial covers the use of the Paint Bucket tool and it's options. The paint bucket tool was an addition to Inkscape in release 0.46.
Body
Basics
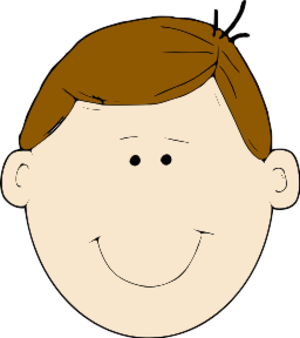
The paint bucket tool allows a fully bounded area to be quickly traced and generates a path that "fills in" that area. This tool is especially useful when "inking" line drawings; On the following example (it is one path that was traced from a bitmap) try using the paint bucket tool to fill in his hair and his face:
After using the paint bucket tool to "fill" the hair and the face, the result should look something like this:
The drawing now has 3 paths (the original, the path of the hair color and the path of the face color.) It is important to note that the paint bucket does not change the fill property of any object in the document, it merely creates a new path to represent the "fill".
How the paint bucket tool works
the majority of this text was taken from the release notes...
The paint bucket tool works by performing a bitmap-based flood fill on a rendered version of the visible canvas it then traces the resulting fill and places the traced path into the document.
It is important to note that the tool is perceptual, not geometric. That is, when looking for the boundaries around the point you clicked, it takes for such boundaries any visible color changes. This means that filling will stop at gradients, blurs, and even the color boundaries in imported bitmaps, but will ignore any paths or other objects that are fully (or almost) transparent or for any other reason do not stand out from the background.
Using the paint bucket tool
this text was taken from the release notes...
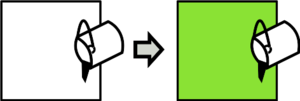
- Single click performs filling from the click point.
- Shift+click performs filling from the click point and then unions the resulting path with the selected path. This way, if your first attempt did not fill in all of the desired area, you can Shift+click the remaining corner to fill it in separately and combine the result with the result of the previous fill.
- Ctrl+click on an object simply changes that object's fill to the current fill color of the tool, and Shift+Ctrl+click changes the stroke to the current stroke color.
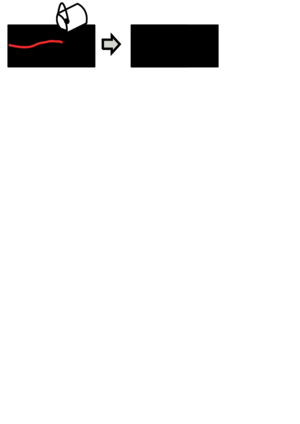
- Click and drag performs filling from all of the points that you pass while dragging (you will see your path visualized by a red line). From each point, the fill spreads to the neighbors with the colors similar to that point - in other words, it's like clicking with this tool at each point of the drag path and unioning the results. This lets you easily fill an area occupied by a gradient or blur - just drag from the darkest to the lightest points in the area you want to fill.
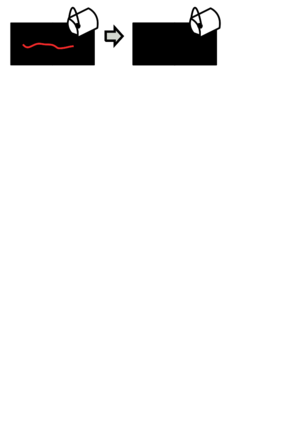
- Alt+click and drag works similarly to simple drag, except from each point of the drag path, the fill spreads to the neighbors (if any) with the colors similar to the initial point (the point where you started the drag). This lets you fill a series of similarly-colored yet separated areas (for example, multiple cells in a cartoon) by starting the drag in one of those areas, and alt+dragging the tool through all the other areas.
Paint Bucket's control bar options
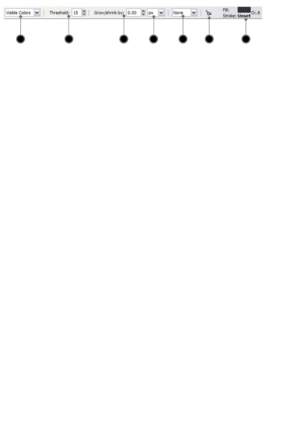
There are several options that allow the use of the paint bucket to be refined. Below is a screen shot of the tool's options that are displayed in the control bar.
- Color Channels
- Threshold
The threshold option is used to control if a colour is determine to be the same or not. A threshold setting of 0 means that only the exact same colour is considered the same, whereas a setting of 100 means that every colour is viewed as being the same. For diagrams and technical drawings a setting of 0 is often used, whereas in artistic work a higher setting ~ 20-30 is not uncommon.
- Grow/Shrink amount
- Grow/Shrink units
Grow and shrink is used mainly to make up for a lack of autocracy of the paint bucket fill. Often the paint bucket fill will not completely fill a region so by growing the fill region to cover a larger area the gaps will be filled in and no longer noticeable once placed behind the edge objects.
Interesting visual effects can be created by shrinking the fill area and by using multiple fills and strokes or colours.
- Auto Gap setting
Some gapes in an outline will not be visible to the human eye, but will cause the area not to be bounded. One method to fix this is to zoom out, therefore hiding the gap to the computer, but meaning the fill will be less accurate. The auto gap setting is used to fill a gap of 1 to ~ 8 pixels so that the gap is ignored and the area is filled despite the break in the surrounding objects
- Reset to defaults
- Style swatch
is used to show the fill style that is about to be used

