Difference between revisions of "Using Eclipse"
m (minor formatting) |
m (added needs_update) |
||
| Line 1: | Line 1: | ||
{{Needs_update}} | |||
'''Note:''' The instructions in this wiki are out of date and do not work anymore. This page is just a reference as it might provide you with a clue on how to get it to work. If you manage to get compiling and debugging to work under Windows using Eclipse, please modify this page accordingly. | '''Note:''' The instructions in this wiki are out of date and do not work anymore. This page is just a reference as it might provide you with a clue on how to get it to work. If you manage to get compiling and debugging to work under Windows using Eclipse, please modify this page accordingly. | ||
Revision as of 06:17, 4 March 2015
This page contains outdated information and needs to be updated.
Note: The instructions in this wiki are out of date and do not work anymore. This page is just a reference as it might provide you with a clue on how to get it to work. If you manage to get compiling and debugging to work under Windows using Eclipse, please modify this page accordingly.
Eclipse is a popular development tool used primarily with Java; however, C/C++ development can also be done. This page will help you set up Eclipse for coding, building, and debugging Inkscape.
Eclipse on Fedora
- Follow the Installation and Configuration steps of guide BzrEclipse but be carefull:
- At this moment, this How to is for a previous version of Eclipse (some dialogs and menus have changed)
- bzr-xmloutput must be decompress in a folder named exactly xmloutput in Bazaar plugins directory
Setup project in Eclipse
Following steps are equivalent to:
checkout lp:inkscape /home/{USER_NAME}/workspace/Inkscape
In Eclipse:
- File > New > Project...
- Select Bazaar > Checkout as a new project
- Select Initialize a new branch location
- Set Branch location to lp:inkscape
- Select Create a project
- Set Project name to Inkscape
After quite a long time working, the Inkscape project appears in the Eclipse Explorer.
Eclipse on Windows
Running Eclipse provides a relatively easy and familiar way to work with Inkscape code on Windows. This section will explain how to make it happen.
Note: Some of these instructions may be applicable to development on Mac or Linux. Feel free to refactor them if you are adding information for those platforms.
Initial Setup
First, make sure Inkscape compiles under windows using the command line to verify the source and dependencies are installed correctly. Follow the instructions on the Win32Port page under the heading Inkscape under Windows.
If you don't have Eclipse, get it. Check out the online help if needed.
Next, you need to set up the necessary add-ons. Most important is the CDT plug-in which facilitates C/C++ development. You may also wish to add Subclipse for SVN access within Eclipse. Alternatively, many Windows users prefer to use TortoiseSVN, which works with Windows Explorer.
Creating a Project
Subclipse (Outdated as version control is provided by Bazaar now)
The next step is to get the source code ready for use in Eclipse. Check here for general instructions for working with SVN; in this section, the aim is to show how to check out the code using Subclipse.
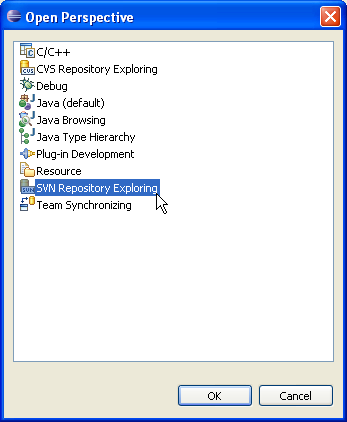
In Eclipse, we want the SVN perspective to be open. Click Window > Open Perspective > Other. Choose SVN Repository Exploring and click ok.
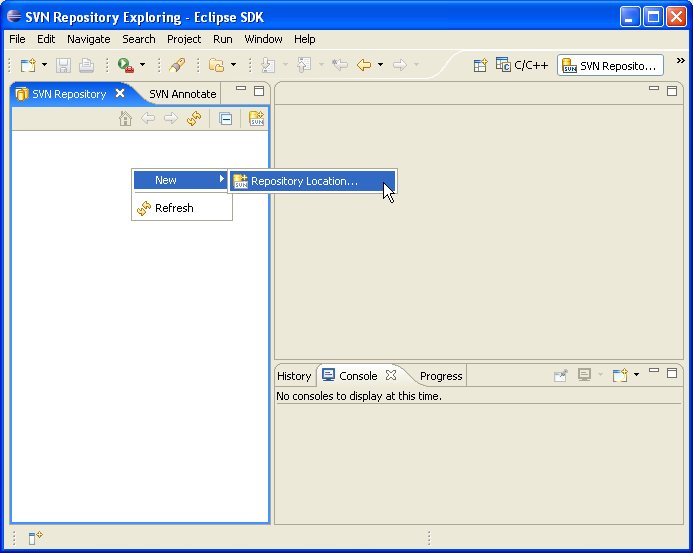
In the SVN Repository tab, right click and choose New > Repository Location....
In the Location Url: box, paste the link https://inkscape.svn.sourceforge.net/svnroot/inkscape/inkscape/trunk and click finish. This location will now show in the SVN Repository tab. You can expand the tree to see what is on the server.
Now right click the location name (which is really just the link given above), and click Checkout.... Choose Check out as a project configured using the New Project Wizard and the revision you want (probably Head), and click Finish.
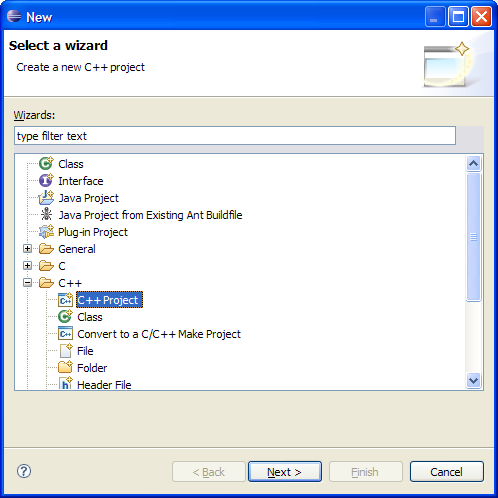
In the New Project window that appears, choose C++ Project in Eclipse Europa (or in Callisto Standard Make C++ Project) and click Next.
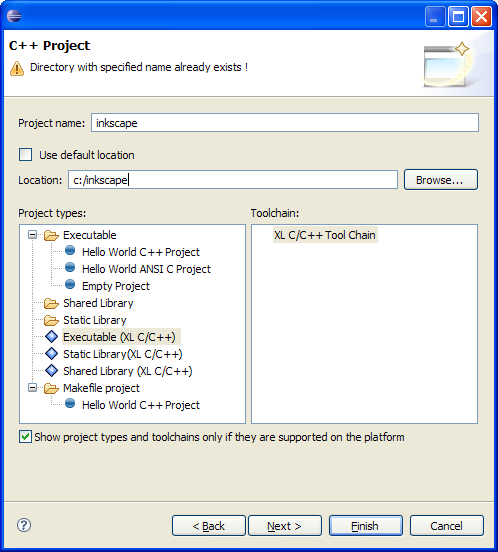
Give your project a name such as InkscapeSVN. Uncheck the Use default location box so you can provide a better project location outside of your workspace, such as C:\InkscapeSVN. Select Executable (XL C/C++) as the project type, and XL C/C++ Tool Chain as the the Toolchain (this will not be necessary in Callisto (or before?) as this has been already been specified by selecting Standard Make C++ Project). Click Finish.
The source code will now be checked out - this may take a while. You will also now have a project in the C/C++ Perspective with whatever name you provided earlier.
TortoiseSVN (Outdated as version control is provided by Bazaar now)
To use TortoiseSVN instead of Subclipse to check out your project, open a Windows Explorer instance. Right click anywhere outside of an existing SVN tree and choose SVN Checkout.... Specify the link given above and the destination directory.
To get a project in Eclipse, go to the C/C++ Perspective.
In Eclipse Europa select File > New > C++ Project. Choose a project type of Executable (XL C/C++).
In Eclipse Calisto right click in the C/C++ Projects tab, and choose New > Project... and in the window choose Standard Make C++ Project.
Give the project a name, and uncheck the Use default location box. You must give the location that you checked the code out into here.
At this point, you will be able to use TortoiseSVN or Subclipse within Eclipse to control the source.
Building
NOTE FOR LINUX USERS For building, you can probably get away with running './autogen.sh' then './configure' from the directory containing your copy of the repository. You can then create a 'Builder' which contains Makefile as Main-Location.
Be sure you have the btool built and ready to go, as outlined on the Win32Port page. You can build Inkscape from the command line or initiate it from within Eclipse, which will capture the output for you.
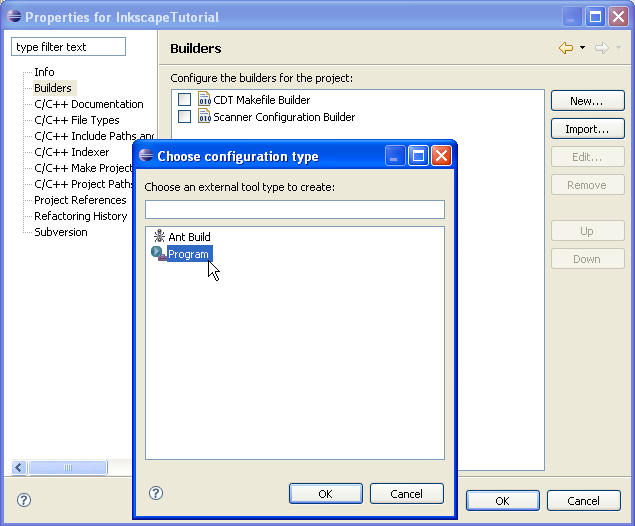
To set up Eclipse to do this, make sure you are in the C/C++ Perspective and that your project is open. Right click on the project name and click Properties. Click on Builders. Uncheck any builders that are there since we will be using the custom btool. Click New... and select Program.
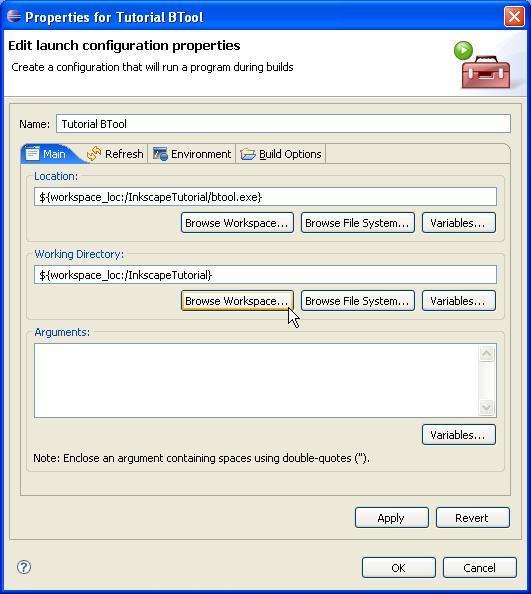
In the Main tab, browse the workspace for the location of the btool.exe file. Browse the workspace again to set the working directory to the main project directory.
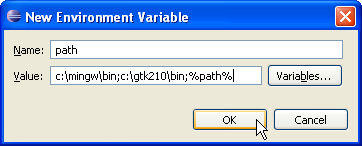
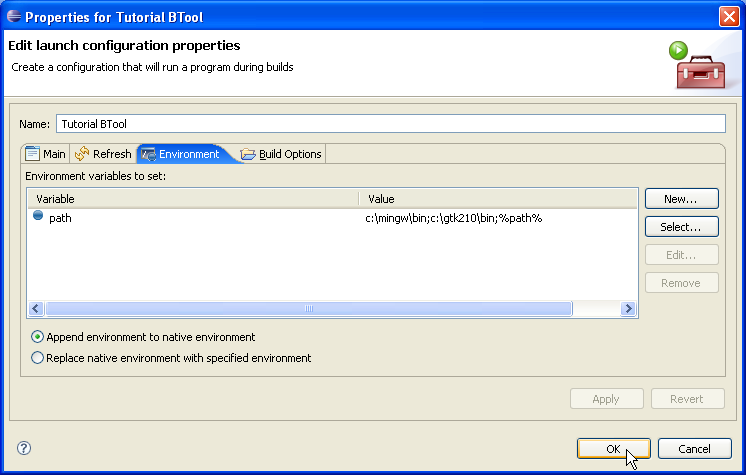
Now go to the Environment Tab and add a new variable called path. Add the same thing that appears in your mingenv.bat file here.
Click on C/C++ Project Paths and then the tab Path Containers. Click Add..., choose Discovered scanner configuration container, Next, Discovered Paths, and Finish.
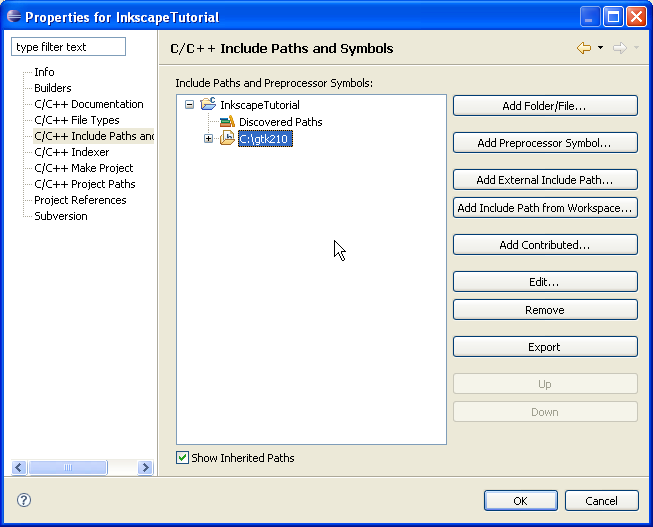
Now go to C/C++ Include Paths and Symbols. Click Add Contributed and choose the Discovered scanner configuration container, then Discovered Paths. Then click Add External Include Path and add the path to your GTK folder (probably something like c:\gtk210).
You should now be able to use the Project > Build All command, capturing the output onto Eclipse's console.
Debugging
You need to make a couple of changes to the build.xml file and do a clean rebuild. First, add -g to the flags section:
 <flags>
     -Wall -O3
     -mms-bitfields
     -g
 </flags>
Then avoid stripping symbol information from the exe by changing this line
strip="true" symfile="${build}/inkscape.dbg"
with this one
strip="false" symfile="${build}/inkscape.dbg"
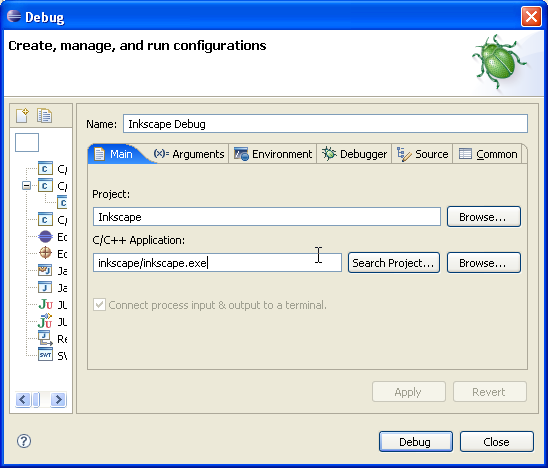
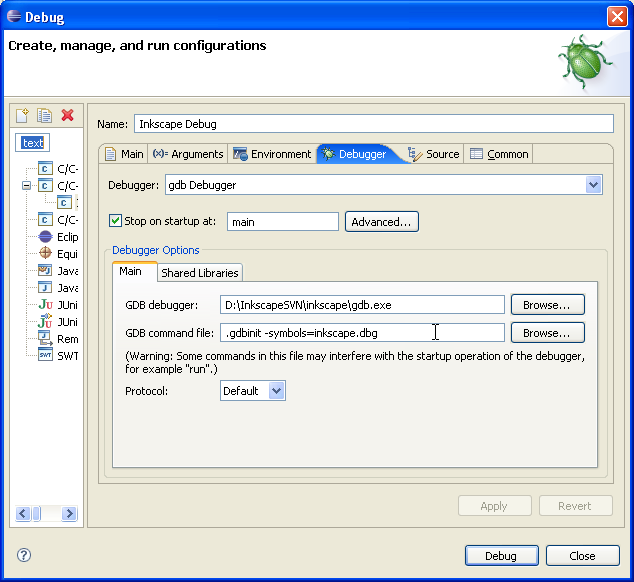
Now you need to create a debugging instance in Eclipse. Click Run > Debug.... Click on C/C++ Local Application and then click the new button. Give the launch configuration a logical name such as Inkscape Debug.
These screenshots show you the values you have to change in each tab. Nothing else needs to change.
Now you can launch this new configuration and debug away!
(Don't worry about funny warnings about files or folders not existing - it doesn't seem to affect the use of the debugger. However, if you know how to fix it, please replace this comment with instructions.)
