Difference between revisions of "SpecSimpleFiltersUi"
Jump to navigation
Jump to search
| Line 95: | Line 95: | ||
== Workflow == | == Workflow == | ||
=== 1. Open | === 1. Open "Filter effects" dialog === | ||
[[Image:Filter-workflow1.png|501px|center]] | [[Image:Filter-workflow1.png|501px|center]] | ||
=== 2. Select object to which you want to add filter === | === 2. Select object to which you want to add filter === | ||
| Line 101: | Line 101: | ||
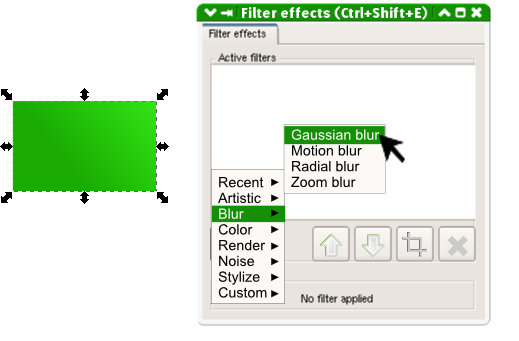
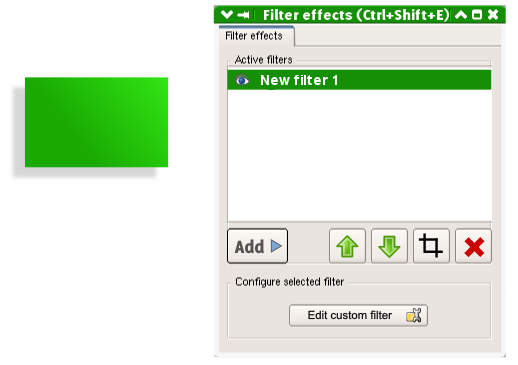
=== 3. Click on "Add" button and select one of the built-in filters === | === 3. Click on "Add" button and select one of the built-in filters === | ||
[[Image:Filter-workflow3.png|501|center]] | [[Image:Filter-workflow3.png|501|center]] | ||
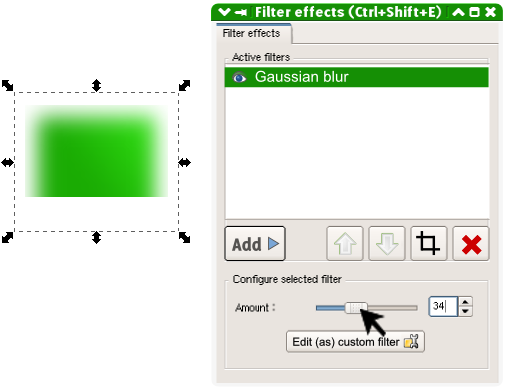
=== 4. Selected filter is now applied, | === 4. Selected filter is now applied, tweak it by changing amount of Gaussian blur === | ||
[[Image:Filter-workflow4.png|500|center]] | [[Image:Filter-workflow4.png|500|center]] | ||
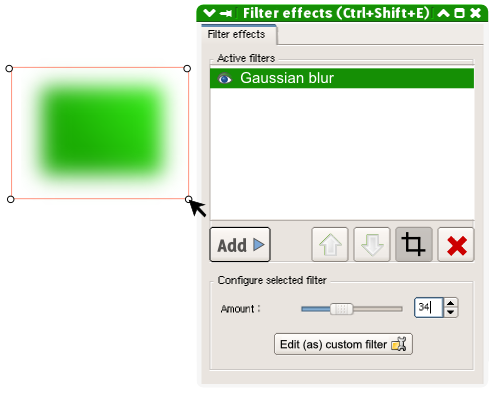
=== 5. Click on "Crop" icon to resize (on canvas) visible area of filter === | === 5. Click on "Crop" icon to resize (on canvas) visible area of filter === | ||
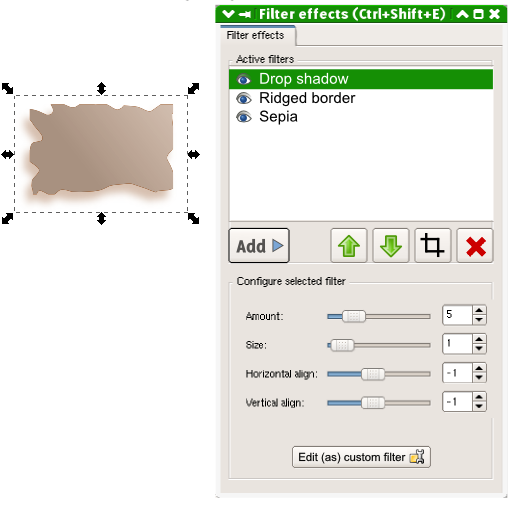
| Line 109: | Line 109: | ||
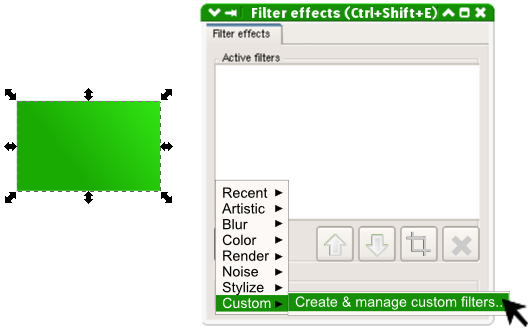
=== 7. If you can't find a built-in filter which would meet your needs - create your own one by going to "Add -> Custom -> Create & manage custom filters" === | === 7. If you can't find a built-in filter which would meet your needs - create your own one by going to "Add -> Custom -> Create & manage custom filters" === | ||
[[Image:Filter-workflow7.png|500|center]] | [[Image:Filter-workflow7.png|500|center]] | ||
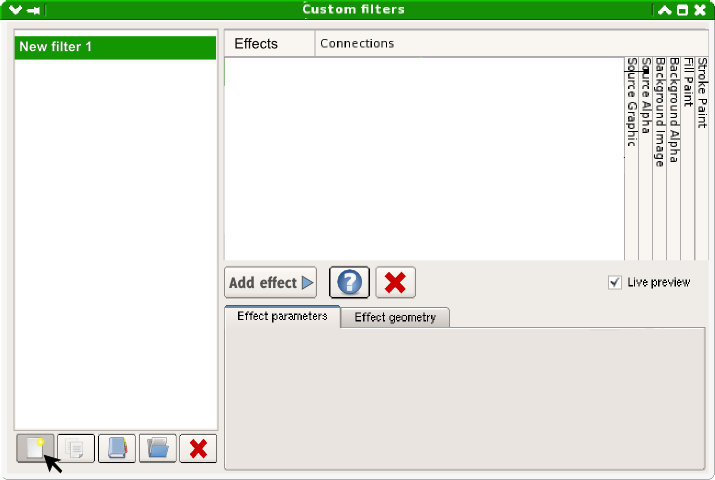
=== 8. Click on "New filter" icon on the left side - | === 8. "Custom filters" dialog shows up. Click on "New filter" icon on the left side - new filter is added to the list of custom filters === | ||
[[Image:Filter-workflow8.png|500|center]] | [[Image:Filter-workflow8.png|500|center]] | ||
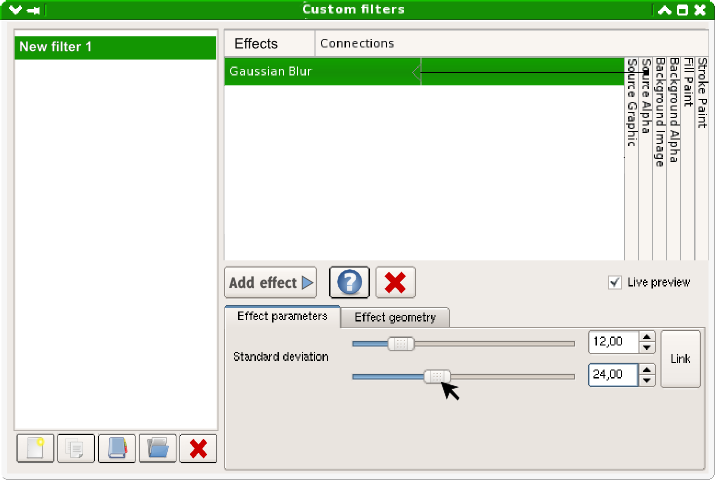
=== 9. Add some effects to your filter add customise them. When you are done - simply close "Custom filter" window=== | === 9. Add some effects to your filter add customise them. When you are done - simply close "Custom filter" window=== | ||
[[Image:Filter-workflow9.png|500|center]] | [[Image:Filter-workflow9.png|500|center]] | ||
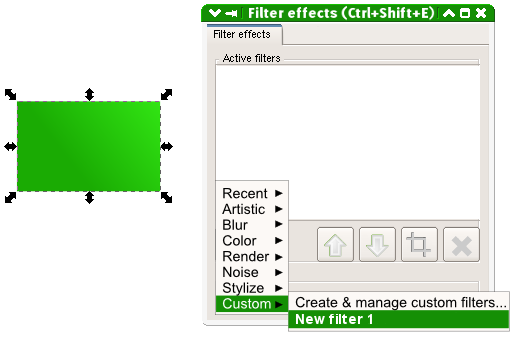
=== 10. New filter is now accesible from | === 10. New filter is now accesible from "Filter effects" dialog under: "Add -> Custom ->" === | ||
[[Image:Filter-workflow10.png|500|center]] | [[Image:Filter-workflow10.png|500|center]] | ||
=== 11. === | === 11. === | ||
Revision as of 20:56, 24 August 2008
Launchpad Entry: https://blueprints.launchpad.net/inkscape/+spec/non-advanced-filters-ui
Summary
Release Note
Rationale
Design
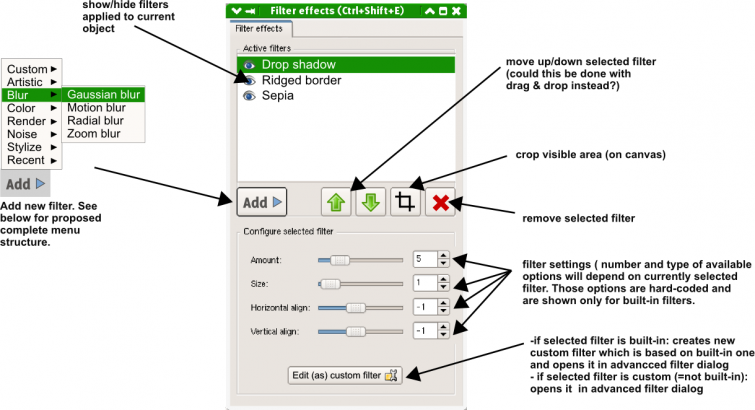
Basic filter dialog mock-up
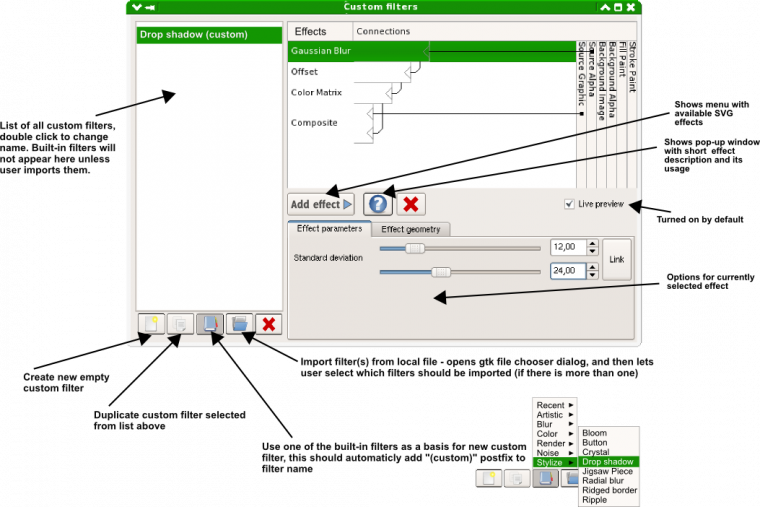
Custom (advanced) filter dialog mock-up
Add:
- Recent
- - - -List of last 10 used filters - - -
- Artistic
- Ink bleed
- Oil painting
- Oil slick
- Blur
- Blur
- Gaussian blur
- Motion
- Radial blur
- Zoom blur
- Color
- Black and white
- Saturize
- Sepia
- Render
- Blue cheese
- Barbed wire
- Brushed metal
- Clouds
- Fire
- Leopard fur
- Metal
- Organic
- Snow
- Swiss cheese
- Zebra
- Noise and deformation
- Ridged border
- Ripple
- Roughen
- Scratched
- Speckle
- Smudge
- Waves
- Edge detection
- Edge detect
- Pencil
- Blueprint
- Stylize
- Age
- Apparition
- Button
- Drop shadow
- Inset
- Crystal
- Splat
- Rubber stamp
- Bloom
- Jigsaw piece
- Jelly bean
- custom
- Create & manage custom filters...
- - - - List of custom filters - - -
Workflow
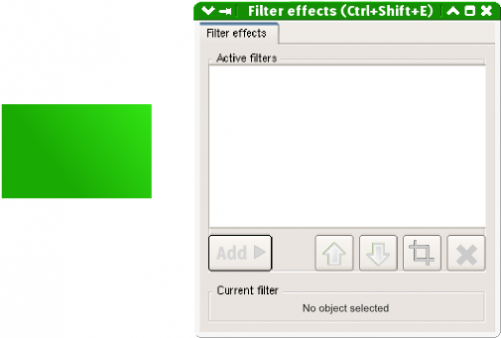
1. Open "Filter effects" dialog
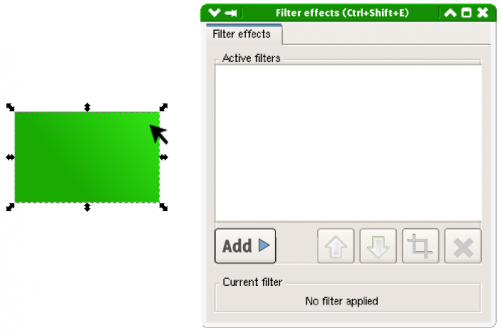
2. Select object to which you want to add filter
3. Click on "Add" button and select one of the built-in filters
4. Selected filter is now applied, tweak it by changing amount of Gaussian blur
5. Click on "Crop" icon to resize (on canvas) visible area of filter
6. Add more filters by repeating previous steps, note that "Configure selected filter" box changes its content according to type of selected filter
7. If you can't find a built-in filter which would meet your needs - create your own one by going to "Add -> Custom -> Create & manage custom filters"
8. "Custom filters" dialog shows up. Click on "New filter" icon on the left side - new filter is added to the list of custom filters
9. Add some effects to your filter add customise them. When you are done - simply close "Custom filter" window
10. New filter is now accesible from "Filter effects" dialog under: "Add -> Custom ->"
11.
TODO
* Flesh this specification out in more detail
Discussion
I like this, but don't like the Path effects to be on a tab on the Effects dialog. I think LPE has to be separated from the filters, as it is now. --Pajarico 11:26, 24 August 2008 (UTC)
