Difference between revisions of "Using Visual Studio"
(Added section to use spaces instead of tabs) |
({{Needs update}}) |
||
| Line 1: | Line 1: | ||
{{Needs update}} | |||
= Introduction = | = Introduction = | ||
Revision as of 18:53, 25 October 2017
This page contains outdated information and needs to be updated.
Introduction
Microsoft Visual Studio is a popular development tool used primarily with C, C++, and C#. Visual Studio (community edition) can be downloaded for free but it requires a plugin called VisualGDB or WinGDB. These plugins are not free, but fully functional evaluation versions are available. This wiki focuses on the VisualGDB plugin, but WinGDB settings are also provided.
This page will help you set up Visual Studio for coding, building, and stepping through code in Inkcape.
Installation
- Follow all steps of guide Compiling Inkscape on Windows.
- Make sure Inkcape compiles correctly using the console first.
- Install Visual Studio.
- Install VisualGDB.
- Set the Environment variables in the Windows System settings as described here: Compiling Inkscape on Windows. Do not use mingwenv.bat to set the environment variables.
Note: It is assumed the required packages are installed in the following directories:
- c:\mingw
- c:\devlibs
- c:\src\inkscape\trunk
Editor Settings
The Inkscape coding style is to use spaces instead of tabs. To change this, go to:
Tools->Options->Text Editor->All Languages->Tabs->Tab: set to "Insert spaces".
Create project in Visual Studio
- Open Visual Studio.
- Select File->New->Project->Installed->Templates->VisualGDB->MinGW/Cygwin Project Wizard.
- For the project location, do not use a path with spaces.
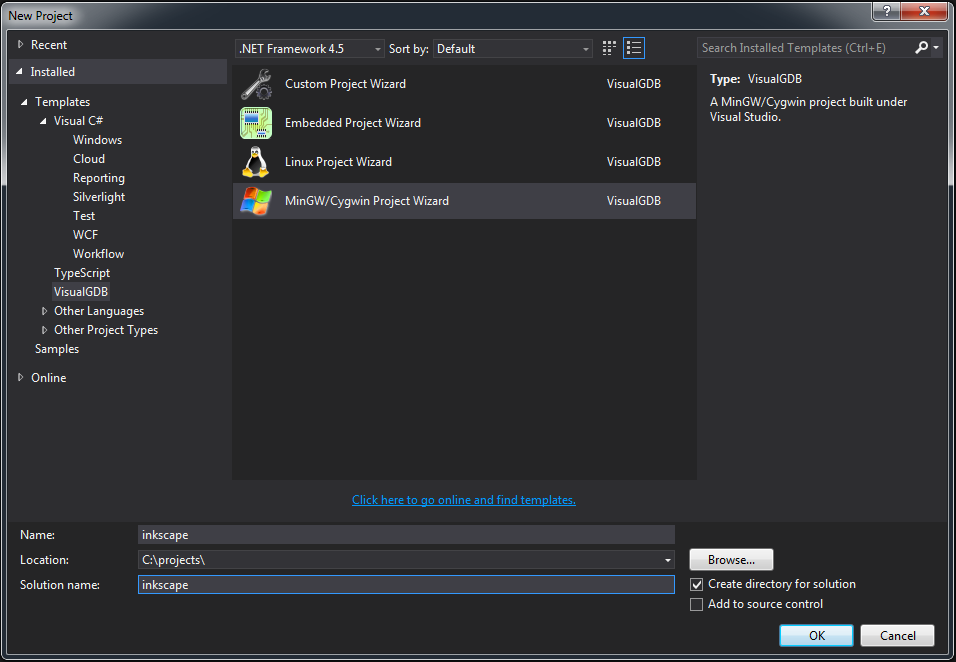
- Give the project a name, and click OK.
- At the wizard, select Project Type->Import a project build with command-line tools.
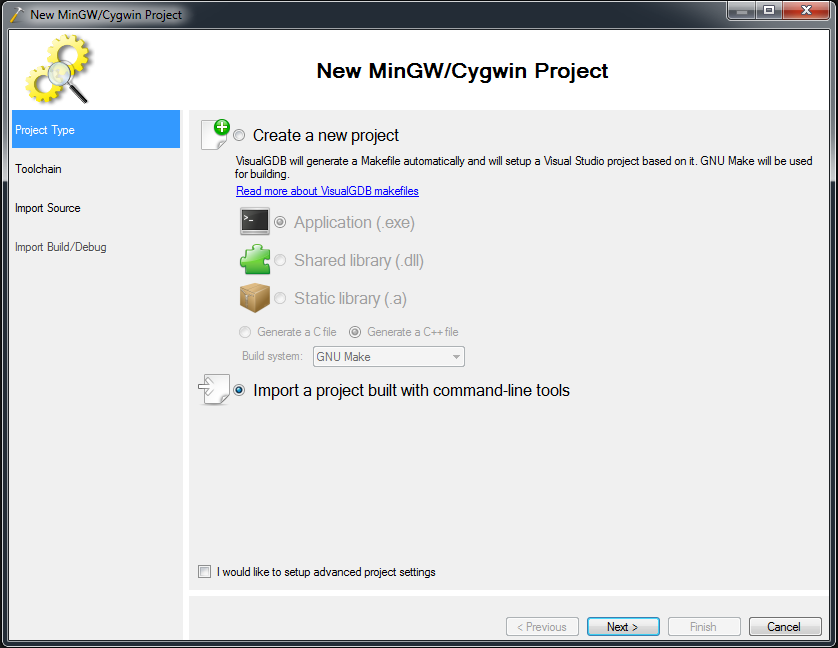
- Click Next.
- Check the path to MinGW is correct.
- Click Next.
- Set the Inkscape source directory to:
- c:\src\inkscape\trunk
- Note: Do not set this directory to \src
- Select Import preserving directory structure.
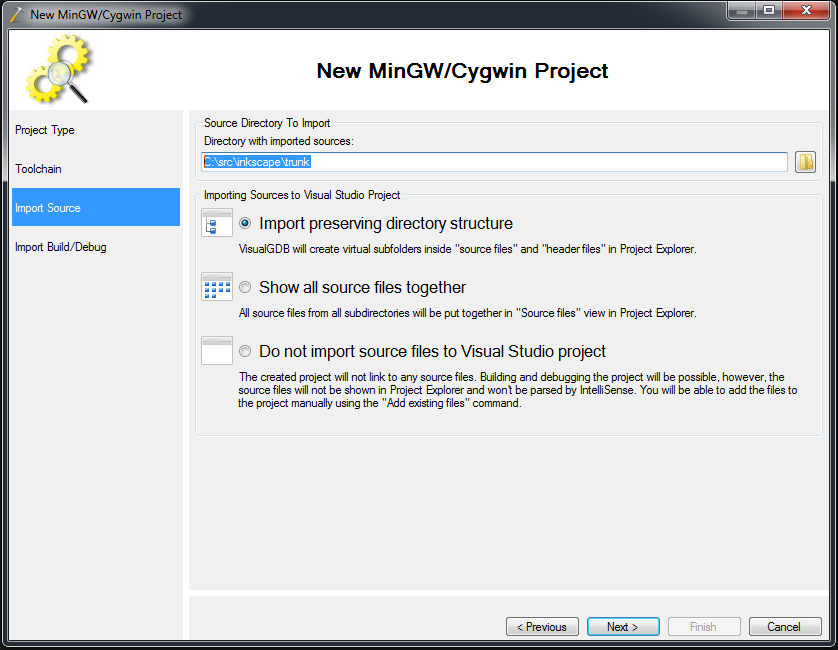
- Click Next.
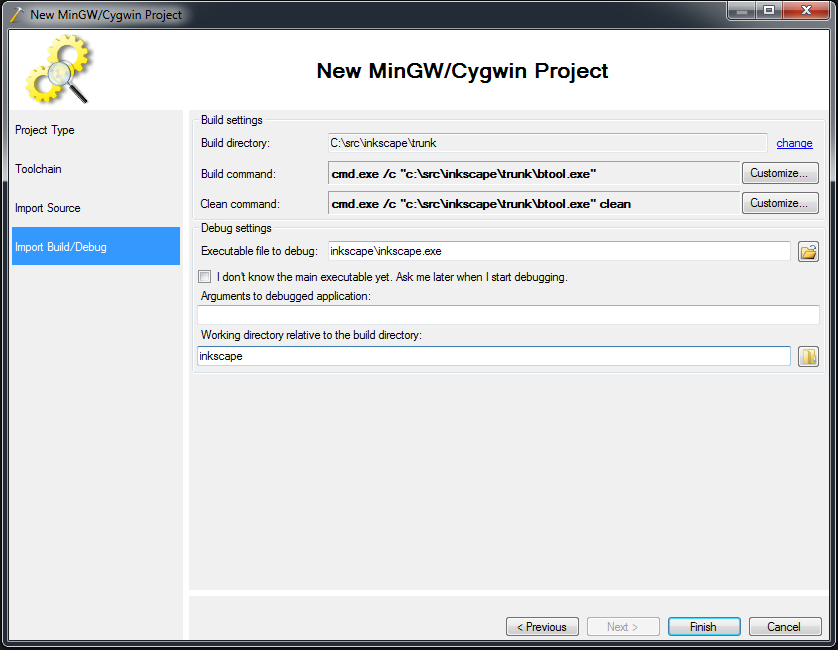
- At Build Command, select Customize.
- Set Arguments to:
- /c "c:\src\inkscape\trunk\btool.exe" -j 8
- Note: "-j 8" is to compile with 8 cpu threads.
- Note: if you only want to build inscape.exe and not inkview or any other tools (to save time), use this as an argument instead:
- /c "C:\src\inkscape\guides-improvements\btool.exe" -j 8 dist-inkscape
- Select OK.
- At Clean Command, select Customize.
- Set Arguments to:
- /c "c:\src\inkscape\trunk\btool.exe" clean
- Select OK.
- At Debug Settings->Executable file to debug, browse to:
- Click Finish and wait for the project generation to finish.
Note: VisualGDB will not copy the source files to the Visual Studio project directory, so you can still use Version Control the usual way.
Note: The project settings can be changed at a later time by going to: Project->VisualGDB Project Properties.
Enable debugging
In Explorer, open build.xml located in:
- c:\src\inkscape\trunk
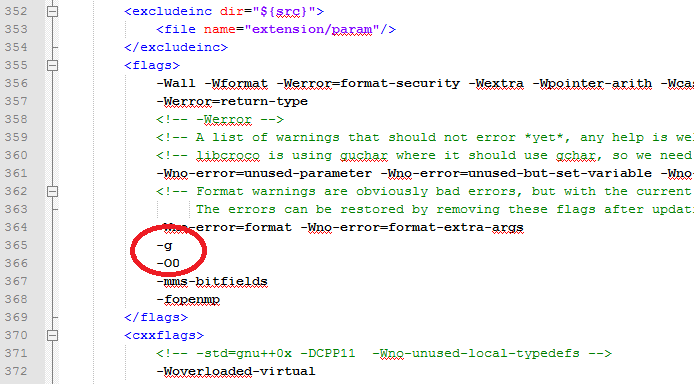
Then look for the "T A R G E T : C O M P I L E" section, go to the <flags> section, and change
-O2
to
-O0
Also add this flag:
-g
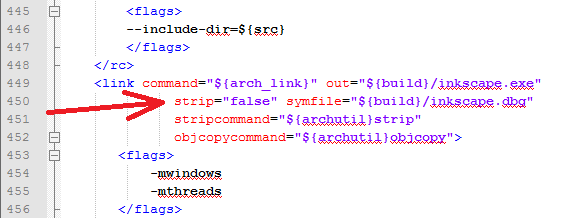
Then search for this:
strip="true" symfile="${build}/inkscape.dbg"
And change to this:
strip="false" symfile="${build}/inkscape.dbg"
Note: these changes will make Inkscape very slow to compile.
Building Inkscape
- In Visual Studio, select Build->Clean Solution.
- Then select Build->Build Solution.
- Compiling will take even longer then a release version of Inkscape.
Note: The compiler will seem to be stuck at this for a while, but that is normal:
1> --- compile / cc
Stepping through code
- In Visual Studio, go to Solution Explorer->Inkscape->Source Files->src->main.cpp, and set a breakpoint here:
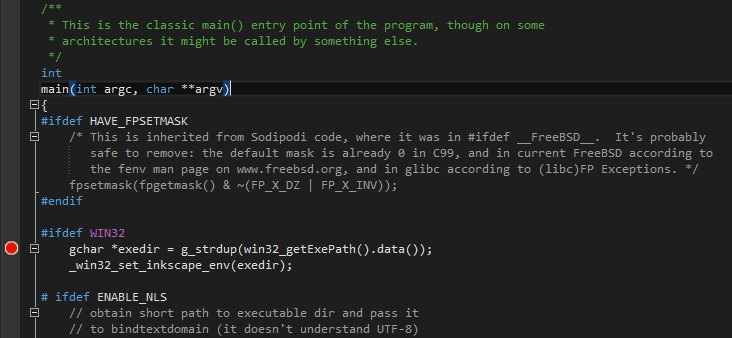
- Select Debug->Start Debugging With GDB.
- If you get a "GDB command timeout" window, be patient.
- Inkscape will stop at the breakpoint. Happy debugging.
Trouble shooting
Unable to break
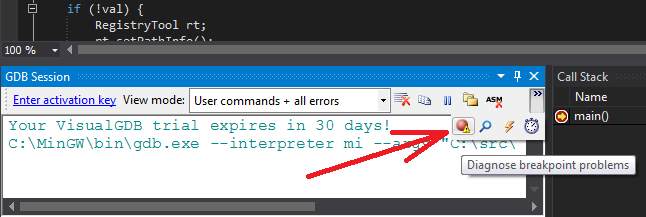
In case Visual Studio cannot break at a certain breakpoint (most likely no debugging symbols present), you can diagnose breakpoint problems using the VisualGDB diagnose tool:
Make error
If you get the error below, it means the environment variables are not set up correctly. Do not use mingwenv.bat to set up the environment variables, but set them in the Windows System Settings instead as described here: Setting Environment Variables
 --- i18n / msgfmt
 Make error line 422: executeCommand : could not create process : the system cannot find the file specified.
 Make error line 422: <msgfmt> problem:
Build failed
If you get the error below, the main build directory is incorrect. Delete the project and make a new project using the wizard, paying attention to the correct paths.
 Error 1	error : Command-line action failed
 Error 2	error : Build has failed. See the Output window for more details.
 Error 3	error MSB3073: The command ""C:\VisualGDB\\VisualGDB.exe" /build exited with code 1.
Clean failed
If Clean fails with error code -1, make sure you close inkscape first.
WinGDB settings
Wizard settings:
- File->New->Project->Installed->Templates->WinGDB->WinGDB Standard Projects->Multiplatform Executable->OK
- MinGW installation directory: C:\MinGW
- Make executable location: C:\src\inkscape\trunk\btool.exe
- Source dir: C:\src\inkscape\trunk\src
- Group imported files in folders = true
- Build result directory: C:\src\inkscape\trunk\inkscape
- Build debuggable result: inkscape.exe
- Build working directory: C:\src\inkscape\trunk
- Working directory: C:\src\inkscape\trunk
- Additional source directories: C:\devlibs
Project settings:
- Right click project->WinGDB->Properties->:
- Environment->Debugger path: C:\mingw\bin\gdb.exe
- Environment->Build toolchain paths: C:\MinGW\bin;C:\src\inkscape\trunk
- Debug->Executable path: C:\src\inkscape\trunk\inkscape\inkscape.exe
- Directories->Additional source directories: C:\devlibs
- Project build->Project build command: btool
- Project build->Project rebuild command: btool clean; btool
- Project build->Project clean command: btool clean
- Project build->Build working directory: C:\src\inkscape\trunk
Building:
- WinGDB->Build->Build projectname
Debugging:
- WinGDB->Start debugging
