Difference between revisions of "Extension reference"
| Line 3: | Line 3: | ||
{{Template:MovedToOtherSite|topic=user documentation|new_url=https://inkscape-manuals.readthedocs.io|new_site=ReadTheDocs}} | {{Template:MovedToOtherSite|topic=user documentation|new_url=https://inkscape-manuals.readthedocs.io|new_site=ReadTheDocs}} | ||
''Info: It would be useful to move the information below into the manual.'' | ''Info: It would be useful to move the information below into the manual and update it.'' | ||
---- | |||
''A page with info about the extensions and particularly some PNGs / screenshots. (some parts may be outdated) | ''A page with info about the extensions and particularly some PNGs / screenshots. (some parts may be outdated) | ||
Latest revision as of 19:51, 3 February 2023
Other languages: العربية Català Česky Deutsch English Español Français Italiano 日本語 한국어 Polski Português Português do Brasil Русский Slovenčina 中文
The Inkscape Wiki is no longer used to host information about user documentation.
You can now find related information at ReadTheDocs.
This page is kept for historical reasons, e.g. to document specific decisions in Inkscape development.
Info: It would be useful to move the information below into the manual and update it.
A page with info about the extensions and particularly some PNGs / screenshots. (some parts may be outdated)
This page is partially outdated and needs an overhaul. If you can help with updating the page, please contact the Inkscape developers mailing list, or the docs mailing list.
For alternative information sources, also see:
- More info about other, user-created extensions can be found
- in our website's addon gallery
- and in the Extension Repository page of the Wiki.
Color
Brighter
Brightens the color(s) by dividing each RGB channel by 0.9. Channels with a value of 0 remain unaffected. Although brighter and darker are inverse operations, the results of a series of invocations will cause inconstancies due to rounding errors. Use More Light if you want to brighten up black areas as well.
Custom...
Allows you to evaluate different functions for each channel. r, g and b are the normalized values of the red, green and blue channels. The resulting RGB values are automatically clamped.
Note: This effect is half broken in 0.45! The original values are overwritten by the new ones, which means things like the last example won't work as expected.
Examples
Default (doesn't change anything):
- Red Function:r
- Green Function:g
- Blue Function:b
Half the red, swap green and blue:
- Red Function:r*0.5
- Green Function:b
- Blue Function:g
ITU-R Recommendation BT.709 for grayscale:
- Red Function:0.2125 * r + 0.7154 * g + 0.0721 * b
- Green Function:0.2125 * r + 0.7154 * g + 0.0721 * b
- Blue Function:0.2125 * r + 0.7154 * g + 0.0721 * b
Darker
Darkens the color(s) by multiplying each RGB channel with 0.9. Although brighter and darker are inverse operations, the results of a series of invocations will cause inconstancies due to rounding errors. Less Light is usually a better option, because it operates in the HSL color space.
Desaturate
Desaturates the color(s) by dividing the sum of the minimum and maximum channel values by two. Use Grayscale if you want something closer to the human perception of luminance.
Grayscale
Creates a grayscale version of the color(s) via the PAL/NTSC formula (0.299 * RED + 0.587 * GREEN + 0.114 * BLUE).
Less Hue
Converts to HSL color space, subtracts 0.05 from the hue, wraps if necessary, and converts it back to RGB again.
Less Light
Converts to HSL color space, subtracts 0.05 from the lightness, clamps if necessary, and converts it back to RGB again.
Less Saturation
Converts to HSL color space, subtracts 0.05 from the saturation, clamps if necessary, and converts it back to RGB again.
More Hue
Converts to HSL color space, adds 0.05 from to hue, wraps if necessary, and converts it back to RGB again.
More Light
Converts to HSL color space, adds 0.05 from to lightness, clamps if necessary, and converts it back to RGB again.
More Saturation
Converts to HSL color space, adds 0.05 from to saturation, clamps if necessary, and converts it back to RGB again.
Negative
Inverts each RGB channel (255-value).
Randomize
Converts to HSL, randomizes hue and/or saturation and/or lightness and converts it back to RGB.
Remove Blue
Sets the blue channel to 0.
Remove Green
Sets the green channel to 0.
Remove Red
Sets the red channel to 0.
Replace Color...
Replaces a specific color with another one.
RGB Barrel
Rotates the RGB channels (RGB->BRG->GBR->RGB...).
Developer Examples
Export
Groups to PNGs
Generate from Path
Inset/Outset Halo
Parameters:
- Width
- 20
- Number of steps
- 5
Creates translucent copies of the path inside and outside the path.
Extrude
Parameters:
- Magnitude
- 20
- Angle
- 45
Interpolate
Outline
Iterpolate does a linear interpolation between 2 or more paths. It basically means that it "fills in the gaps" between the paths according to the number of steps given.
Basic Usage
To use the interpolation effect, select the paths that you wish to interpolate, and go to Effects > Generate From Path > Interpolate. Choose your options, and Click OK.
Basic Example
View figure 1 below, where there are 2 identical paths.
Here is the result when the interpolation effect is called with a "Steps" value of 6.
Options
One of the great features of the inkscape interpolation is "transform style", which transforms the
It appears that you need to convert an object to a path first (Path > Object to path ; Shift-Ctrl-c). You can alter the number of steps used and choose one of two methods.
File:Interpolate blueSquare-redCircle.png
Pattern along Path
Star pattern and a line path:
Pattern along path:
Parameters:
- Copies of the pattern
- repeated
- Deformation type
- snake
- Space between copies
- 0
- Normal offset
- 0
- Tangential offset
- 0
- Pattern is vertical
- unchecked
- Duplicate the pattern before deformation
- checked
Modified parameter:
- Deformation type
- ribbon
Images
Modify Path
Envelope
Add Nodes
Adds extra nodes to the segments of a shape according to the options set.
Color Markers to Match Stroke
Flatten Beziers
Parameters:
- Flatness
- 10
Fractalize
Parameters:
- Subdivisions
- 6
- Smoothness
- 4.0
Jitter nodes
Parameters:
- Maximum Displacement
- 50.0
- Shift Nodes
- checked
- Shift Node Handles
- checked
- Use Normal Distribution
- checked
Perspective
Straighten Segments
Parameters:
- Percent
- 50
- Behavior
- 1
Render
3D polyhedron
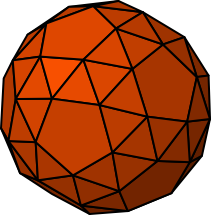
3D polyhedron draws polyhedra stored in OBJ files. A selection of polygons are provided with Inkscape, and others can be used by selection Load From File... in the extension dialogue.
Alphabet soup
Alphabet Soup generates a series of shapes that resemble a given text string.
Barcode
Renders a data string as various types of barcode. Choices are:
- EAN8
- EAN13
- UPC-A
- UPC-E
- Code39
- Code39Ext
- Code93
- Code128
- RM4CC/RM4SCC
Calendar
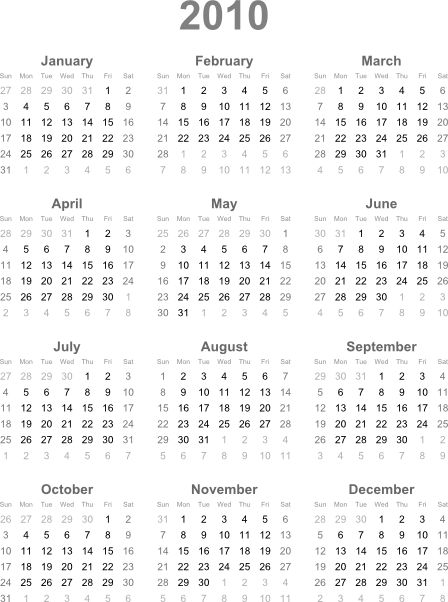
Generates a rather impressive calendar according to your own colours, month/day names etc.
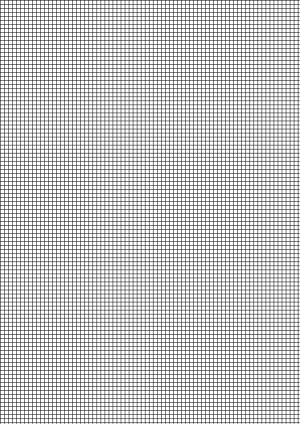
Cartesian grid
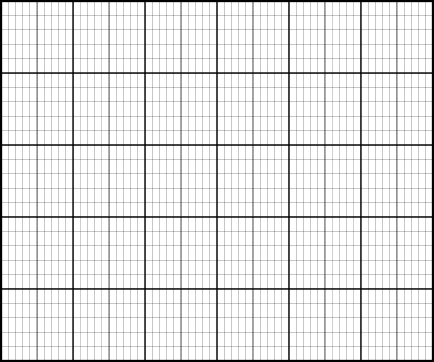
Generates a Cartesian Grid according to your parameters. The default looks like this:
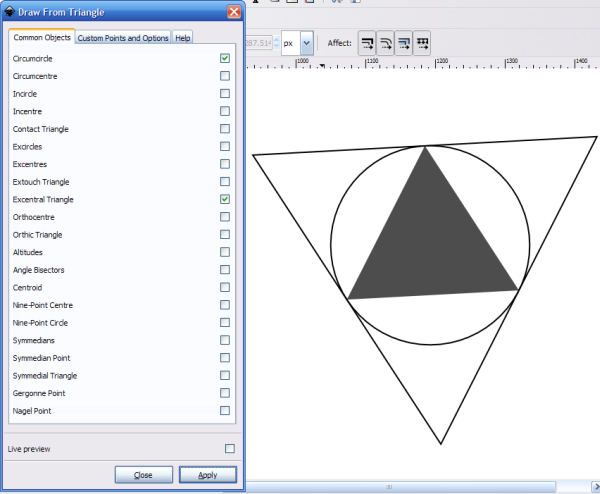
Draw from triangle
Draws various shapes based on a triangle you have selected.
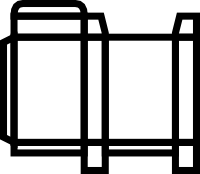
Foldable box
Produces a net that you could print out and fold & stick into a box. Nets look something like this:
Function plotter
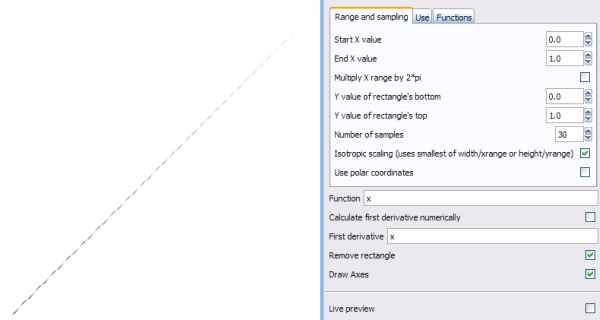
Generates the plot of a function using a selected rectangle as the grid. Can cope with Cartesian and Polar coordinates, uses Python's maths functions.
- I can't get this to work properly; for example y=x (Cartesian) produces this:
- Is this an error in the settings (so I can add information on using the effect) or a problem with the script itself? Legio noctis 20:54, 11 January 2010 (UTC)
- I get the expected function plot (straight diagonal line) by either activating the checkbox for 'Calculate first derivative numerically' or setting the first derivative to '1' (the slope of the curve f(x)=x is f’(x) = 1) --~suv 18:09, 12 January 2010 (UTC)
Gear
Produces a gear/cog shape with a chosen number of teeth, pitch and pressure angle.
Grid
Generates a grid similar to the Cartesian grid but without the bolded lines (which could be used for axes etc.).
Guides
Allows you to render guides onto the page at regular positions horizontally and vertically.
For example, choosing Vertical 1/3 and Horizontal 1/3 renders 'rule of thirds' guides—three horizontal and three vertical, equally spaced.
LaTeX formula
Renders a string as a formula in LaTeX. You probably need a TeX distribution installed to do this (is it included? I don't know, I already have MiKTeX). If you do not have one, try installing MiKTeX or the LyX bundle (which includes TeX and LaTeX configured).
L-system
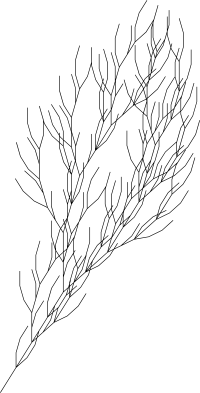
Produces this sort of thing:
Parametric curves
Perfect-bound cover template
Polar grid
Printing marks
Random tree
Sequential labels
Spirograph
Triangle
Renders a certain size triangle. Also achievable (although to a less fine degree) with the Create stars and polygons tool set up correctly.
Wireframe sphere
Visualise Path
Number Nodes
Parameters:
- Font Size
- 20
- Dot Size
- 10px
Kochify
To use, select one path consisting of only line segments and apply the effect. Kochify will replace the given path with a path that has a copy of the original path in between each two adjacent nodes in the original path. If the original path input has bezier curves, the effect will effectively replace them with lines and then apply the effect. For more information about Kochify from a developers perspective, look here. Requires: python.


